Prerequisites
Alation Cloud Service Applies to Alation Cloud Service instances of Alation
Customer Managed Applies to customer-managed instances of Alation
Before you install the ServiceNow OCF connector, ensure that you have performed the following:
Enable Network Connectivity
Open the outbound TCP port 443 to the ServiceNow server.
Create a Service Account
Perform the following steps to create a ServiceNow service account:
Login to the ServiceNow Instance.
Go to System Security > Users > New.
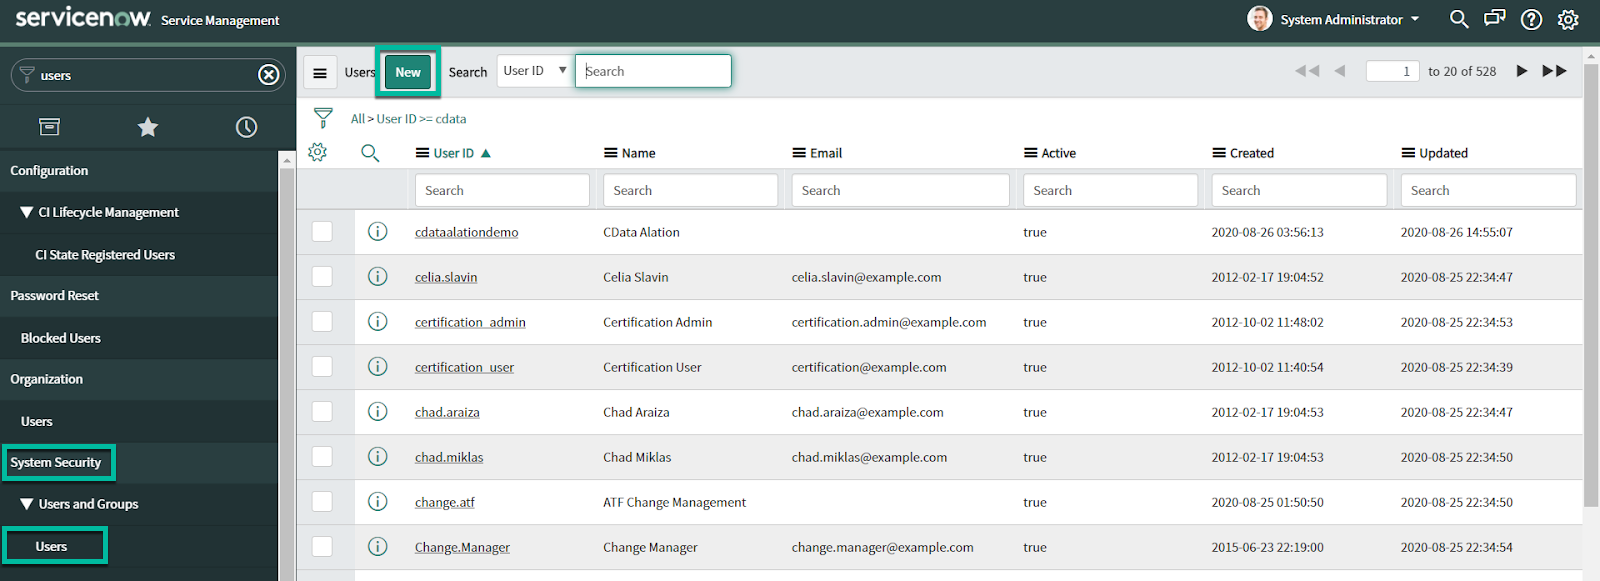
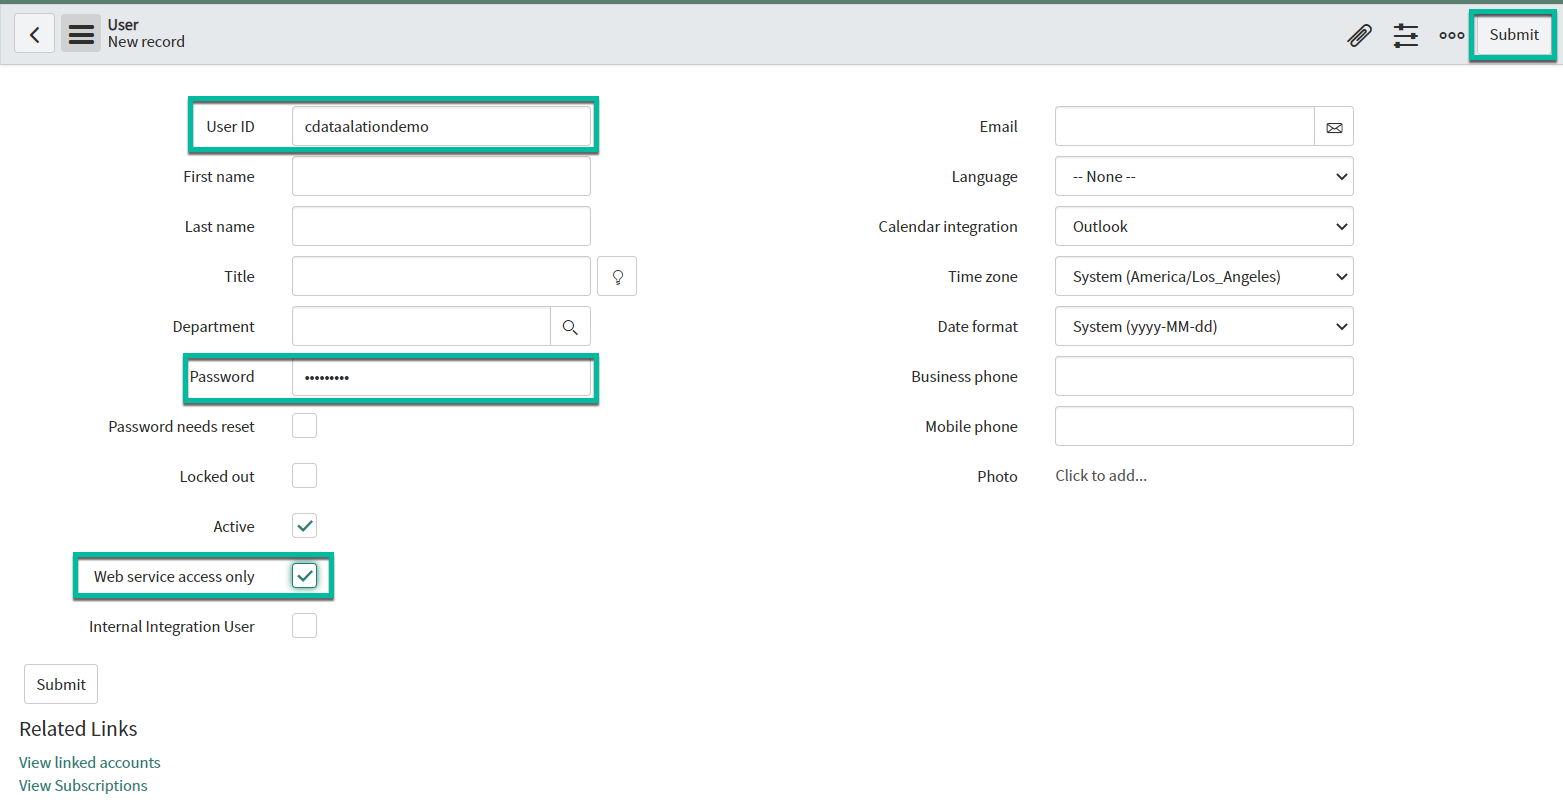
Provide the User ID and Password; Select the Web service access only checkbox and click Submit. Ensure that you make a note of the provided User ID and Password because it will be used in the JDBC URI.
Permissions
For an authenticating user to connect to ServiceNow, Read permissions are required to access listing metadata such as:
sys_db_object (required for all data)
sys_glide_object (required for ServiceNow table metadata)
sys_dictionary (required to retrieve ServiceNow schema information)
To enable this, you must elevate the user’s role as follows:
In the Admin console, go to user menu > Elevate Roles.
At check the security _admin box, click OK.
The user also requires row-level permissions to access tables. Also, all the connections require the Url property.
READ sys_db_object
Requires row-level and field-level permissions. To enable access to sys_db_object:
Navigate to System Security > Access Controls (ACL).
To create a new Access Control (ACL) object, select New.
For Type, select record.
For Operation, select read.
For Name, select Table [sys_db_object] in the first drop-down and None in the second drop-down.
Double-click Insert a new row text box in the Requires role section and select the role.
Click Submit.
Go to User Administration > Users > Select authenticating user > Roles > Edit.
Add the role that you added for the ACL object.
READ sys_glide_object
Requires row-level and field-level permissions. To enable access to sys_glide_object:
Navigate to System Security > Access Controls (ACL).
To create a new Access Control (ACL) object, select New.
For Type, select record.
For Operation, select read.
For Name, select Table [sys_glide_object] in the first drop-down and None in the second drop-down.
Double-click Insert a new row text box in the Requires role section and select the role.
Click Submit.
Go to User Administration > Users > Select authenticating user > Roles > Edit.
Add the role that you added for the ACL object.
READ sys_dictionary
To enable access to sys_dictionary:
Go to User Administration > Users > Select authenticating user > Roles > Edit.
Add personalize_dictionary role.
Authentication
Create a Custom OAuth Application
Register a Custom OAuth Application to obtain the OAuth client credentials, the OAuth Client ID, and the OAuth Client Secret.
If the OAuth plugin for your instance is not active already, activate it.
Log in to your ServiceNow instance.
In the Navigator, go to System OAuth > Application Registry.
Click New.
Click Create an OAuth API Endpoint for External Clients and select the check box.
Enter a name for the new application.
Set a Client Secret. To have one generated automatically, leave this blank.
Enter a value in the Redirect URL box:
If this is a desktop application, set the Redirect URL to
http://localhost:33333or a different port number of your choice.If this is a web application, set the Redirect URL to a page on your Web app you want the user to be returned to after they have authorized your application.
Click Submit.
After the application is complete, navigate back to the new application and take note of the OAuth Client ID, OAuth Client Secret, and Callback URL values.