Add Data Sources
You can add new data sources to the Alation catalog on the Sources page.
Prerequisites to Add a Data Source
If applicable to the specific database type, the required feature flag is enabled
Server Admin role in Alation
A service account for the data source
Privileges for the service account to retrieve metadata, profile data, and retrieve query history information
Specific setup on the database side for Query Log Ingestion (QLI)
Note that prerequisites will differ depending on the database type. For some types, you may need to perform several preliminary steps on the database side. This article describes a generic scenario of adding a data source. For details about each specific supported DB type, refer to the respective section of the documentation.
Add a Data Source
To add a data source,
Sign in to Alation as a Server Admin.
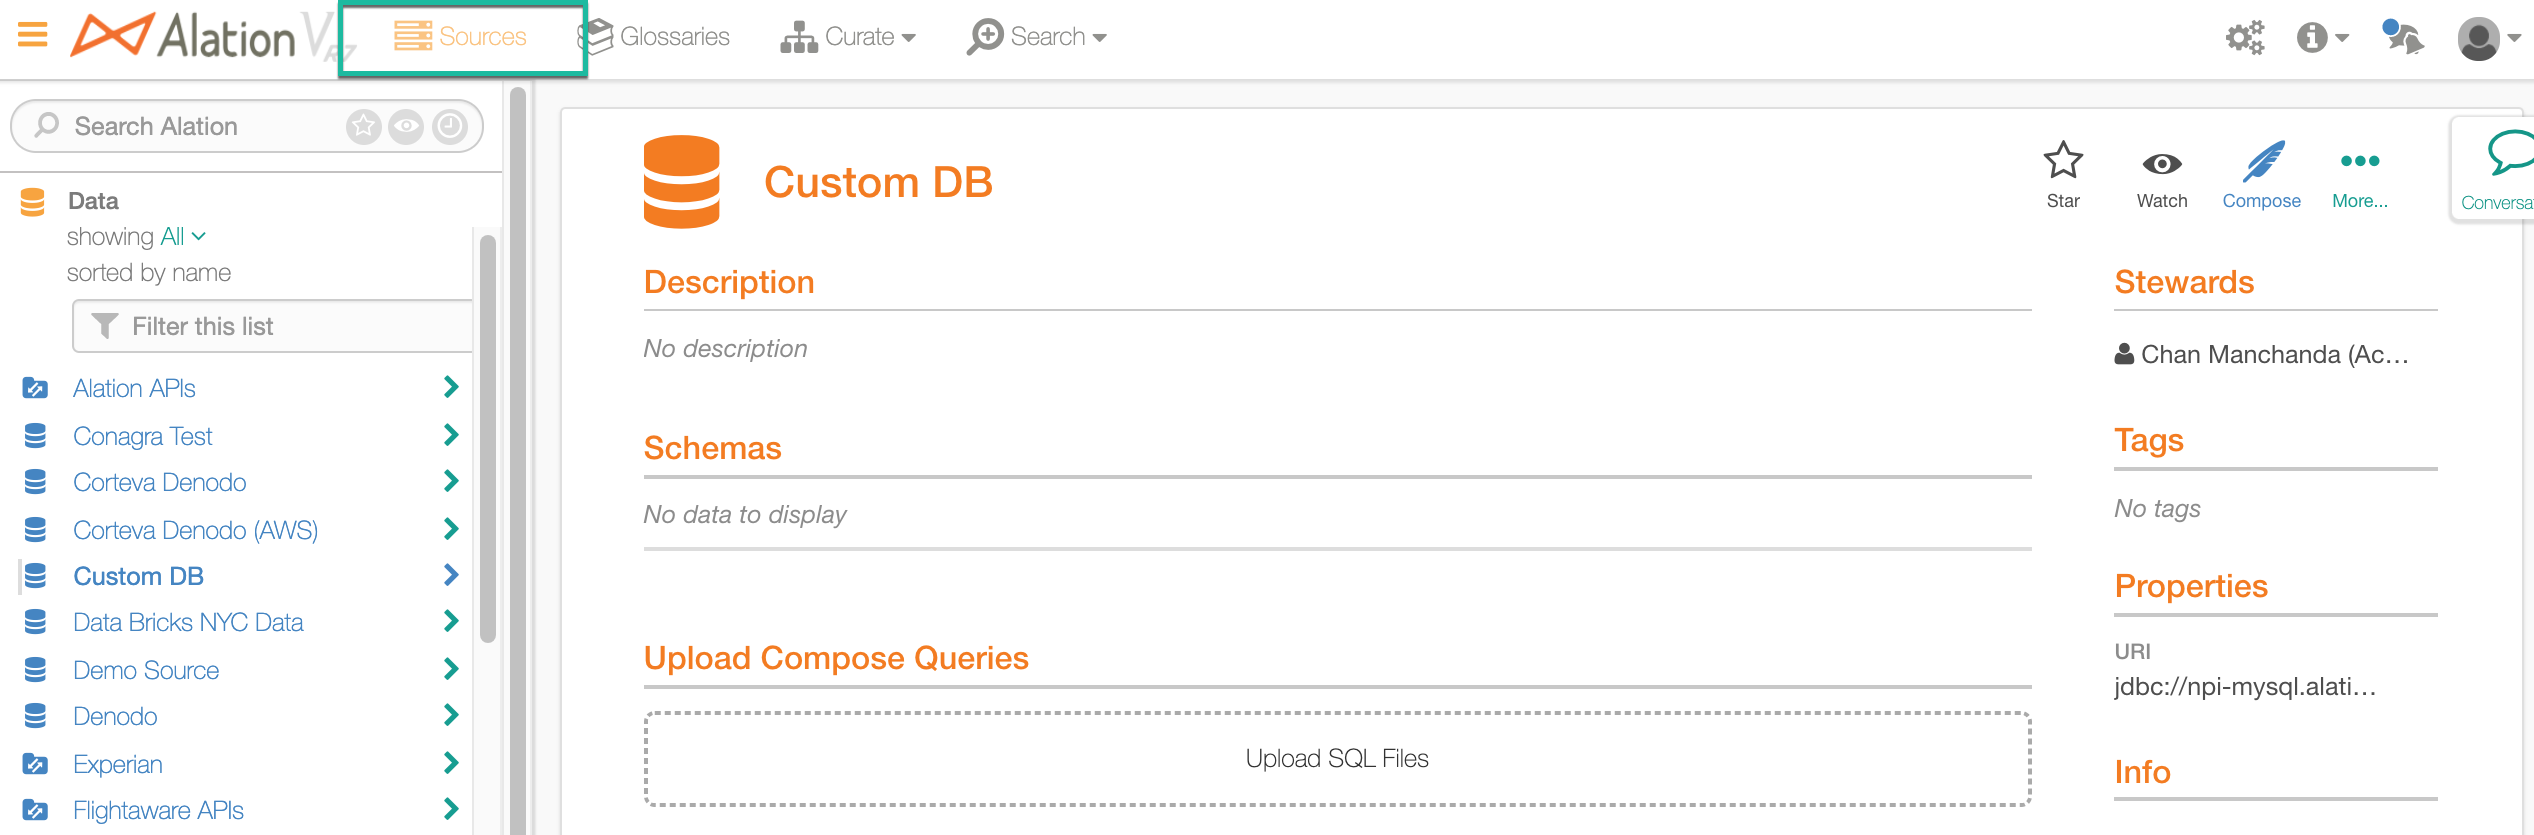
Click the Sources icon on the main toolbar to open the Sources page:
Click the Add icon on the upper right:

In the list that opens, click Data Source. This will bring up the Add a Data Source wizard:
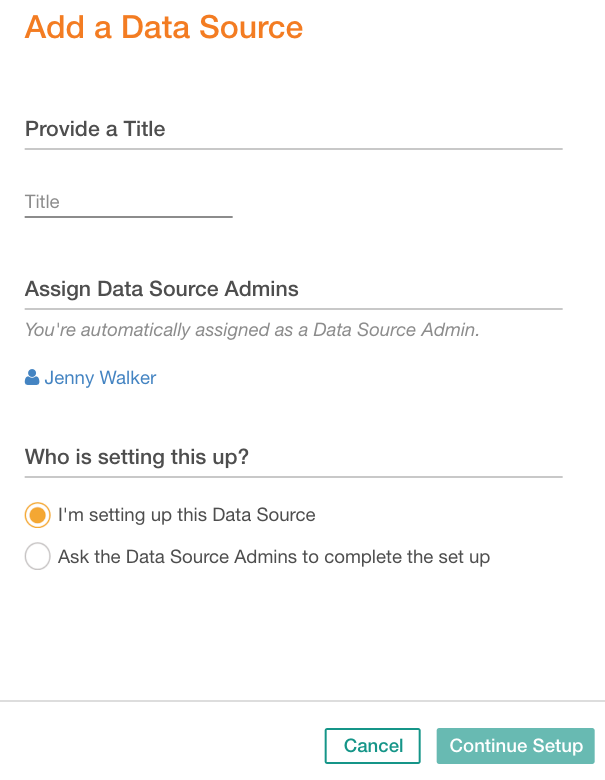
Specify the Title.
The user setting up a data source is automatically assigned as a Data Source Admin to this source. To assign additional Data Source Admins, hover over Assign Data Source Admins section to reveal the Add icon on the right. Click Add to find and add users:

Select an option under Who is setting this up?
I’m setting up this Data Source you will be able to continue to the next step.
Ask the Data Source Admins to complete this setup the wizard will close and the data source admins you have added will be notified. The data source will be added with the incomplete setup. You can finish the setup under Sources > Data Sources > Manage Settings.
If you have chosen the option I’m setting up this Data Source, click Continue Setup. This brings up the next step of the Add a Data Source wizard where you will specify the connection parameters:
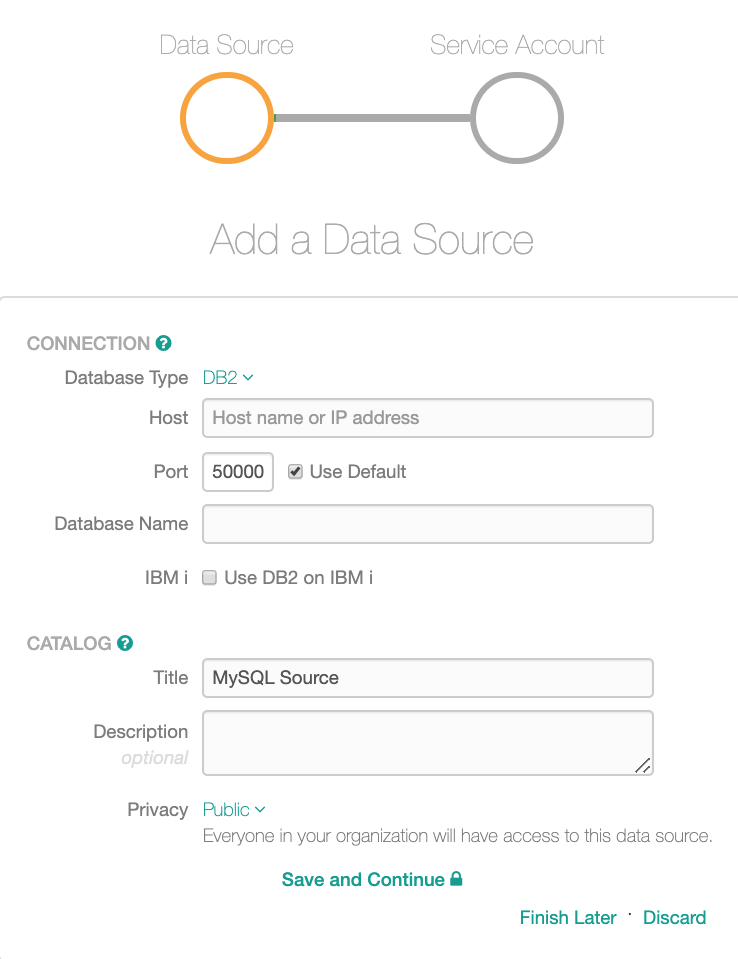
Select the database type from the Database Type dropdown list.
Enter the required information, such as Host, Port, Database Name, and other details. These fields will vary depending on the database type you have selected.
From the Privacy list, select the Privacy value. Privacy settings define access to the data source in the Alation catalog. Select Public if you want everyone in the organization to see this data source in the catalog; or select Private to restrict access to specific Viewers and Data Source Admins.
Click Save and Continue. The Service Account wizard screen will open. A service account is required to establish connection to the database to extract metadata, profile the data, ingest query history, and generate previews of tables:
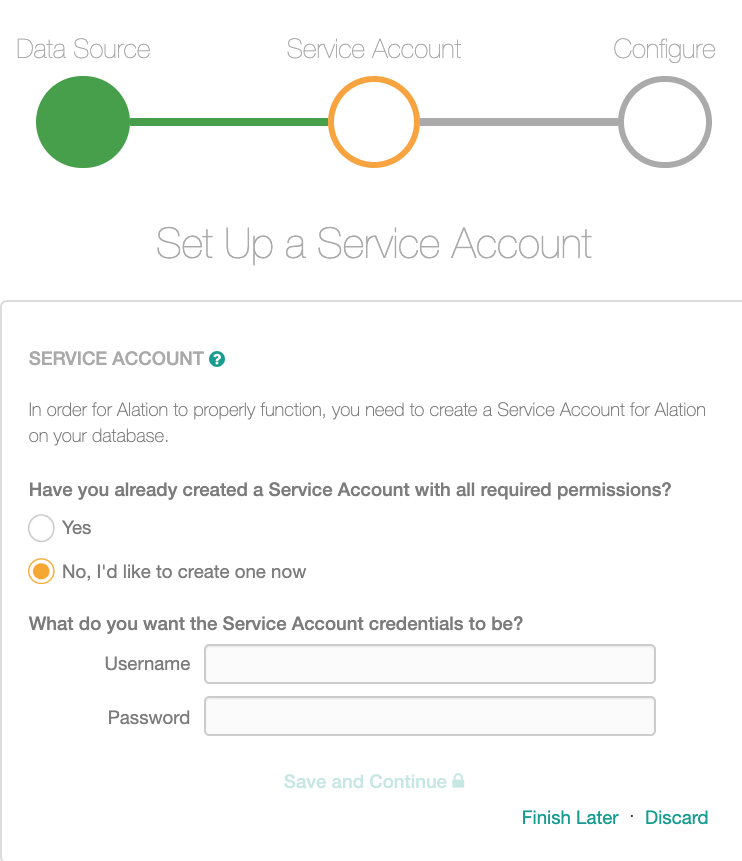
13. On the Service Account screen, select Yes or No depending on the service account availability. We recommend that you create a service account for Alation before adding the source. If you do not have a service account, you can create it now, although this will require that you run a query against the database then return to Alation and confirm that you have created the account.
If you have chosen Yes, then enter the Username and Password of the service account.
If you have chosen No, then specify the Username and Password for the new account. When you do that, Alation will display the query you will need to run on the database to create the account with the required permissions. You can reveal the permission information by clicking Show permissions information under the query:
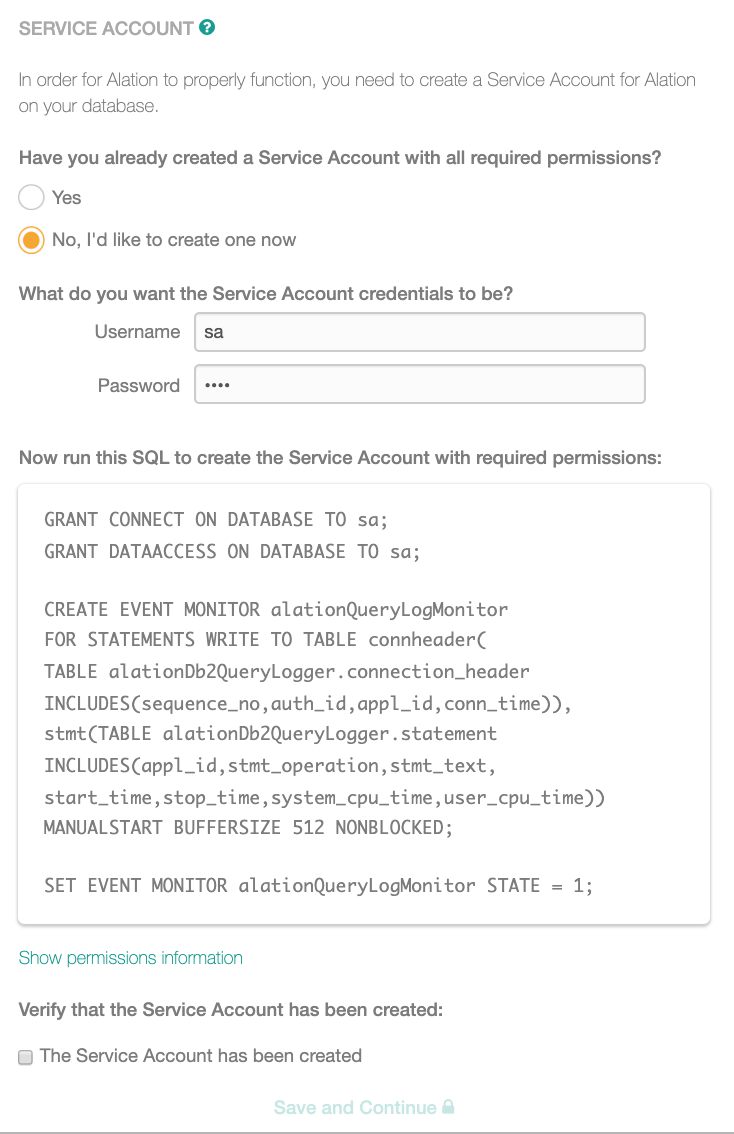
After running the query, return to Alation and select the checkbox The Service Account is created to confirm that you have created the account.
Click Save and Continue. This will bring up the Query Log Ingestion (QLI) setup screen:
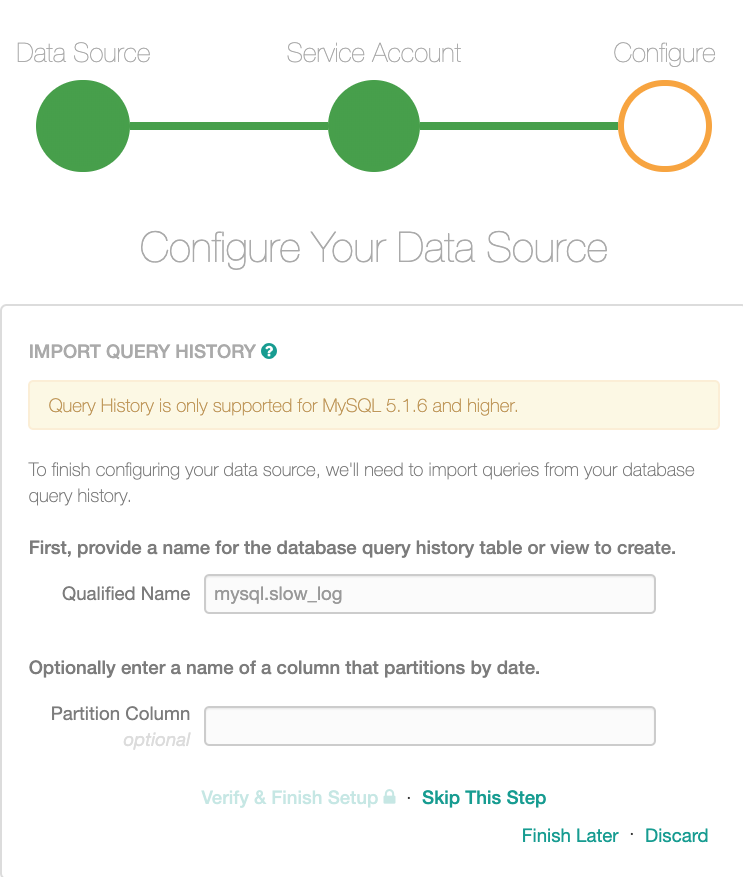
You can skip this step and address QLI setup later on the Query Log Ingestion tab of the data source Settings page. For some data sources, Alation recommends skipping this step. To skip, click Skip this Step.
If you choose not to skip this step, provide the required information and finish setup.
Your data source will be added to Alation and you will land on its settings page. You can now provide additional settings (they will vary depending on the database type) and perform metadata extraction, profiling, and QLI.
Continue With Errors
During setup, you can override errors by clicking Continue with Errors. You will be able to add your data source but will need to troubleshoot the errors on the Settings page to be able to establish connection and run the data jobs:

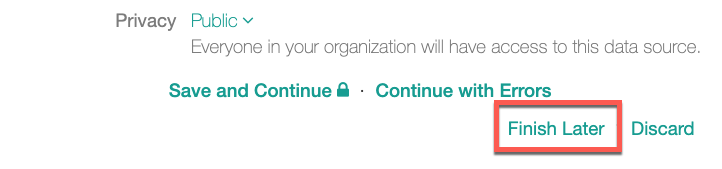
Finish Later
In the Add Data Source wizard, you can save your data source with an incomplete setup by clicking Finish Later:
Data Sources with incomplete setup can be located under Sources > Data Sources > Manage Settings. Data Source Admins can complete setup later where it was left off.
Discard
If you want to drop the setup, in the wizard, click Discard:
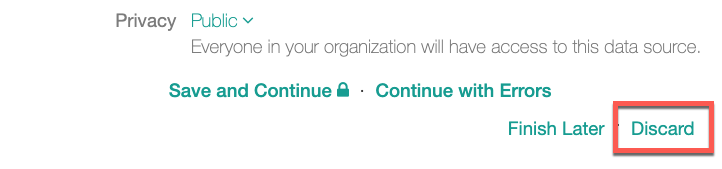
This will cancel the setup, and the data source will not be added.