Qlik Sense Enterprise Connector: Install and Configure
Follow the steps in this topic to perform the required configuration for the Qlik Sense Enterprise connector on the Qlik Sense Enterprise side and in Alation.
Firewall Configuration
Open the outbound TCP port 4747 to the Qlik Sense Engine Service (QES).
Authentication Requirements
The following certificates are required in Alation to configure the Qlik Sense Enterprise as a BI data source.
client.pfx
root.cer
Refer to Export Certificates through the QMC to export the certificates to your local machine.
Configuration in Alation
STEP 1: Install the Connector
Important
Installation of a Qlik Sense OCF connector requires Alation Connector Manager to be installed as a prerequisite.
If this has not been done on your instance, install the Connector Manager: Install Alation Connector Manager.
Make sure that the connector Zip file which you received from Alation is available on your local machine.
Install the connector from the Connectors Dashboard: refer to Manage Connector Dashboard.
STEP 2: Create and Configure a New BI Server Source
This configuration requires the role of the Server Admin.
Add a New BI Server Source
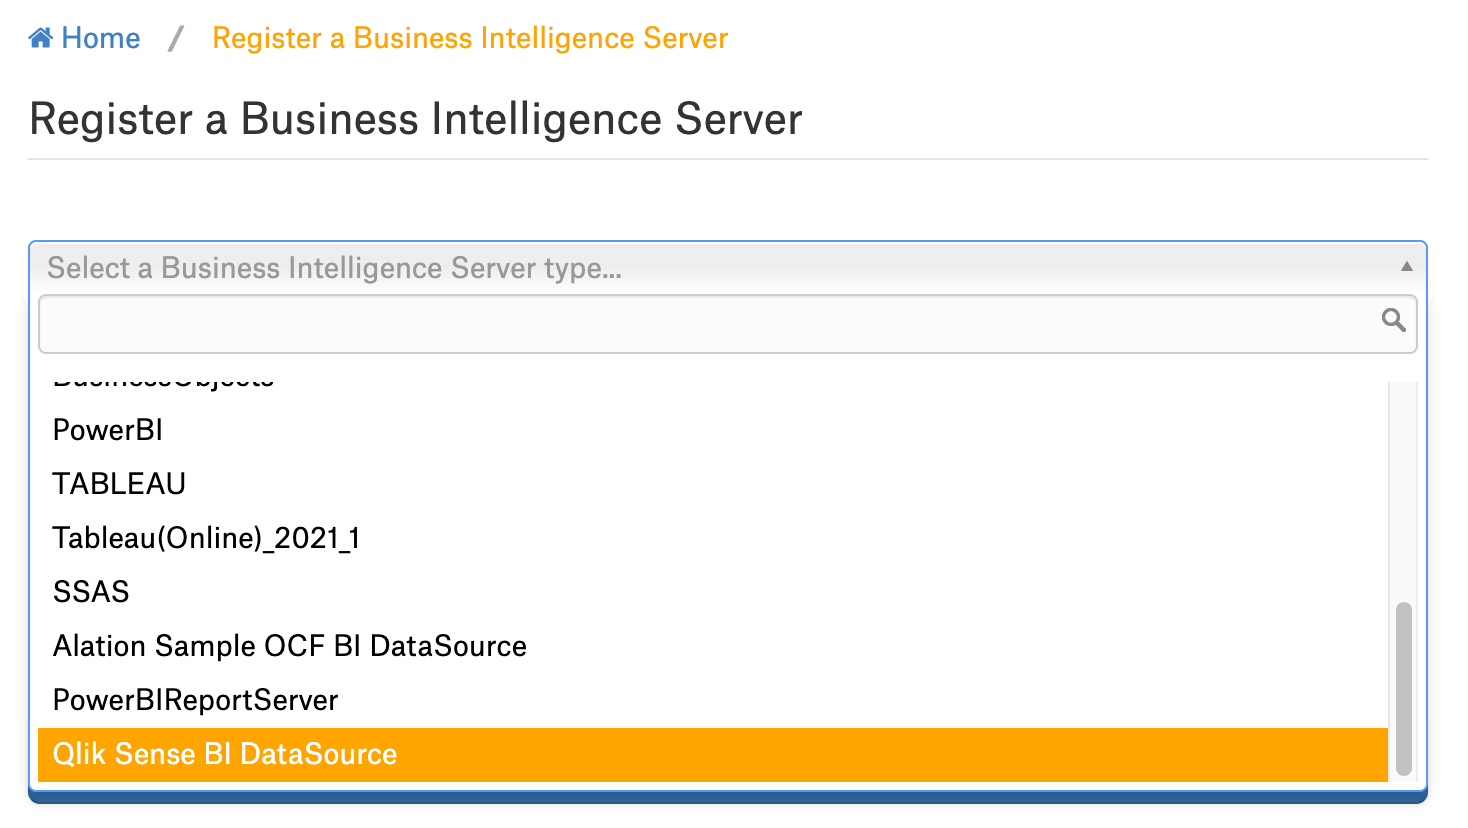
Log in to the Alation instance and add a new BI Server source: Apps > Sources > Add > BI Server. The Register a Business Intelligence Server screen will open.
From the Select a Business Intelligence Server type list, select Qlik Sense BI Data source connector name.
Note
The connector name appears in this list only after it is installed.
Provide the Title and a Description (optional) for your Qlik Sense Enterprise BI data source.
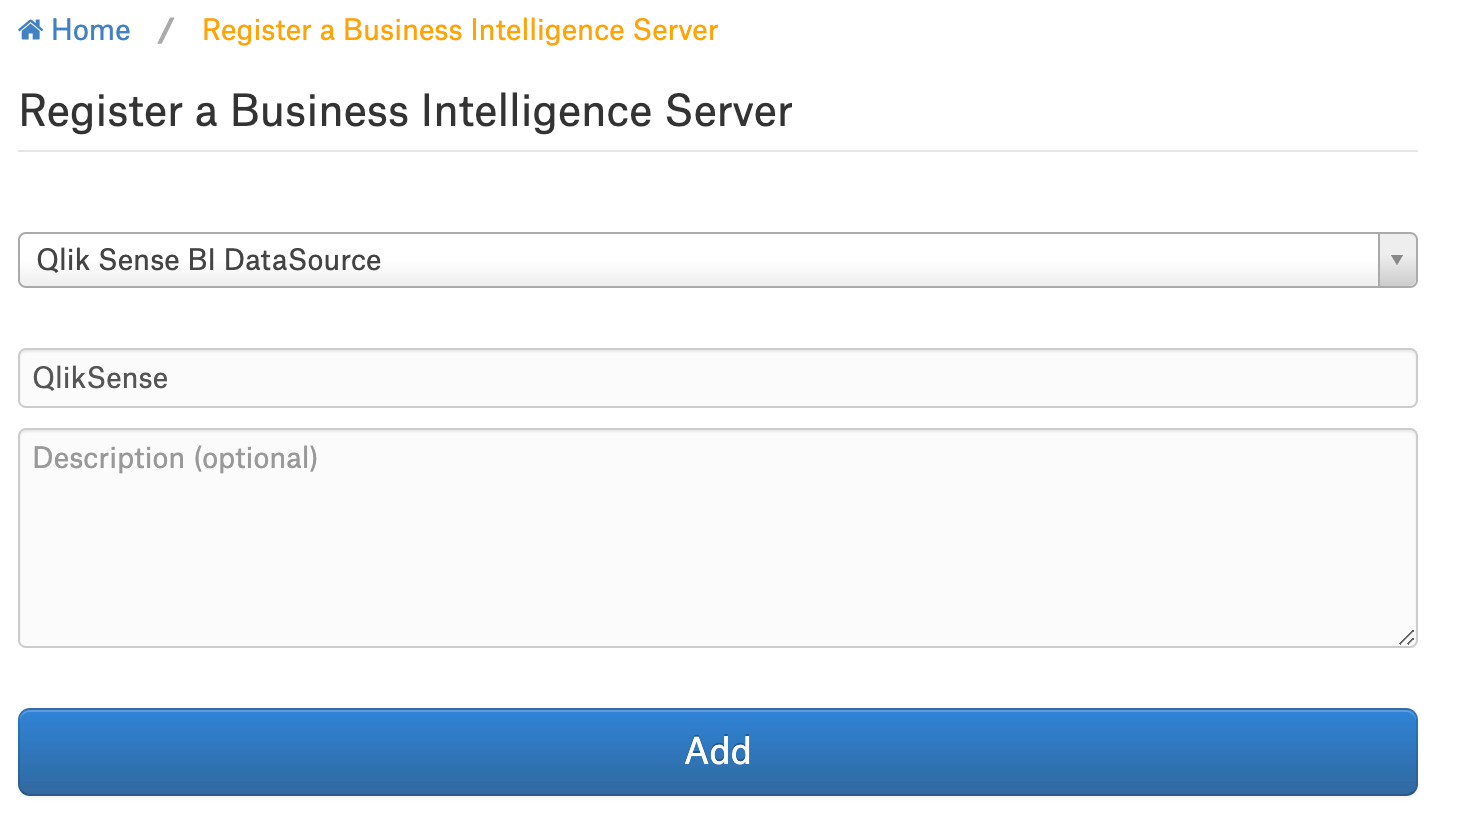
Click Add. You will be navigated to your new BI Server source Settings page.
Configure the Qlik Sense Enterprise BI Source
Perform the configuration on the Settings page.
Configure Access:
You can configure the visibility of a BI source and its child objects such as Folder and Report on the Access tab of the settings page. Refer to for information on how to configure the object privacy settings.
Configure BI Source Visibility
Applies from release 2023.3.5
On the Access tab, follow these steps to set the BI source visibility:
Select one of the following options for setting privacy level:
Public BI Server—The BI source will be visible to all users of the catalog.
Private BI Server—The BI Source will be visible to users that have been assigned the BI Server Admin or Viewer role. It will be hidden for all other users.
Add one or more BI Server Admins or Viewers in the User Access section if required.
For more information on BI Source, see Configure Access to OCF BI Sources
Configure BI Folder and Report Visibility
Applies from release 2024.1.4
On the Settings under a BI Folder or Report, follow these steps to set visibility:
Check the option Enable explicit permission to change access permission defined at the parent level object.
This enables and allows permissions at the object level. By default, the access permissions are inherited from the parent level and are not editable.
Select one of the following options for setting privacy level:
Public—The BI folder or report will be visible to all users of the catalog.
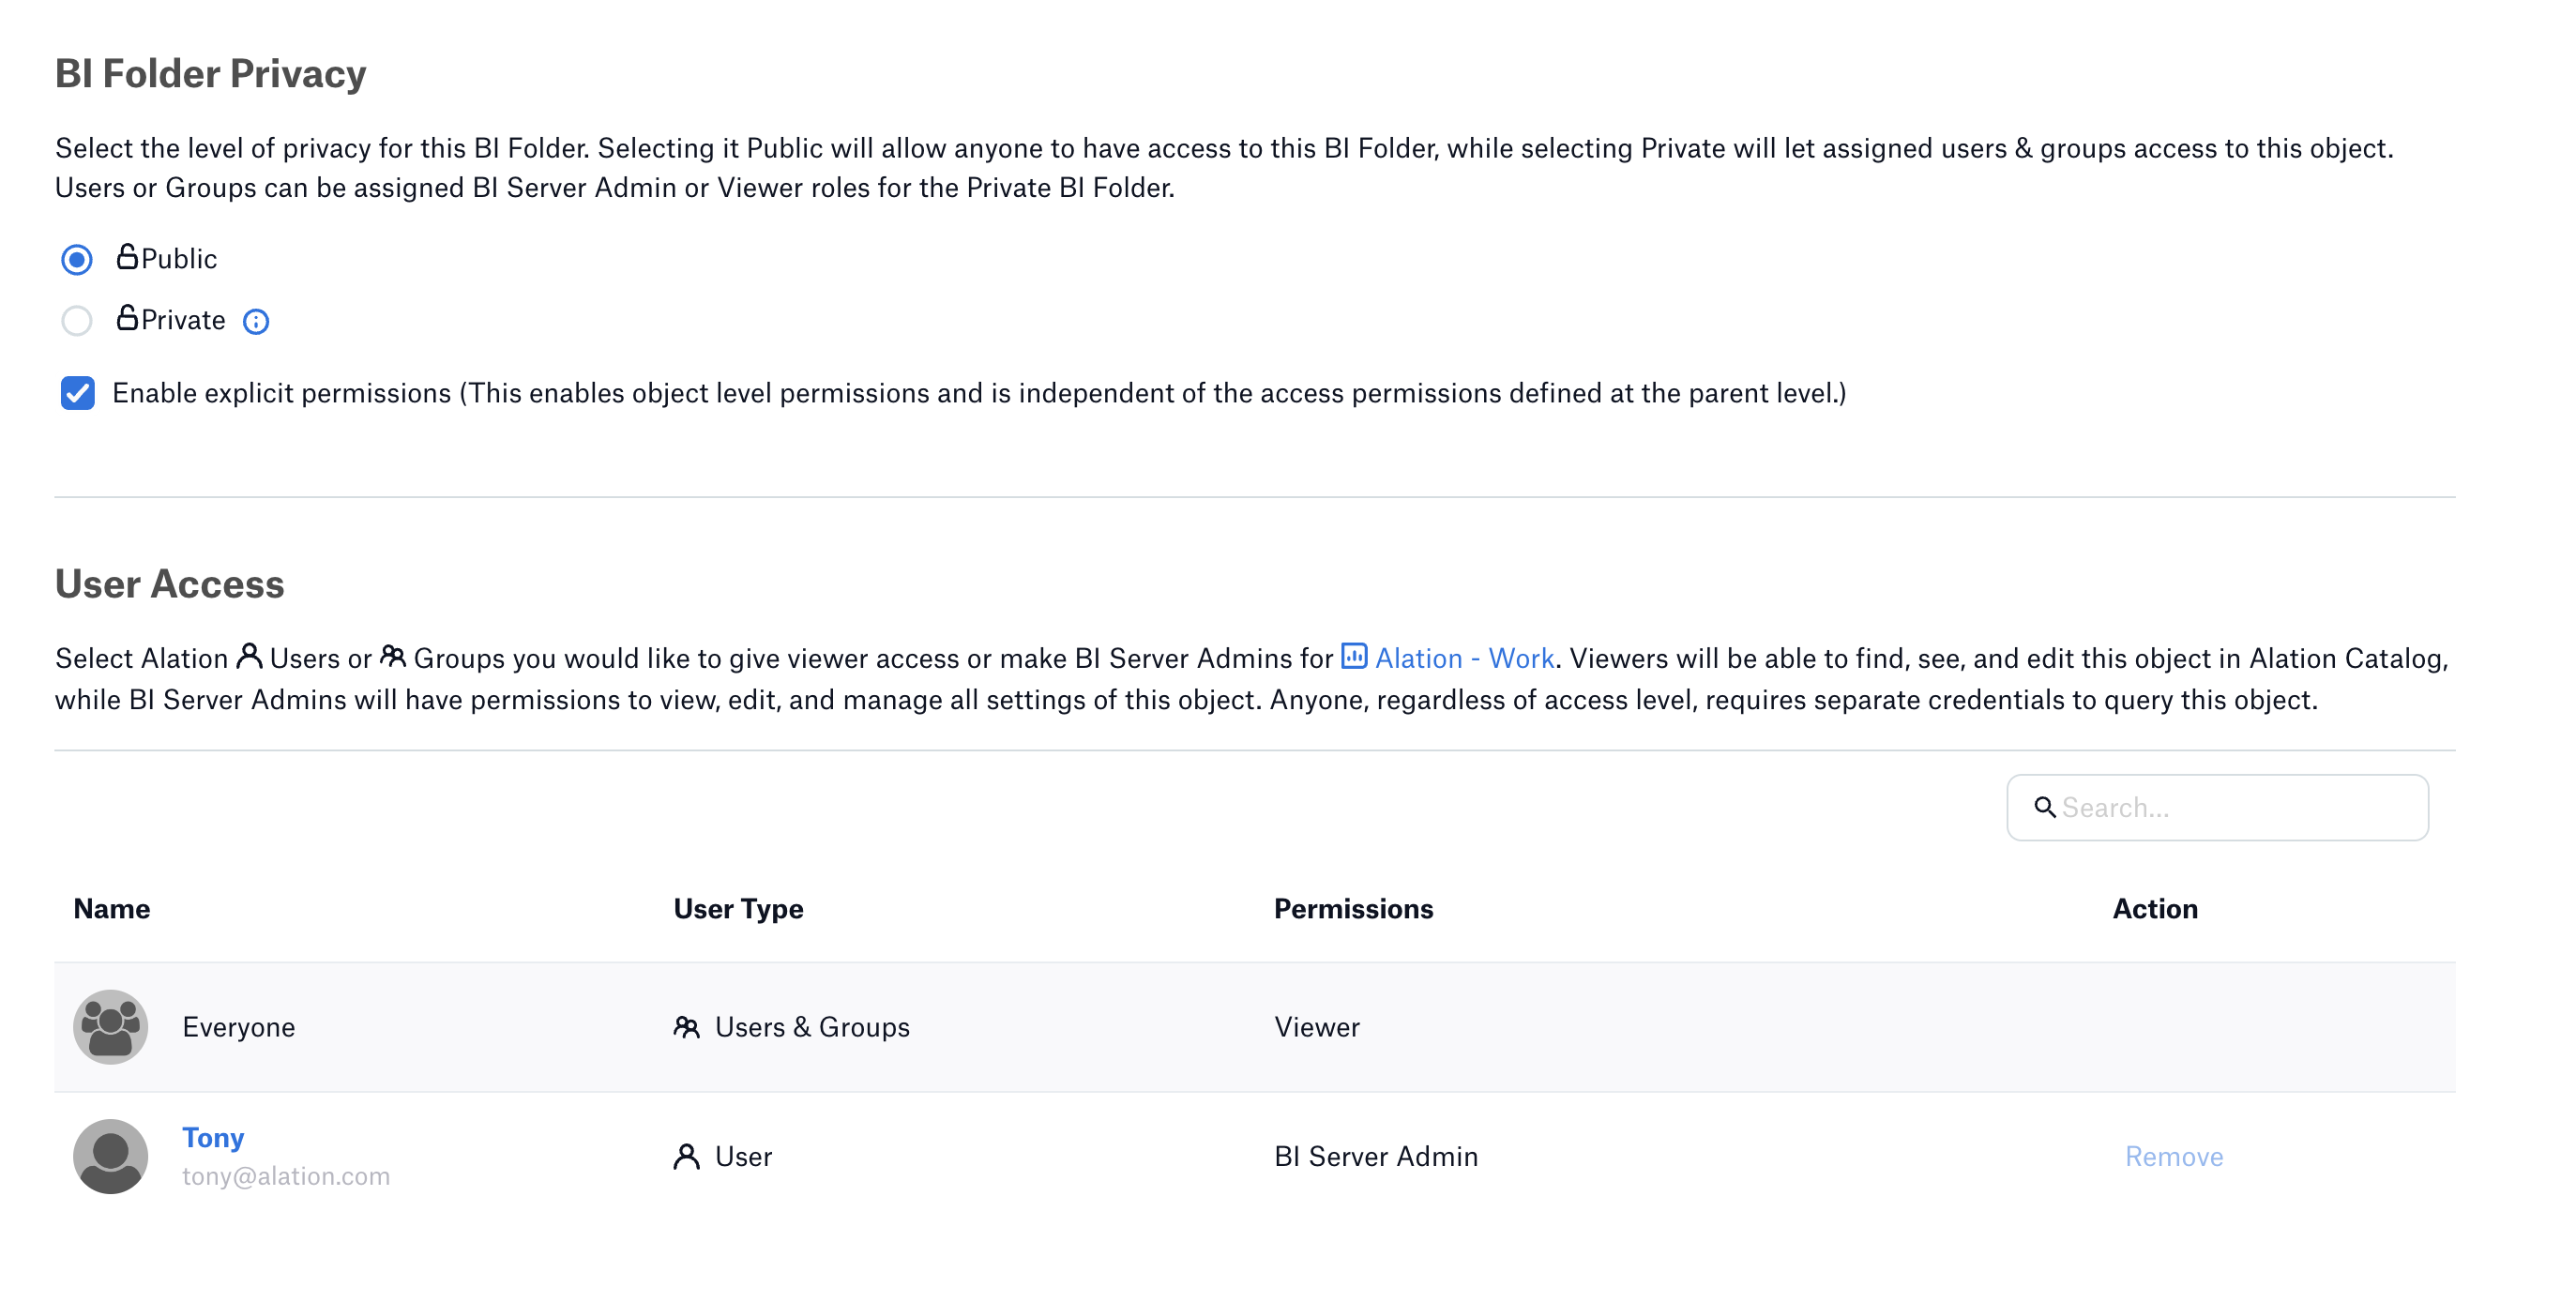
Private—The BI folder or report will be visible to users that have been assigned the BI Server Admin or Viewer role. It will be hidden for all other users.
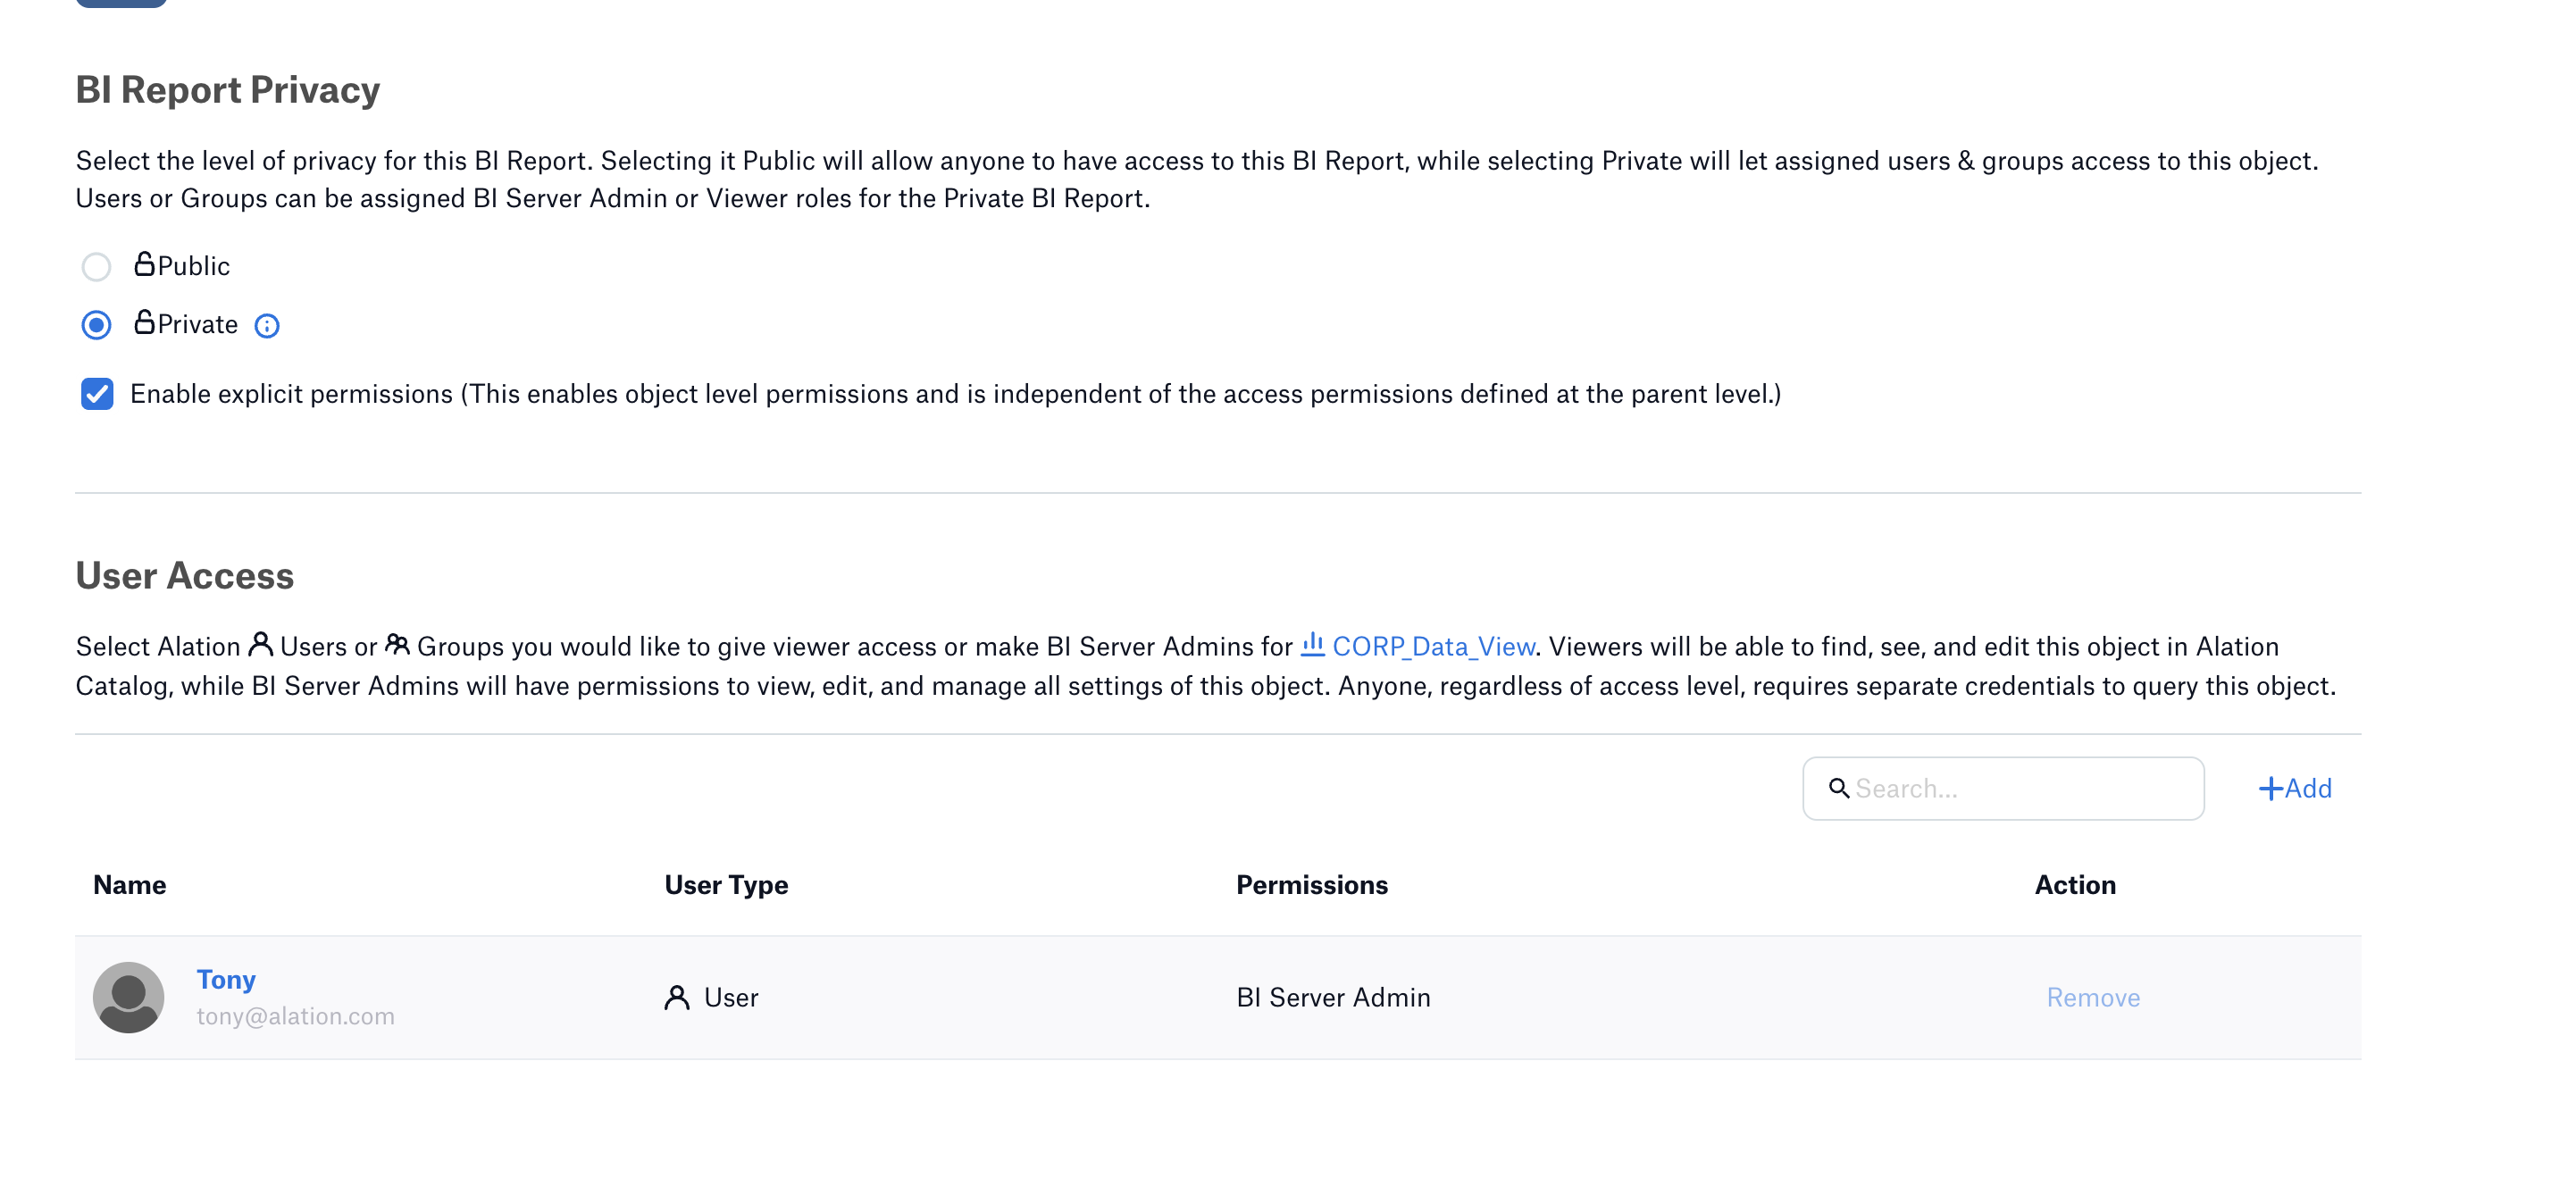
Add one or more BI Server Admins or Viewers in the User Access section if required.
For more information on how to enable the feature and configure access to a folder or report, see Configure Access to OCF BI Folders and Reports
Configure General Settings:
Note
This section describes configuring settings for credentials and connection information stored in the Alation database. If your organization has configured Azure KeyVault or AWS Secrets Manager to hold such information, the user interface for the General Settings page will change to include the following icons to the right of most options:

By default, the database icon is selected, as shown. In the vault case, instead of the actual credential information, you enter the ID of the secret. See Configure Secrets for OCF Connector Settings for details.
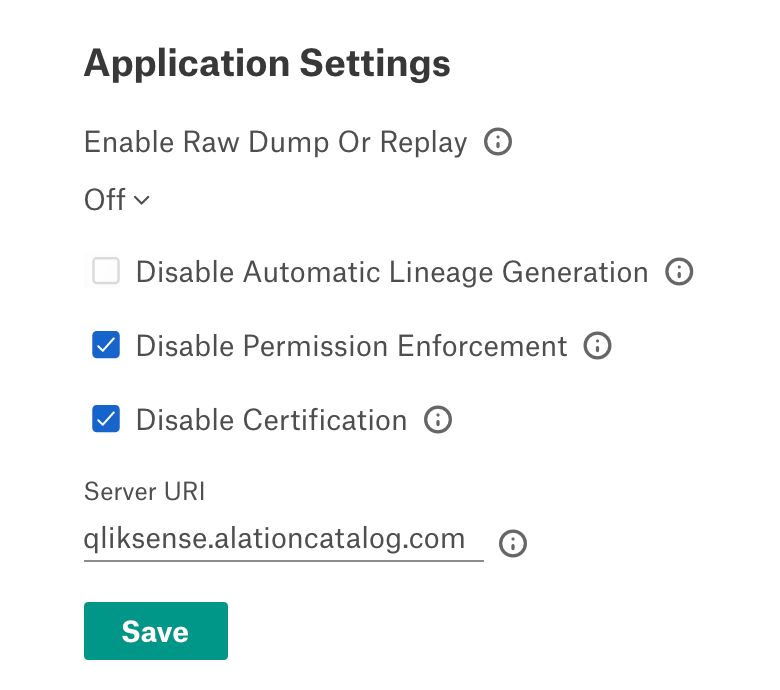
Leave the fields under the Application Settings section as is. None of these fields applies to the Qlik Sense connector.
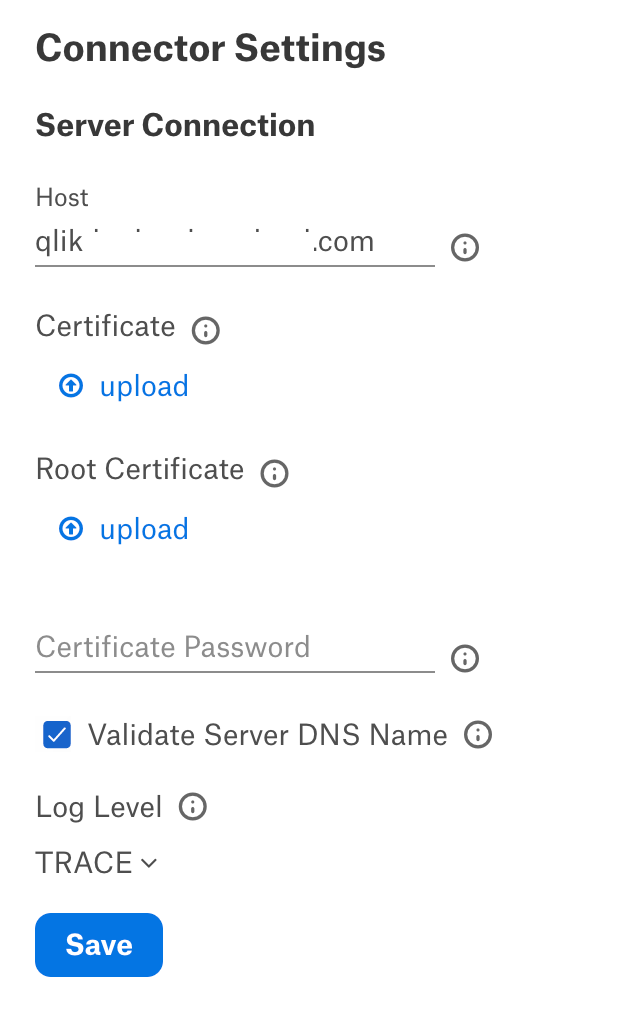
Specify Connector Settings:
Parameter
Description
Host
Enter the URL to access Qlik Sense Enterprise.
Certificate
Click Upload to upload the client.pfx certificate from your local machine.
Root Certificate
Click Upload to upload the root.cer certificate from your local machine.
Certificate Password
Provide the password of the certificates that is used during exporting the certificates.
Validate DNS Server Name
Deselect the checkbox to skip the DNS server name validation. The checkbox will be selected by default.
Log Level
Select the Log Level to generate logs. The available log levels are based on the log4j framework.
Click Save.
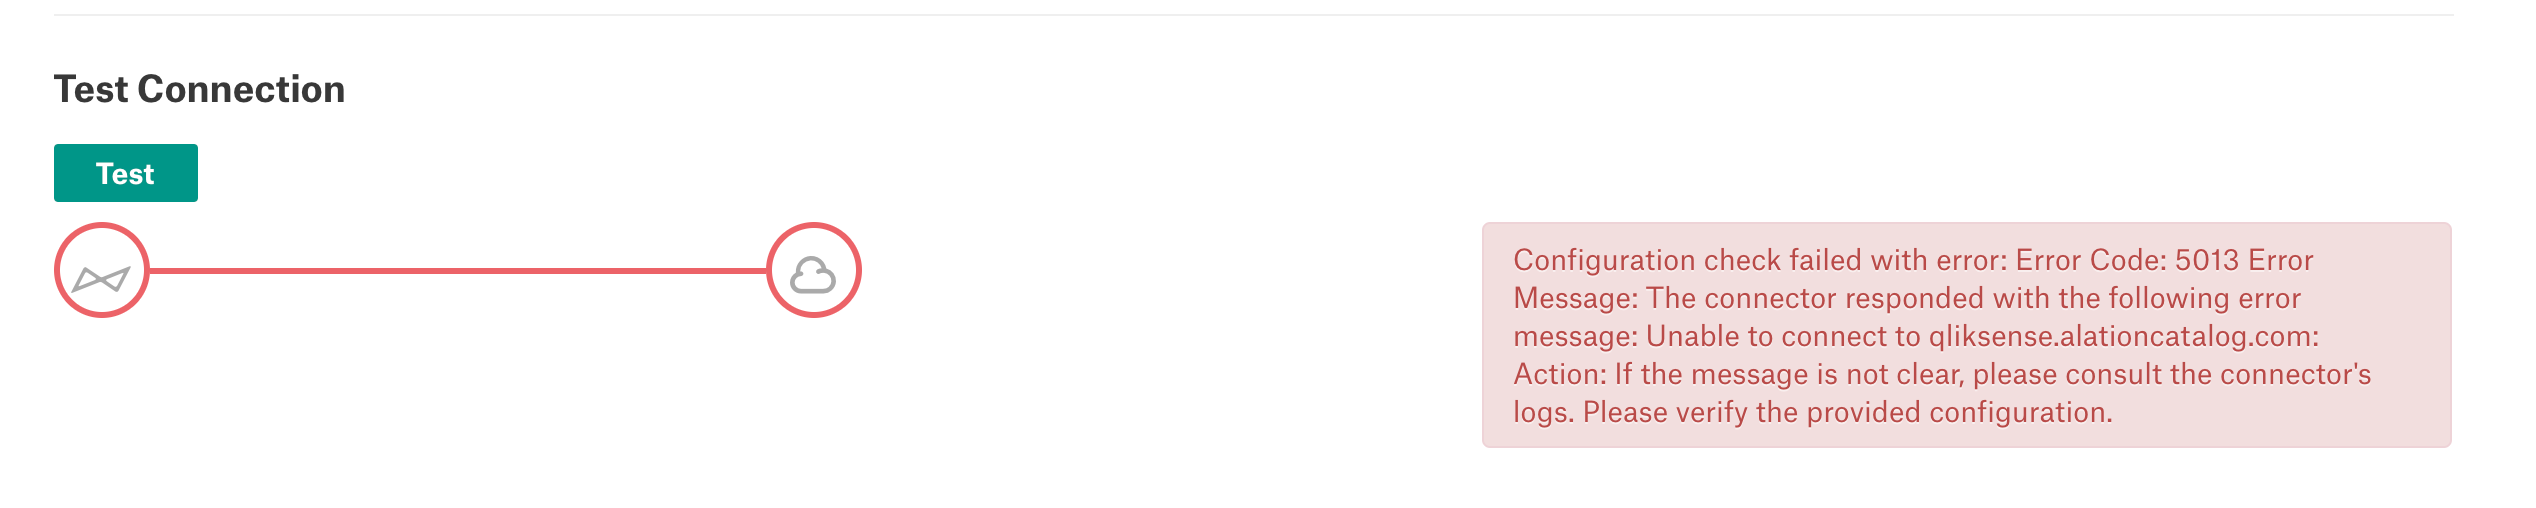
Under Test Connection, click Test to validate network connectivity. An error message will appear.
Under Extraction Settings, turn on Selective Extraction, if required. Selective extraction settings are used to apply a filter to include or exclude a list of projects.
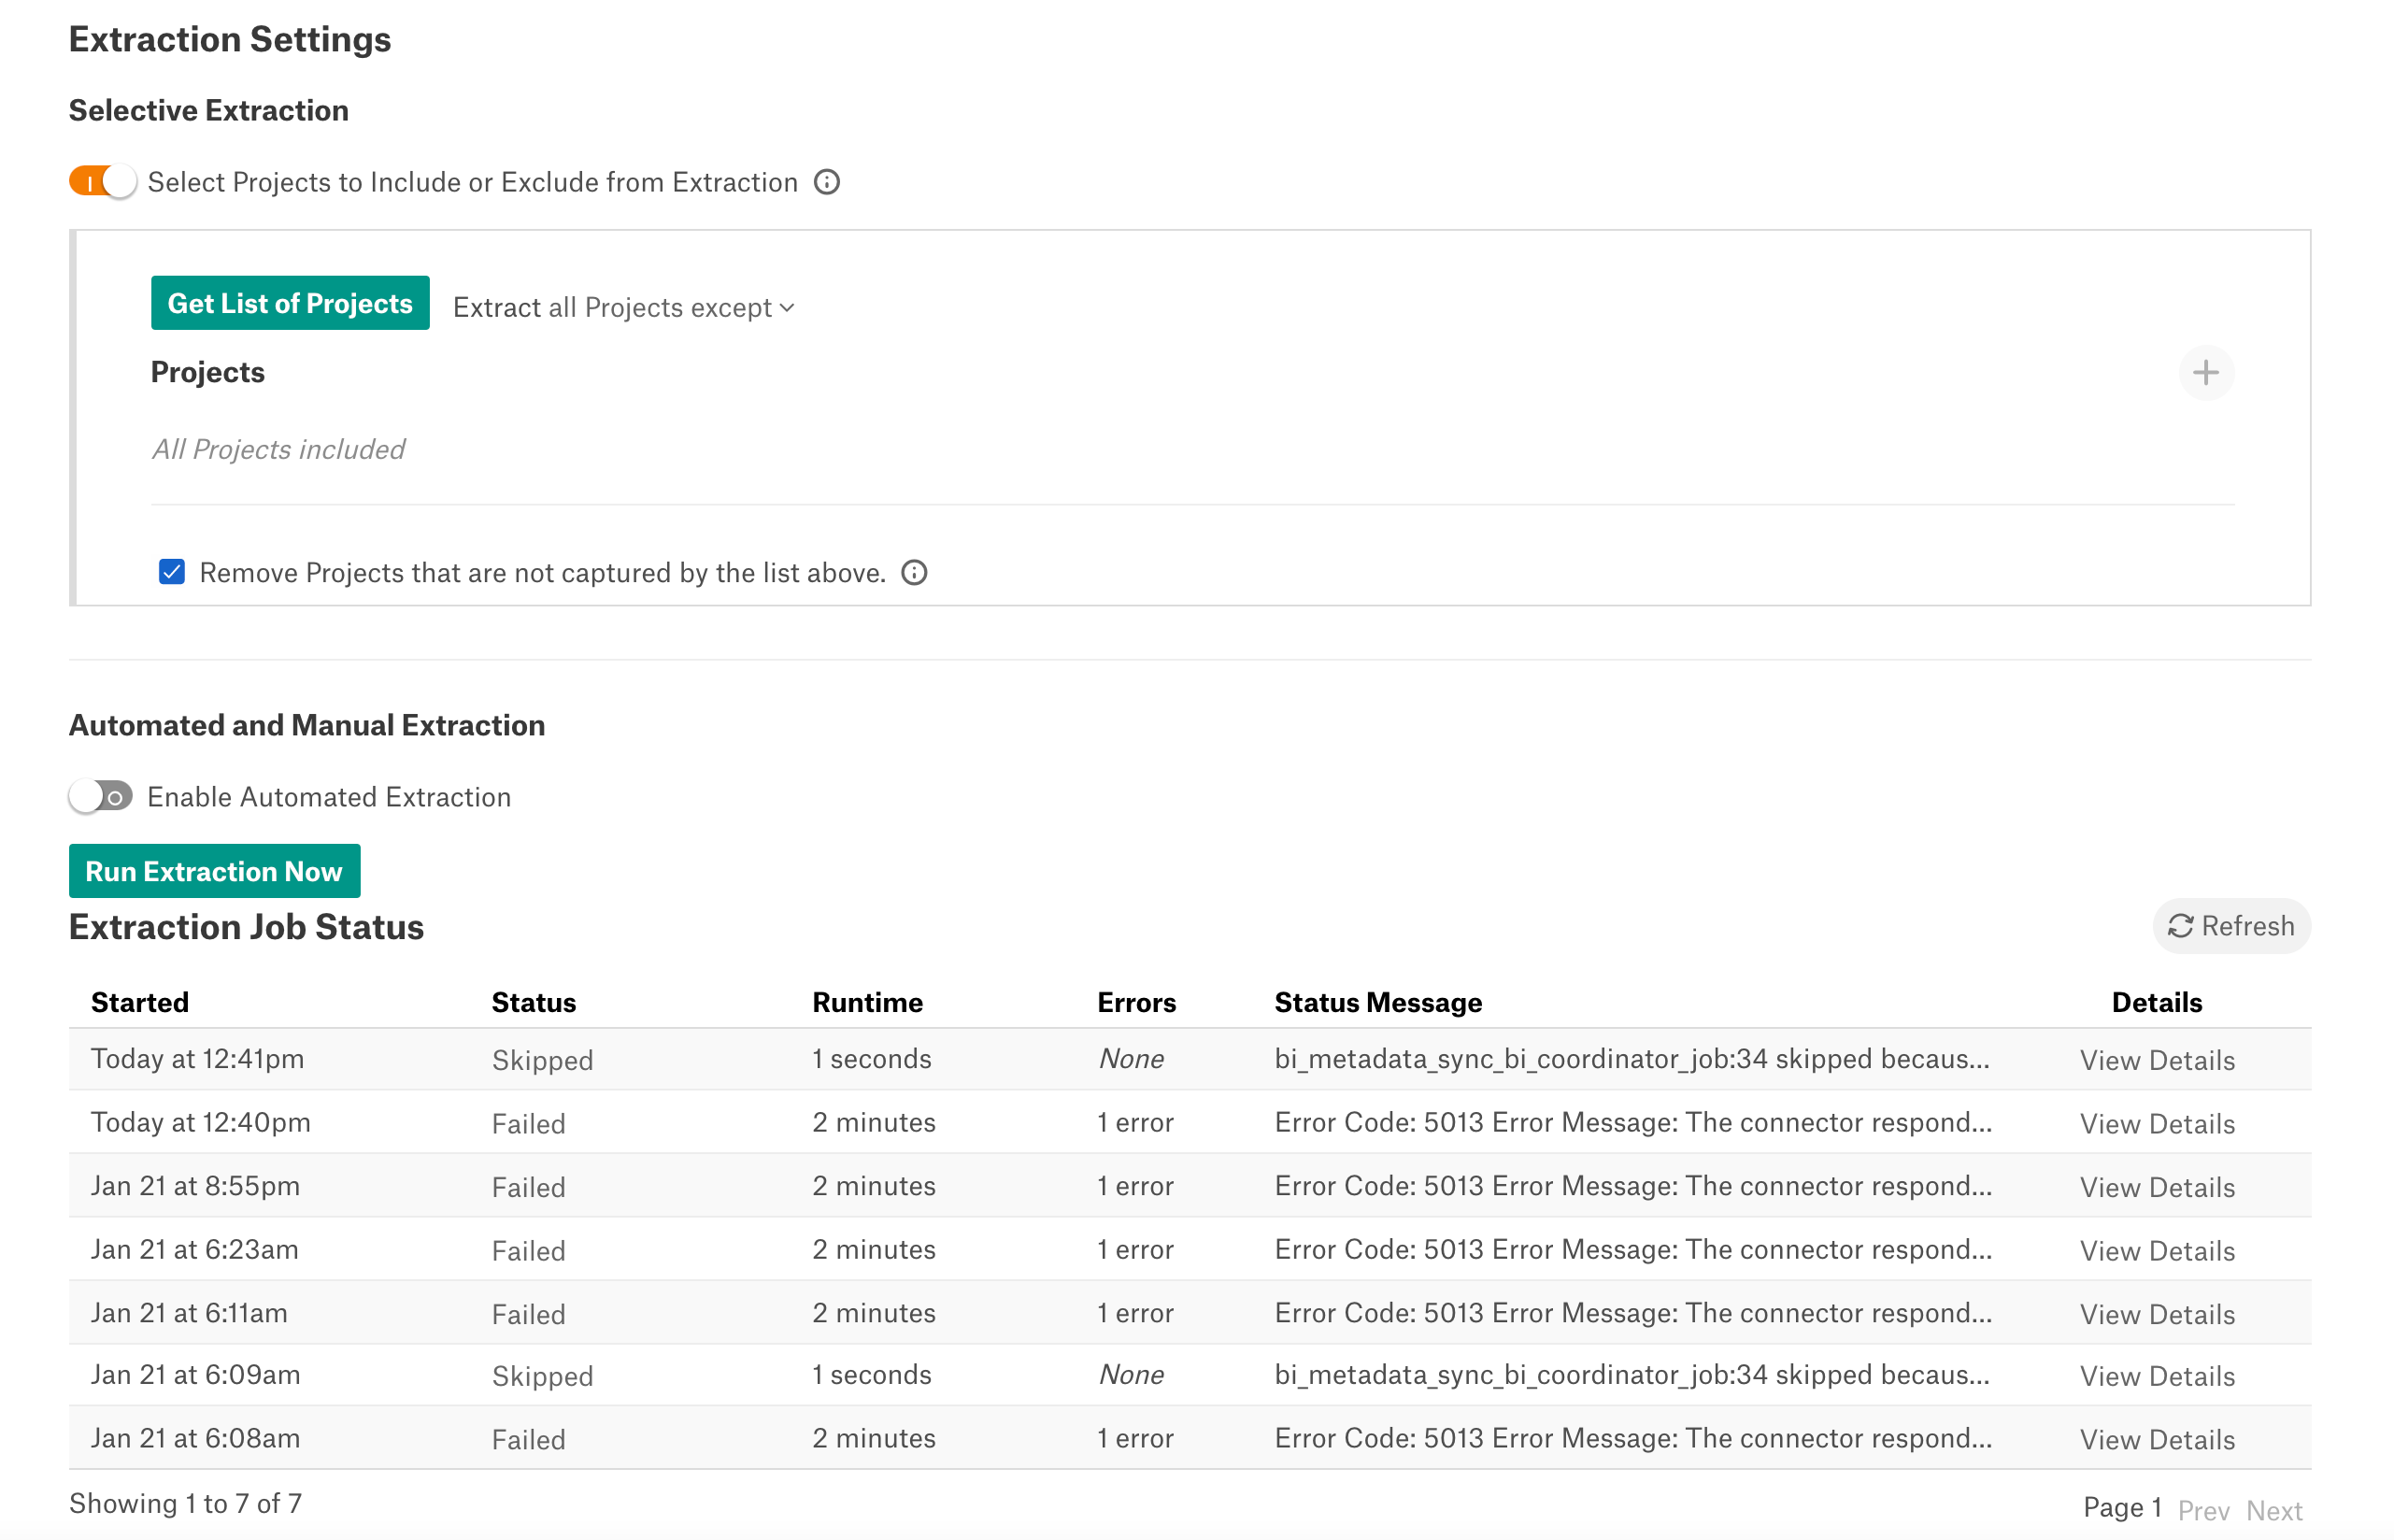
Click Get List of Projects to first fetch the list of projects (Folders in Qlik Sense) from Qlik Sense Enterprise.
The status of the Get Projects action is logged in the Job History table at the bottom of the Settings page.
Once the folder synchronization is successful, a drop-down list of projects will become enabled. Select one or more projects to apply the filter.
Check if you are using the desired filter option. Available filter options are described below:
Filter Option
Description
Extract all Folders except
Extract metadata from all Folders except from the workspaces selected.
Extract only these Folders
Extract metadata only from the selected Folders.
Click Run Extraction Now to extract metadata. The status of the extraction action is also logged in the Job History table at the bottom of the page.
If you wish to automatically update the metadata in the Catalog, under Automated and Manual Extraction, turn on Enable Automated Extraction and select the day and time when metadata must be extracted. The metadata extraction will be automatically scheduled to run at the selected day and time.
Troubleshooting
Refer to Troubleshooting.