Azure Blob Storage OCF Connector: Azure Service Principal Authentication
Available from Alation version 2023.3.1
Azure service principal authentication method is supported from Azure Blob Storage connector version 2.4.1 and Alation version 2023.3.1. Use the steps in the following sections to configure service principal authentication in Azure Blob Storage and in Alation.
Setup in Azure Portal
Perform the following steps to create an application in the Azure portal:
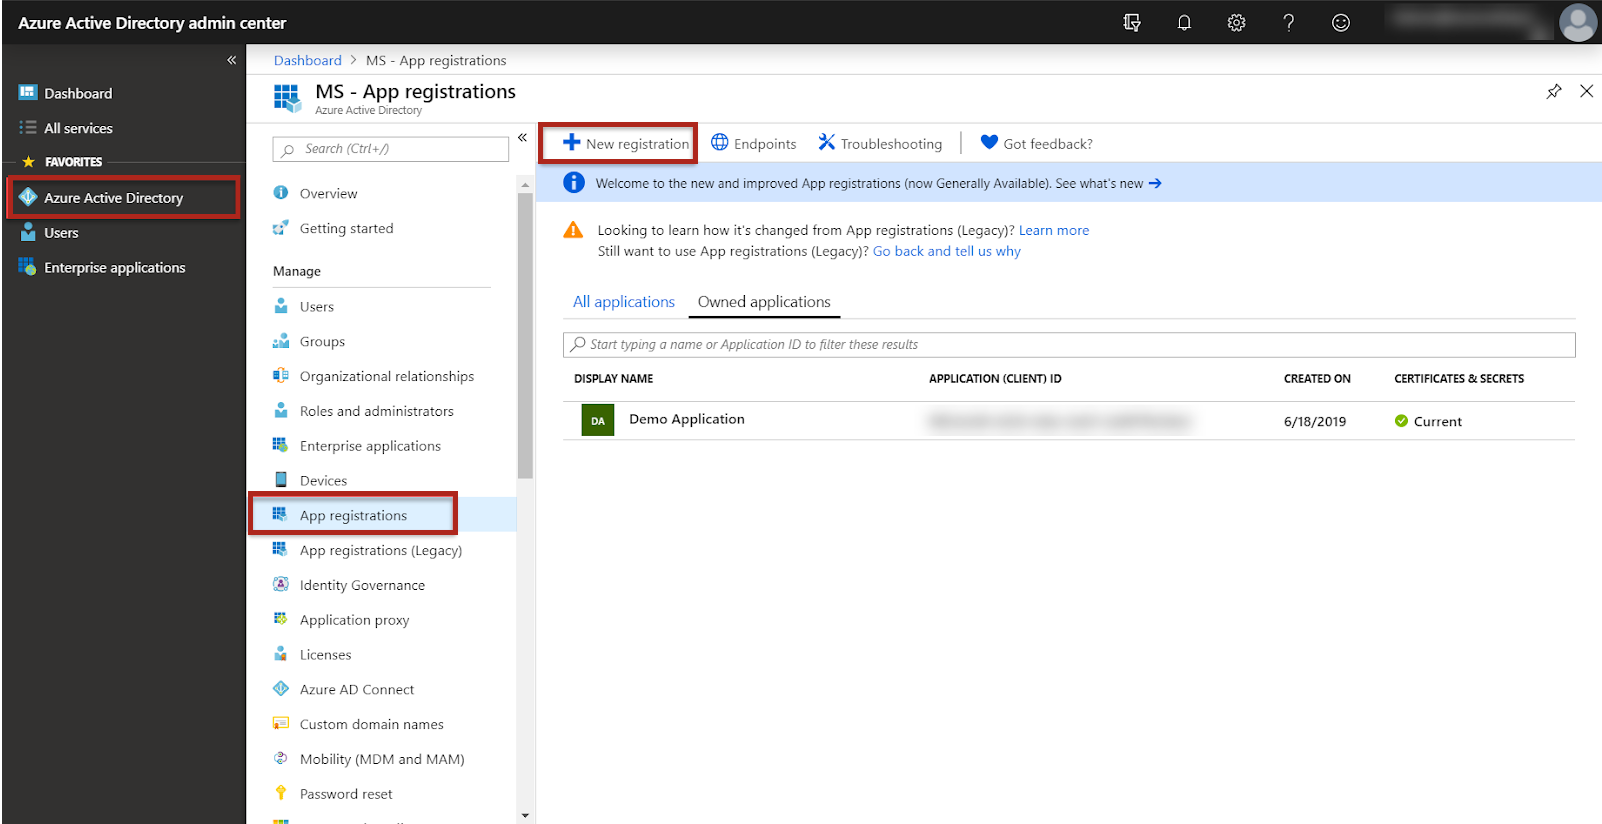
In the Azure portal, go to Azure Active Directory > App registrations.
Click New registration.
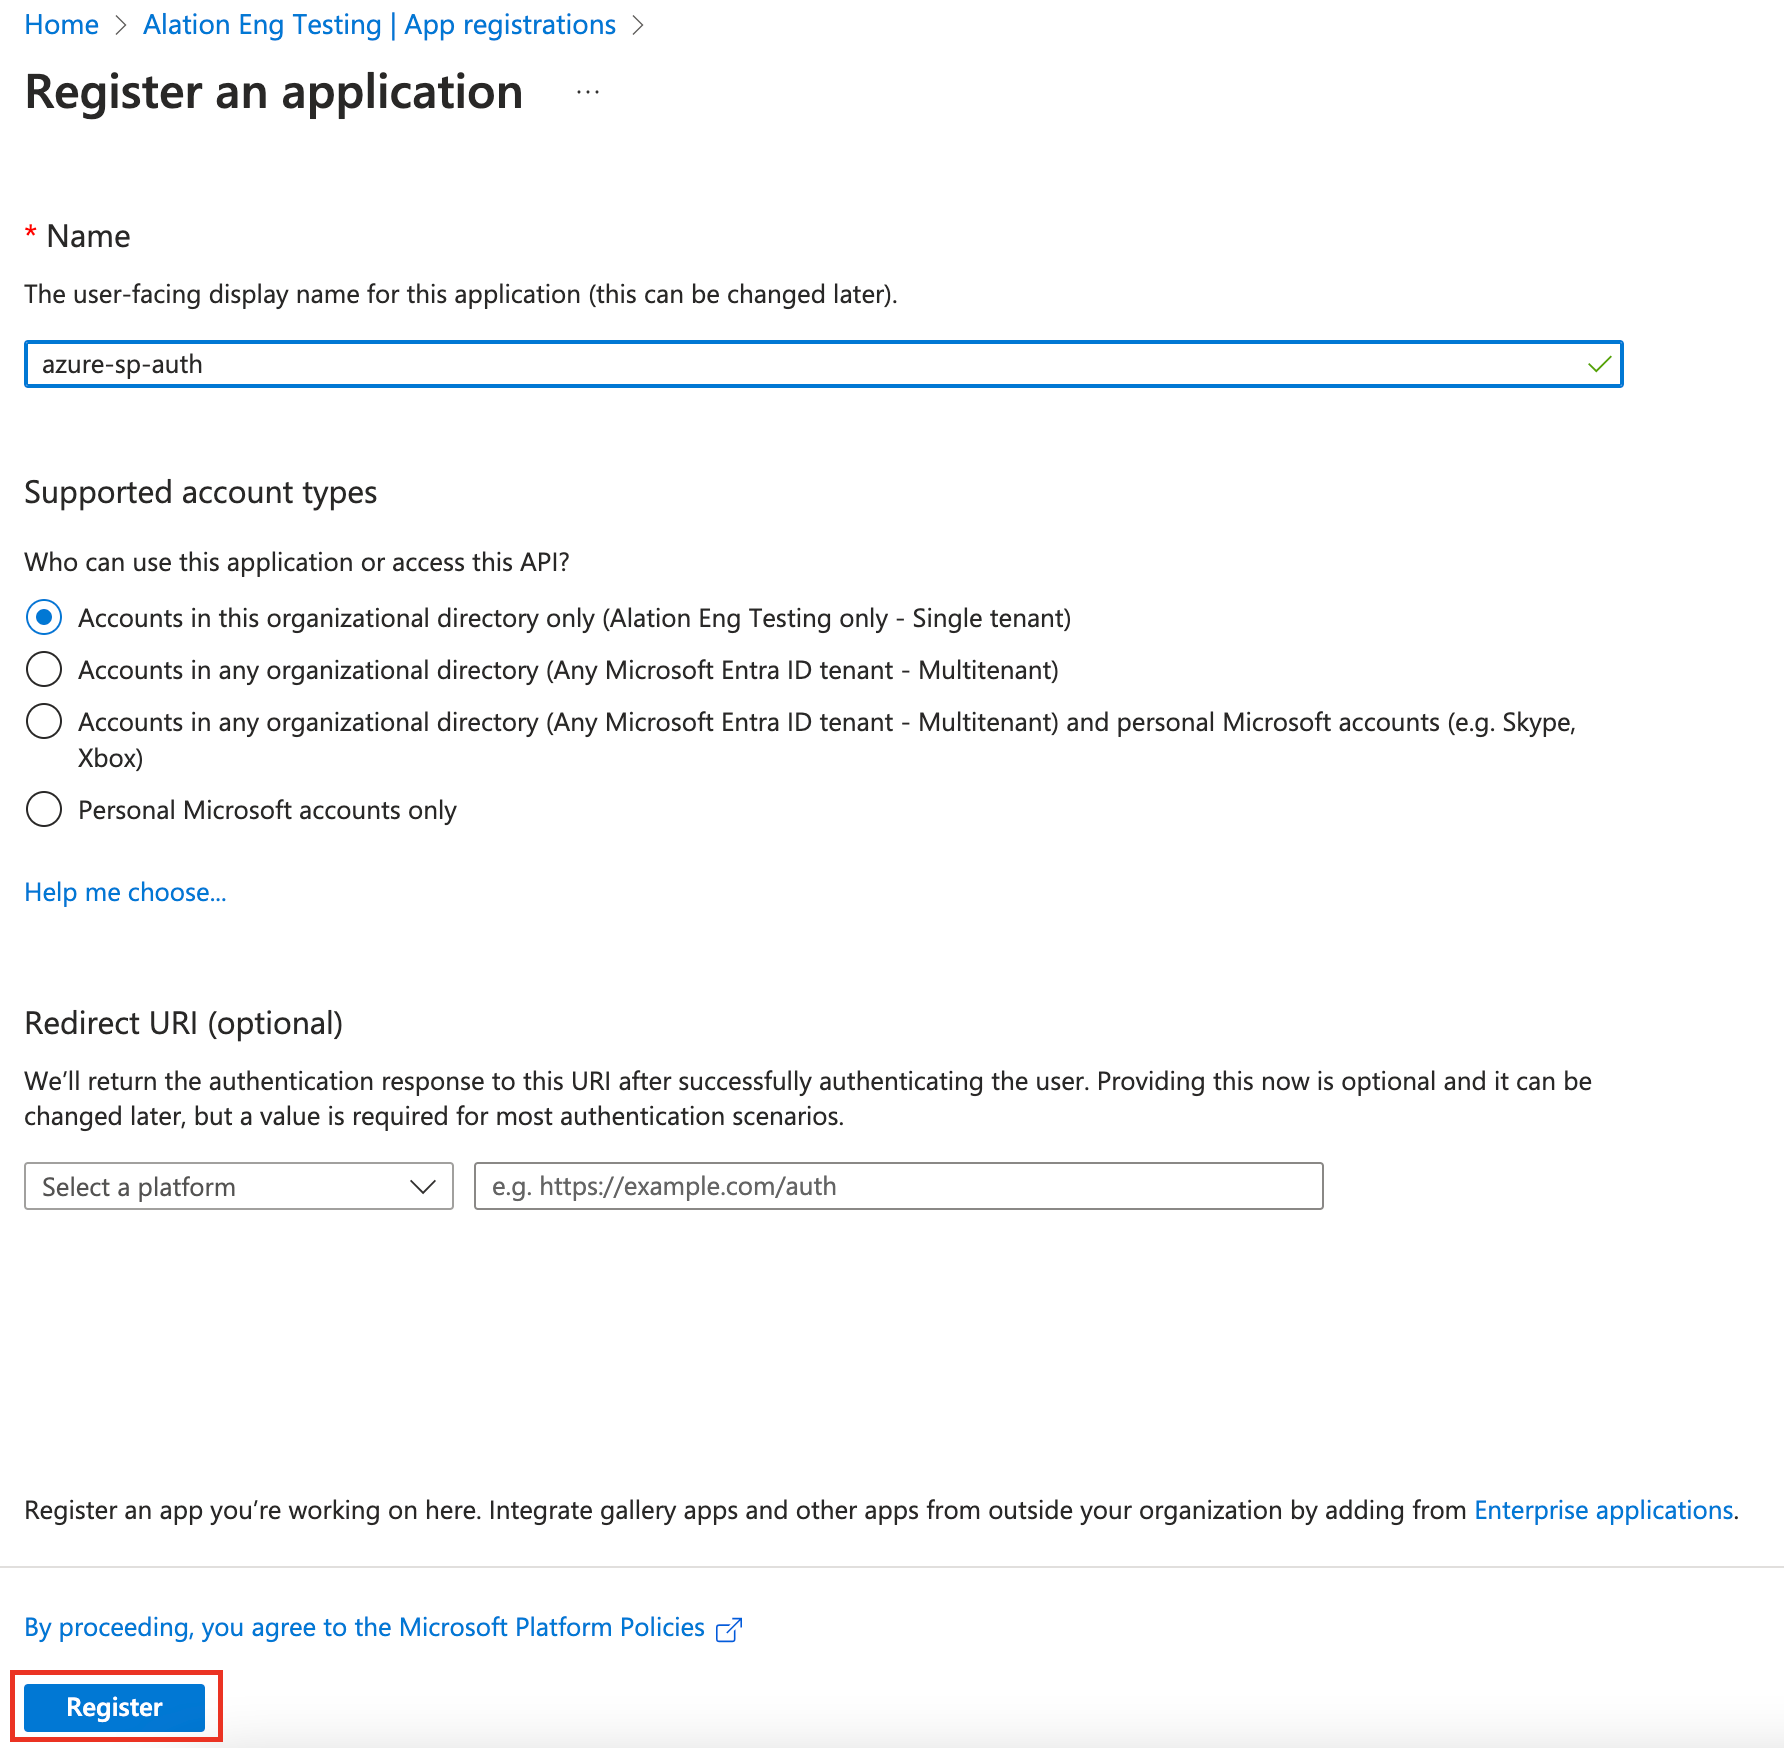
Provide a Name for the application and click Register.
Copy the Client ID and OAuth 2.0 token endpoint (v2) to a secure location on your local machine. You’ll need this information later when configuring authentication in Alation.

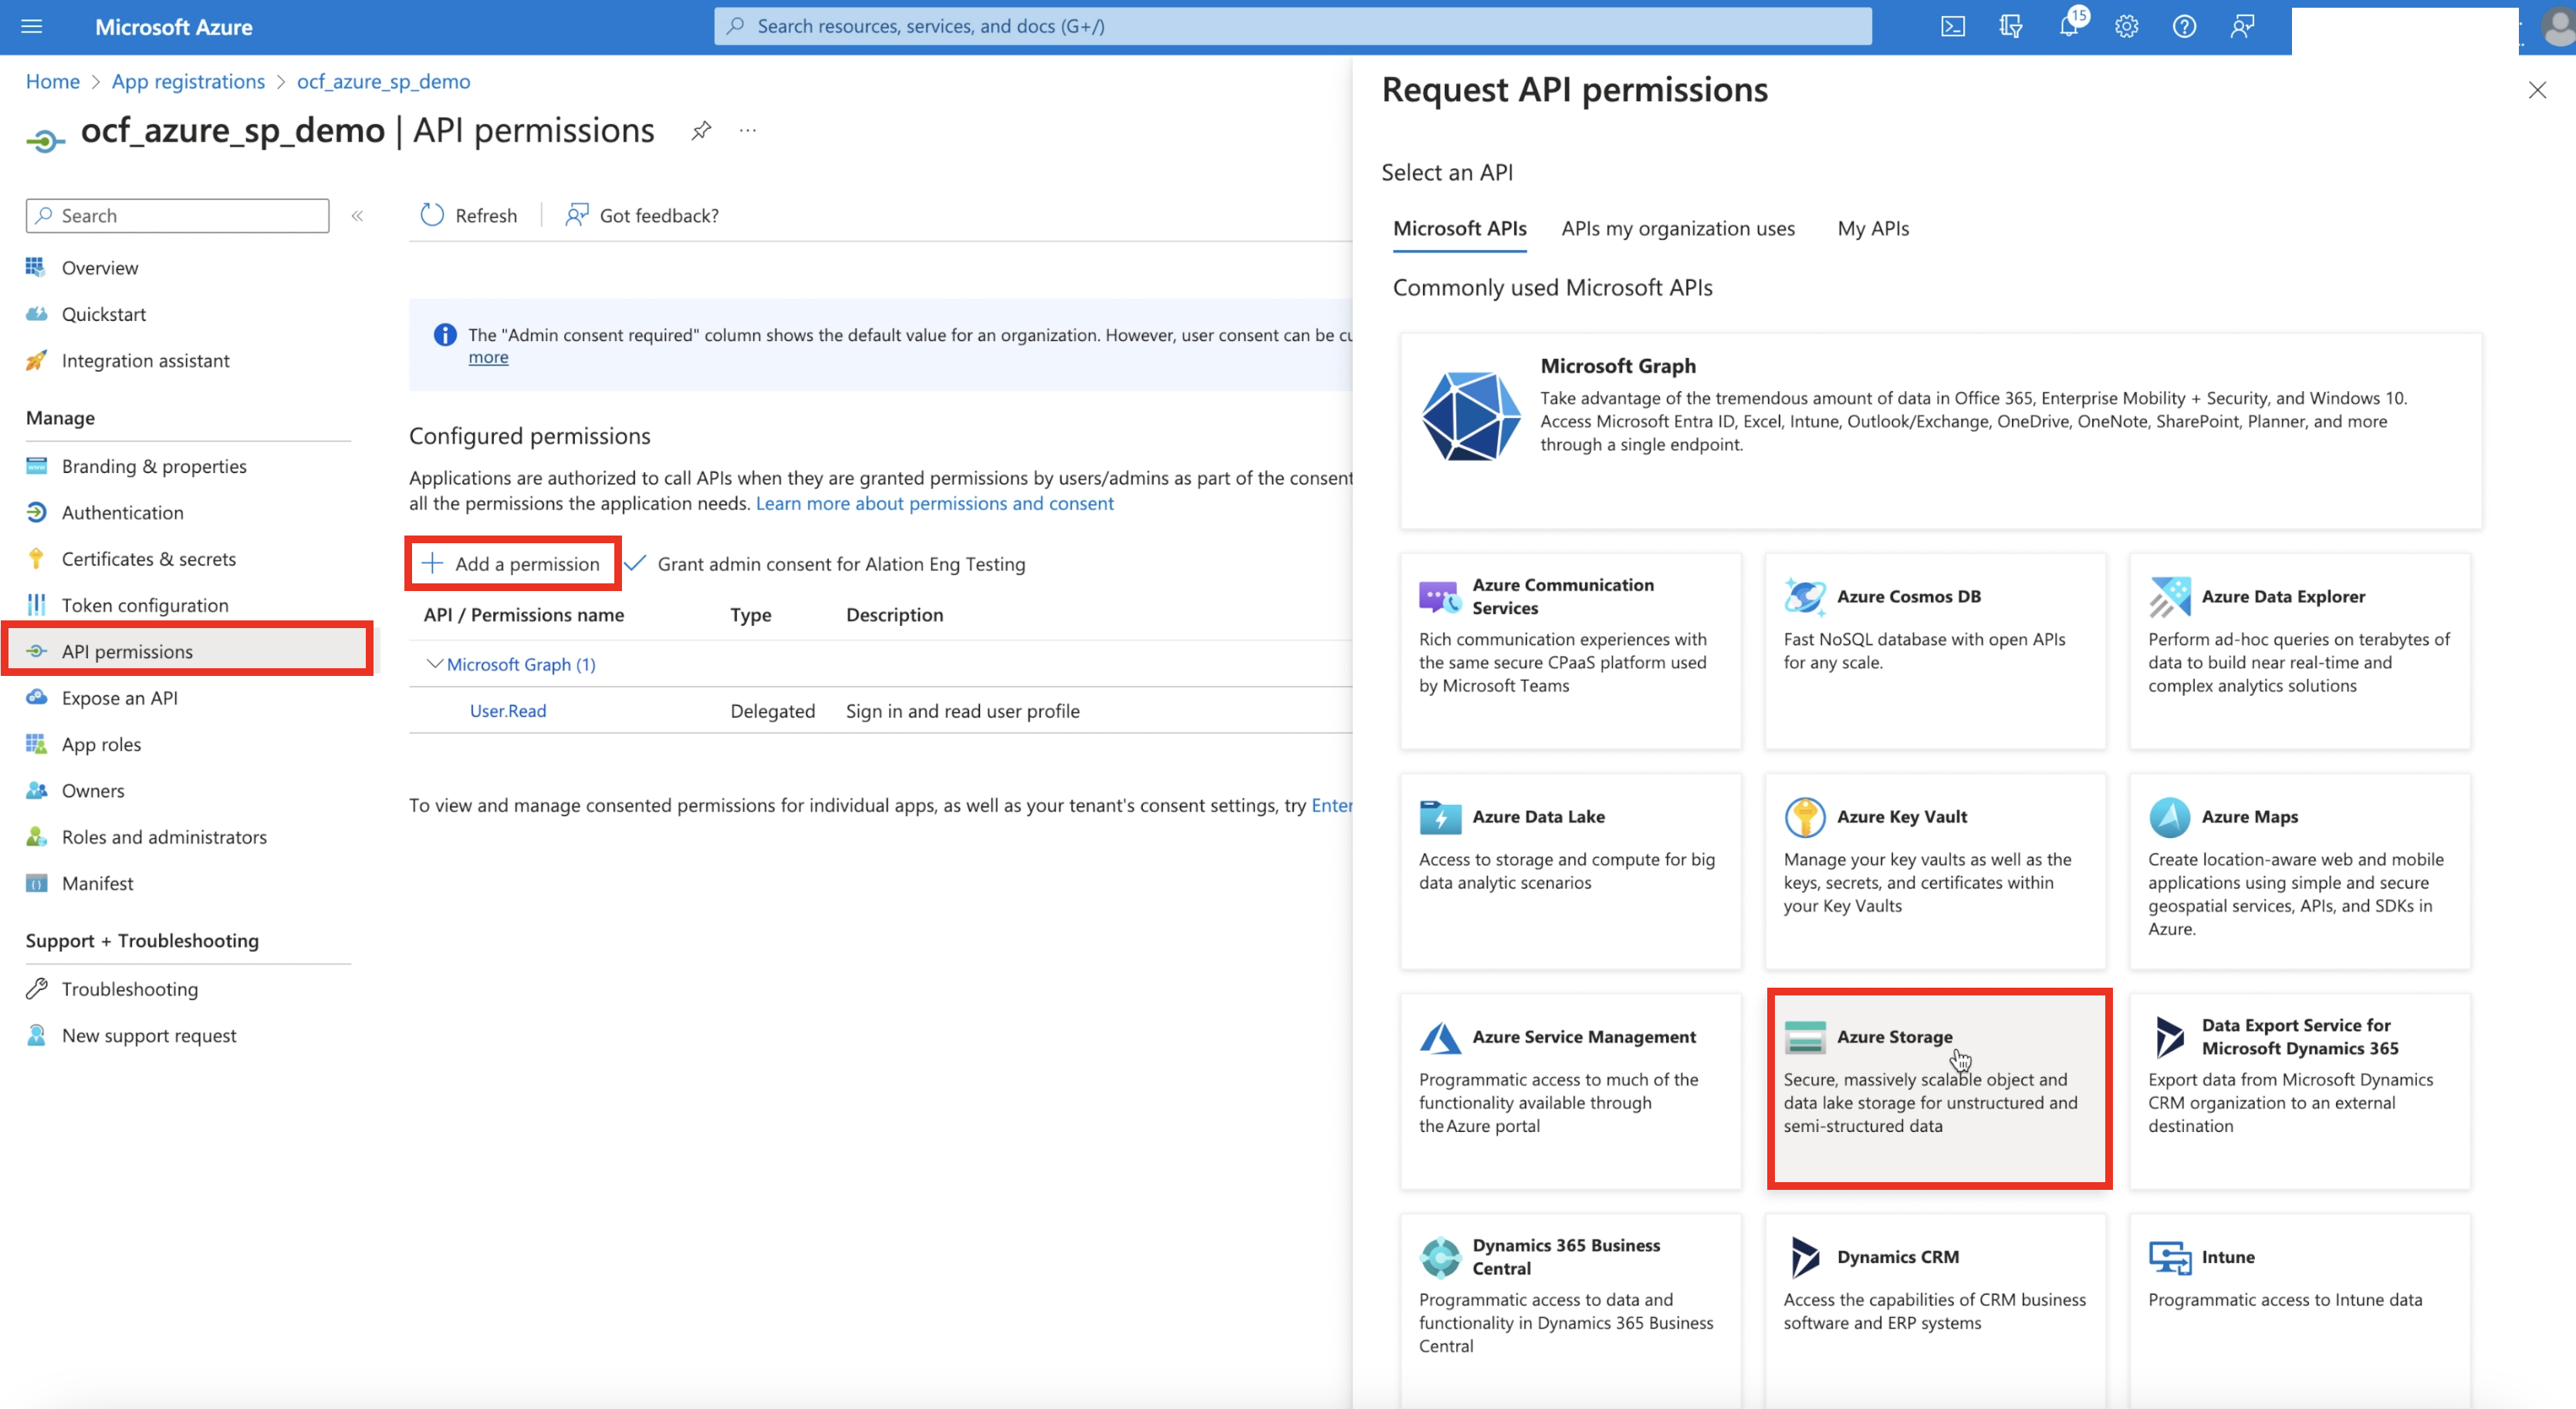
Go to API permissions.
Click Add a permission and select Azure Storage.
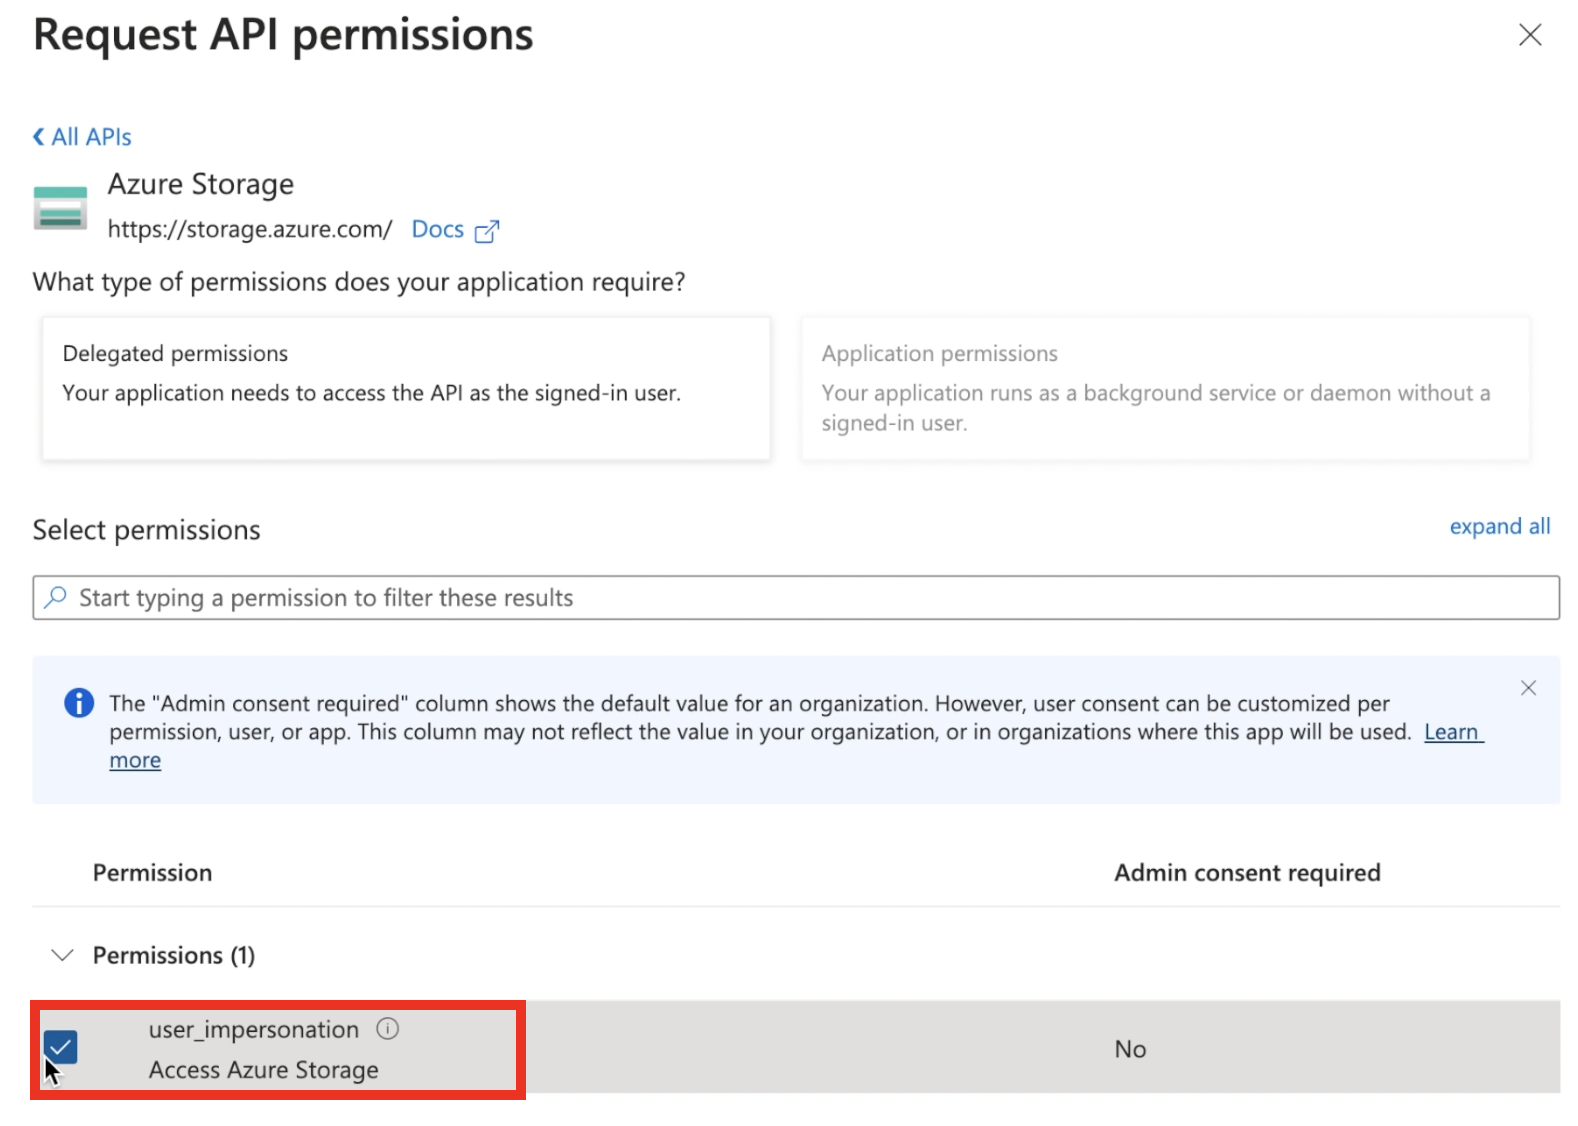
Select the user_impersonation permission.
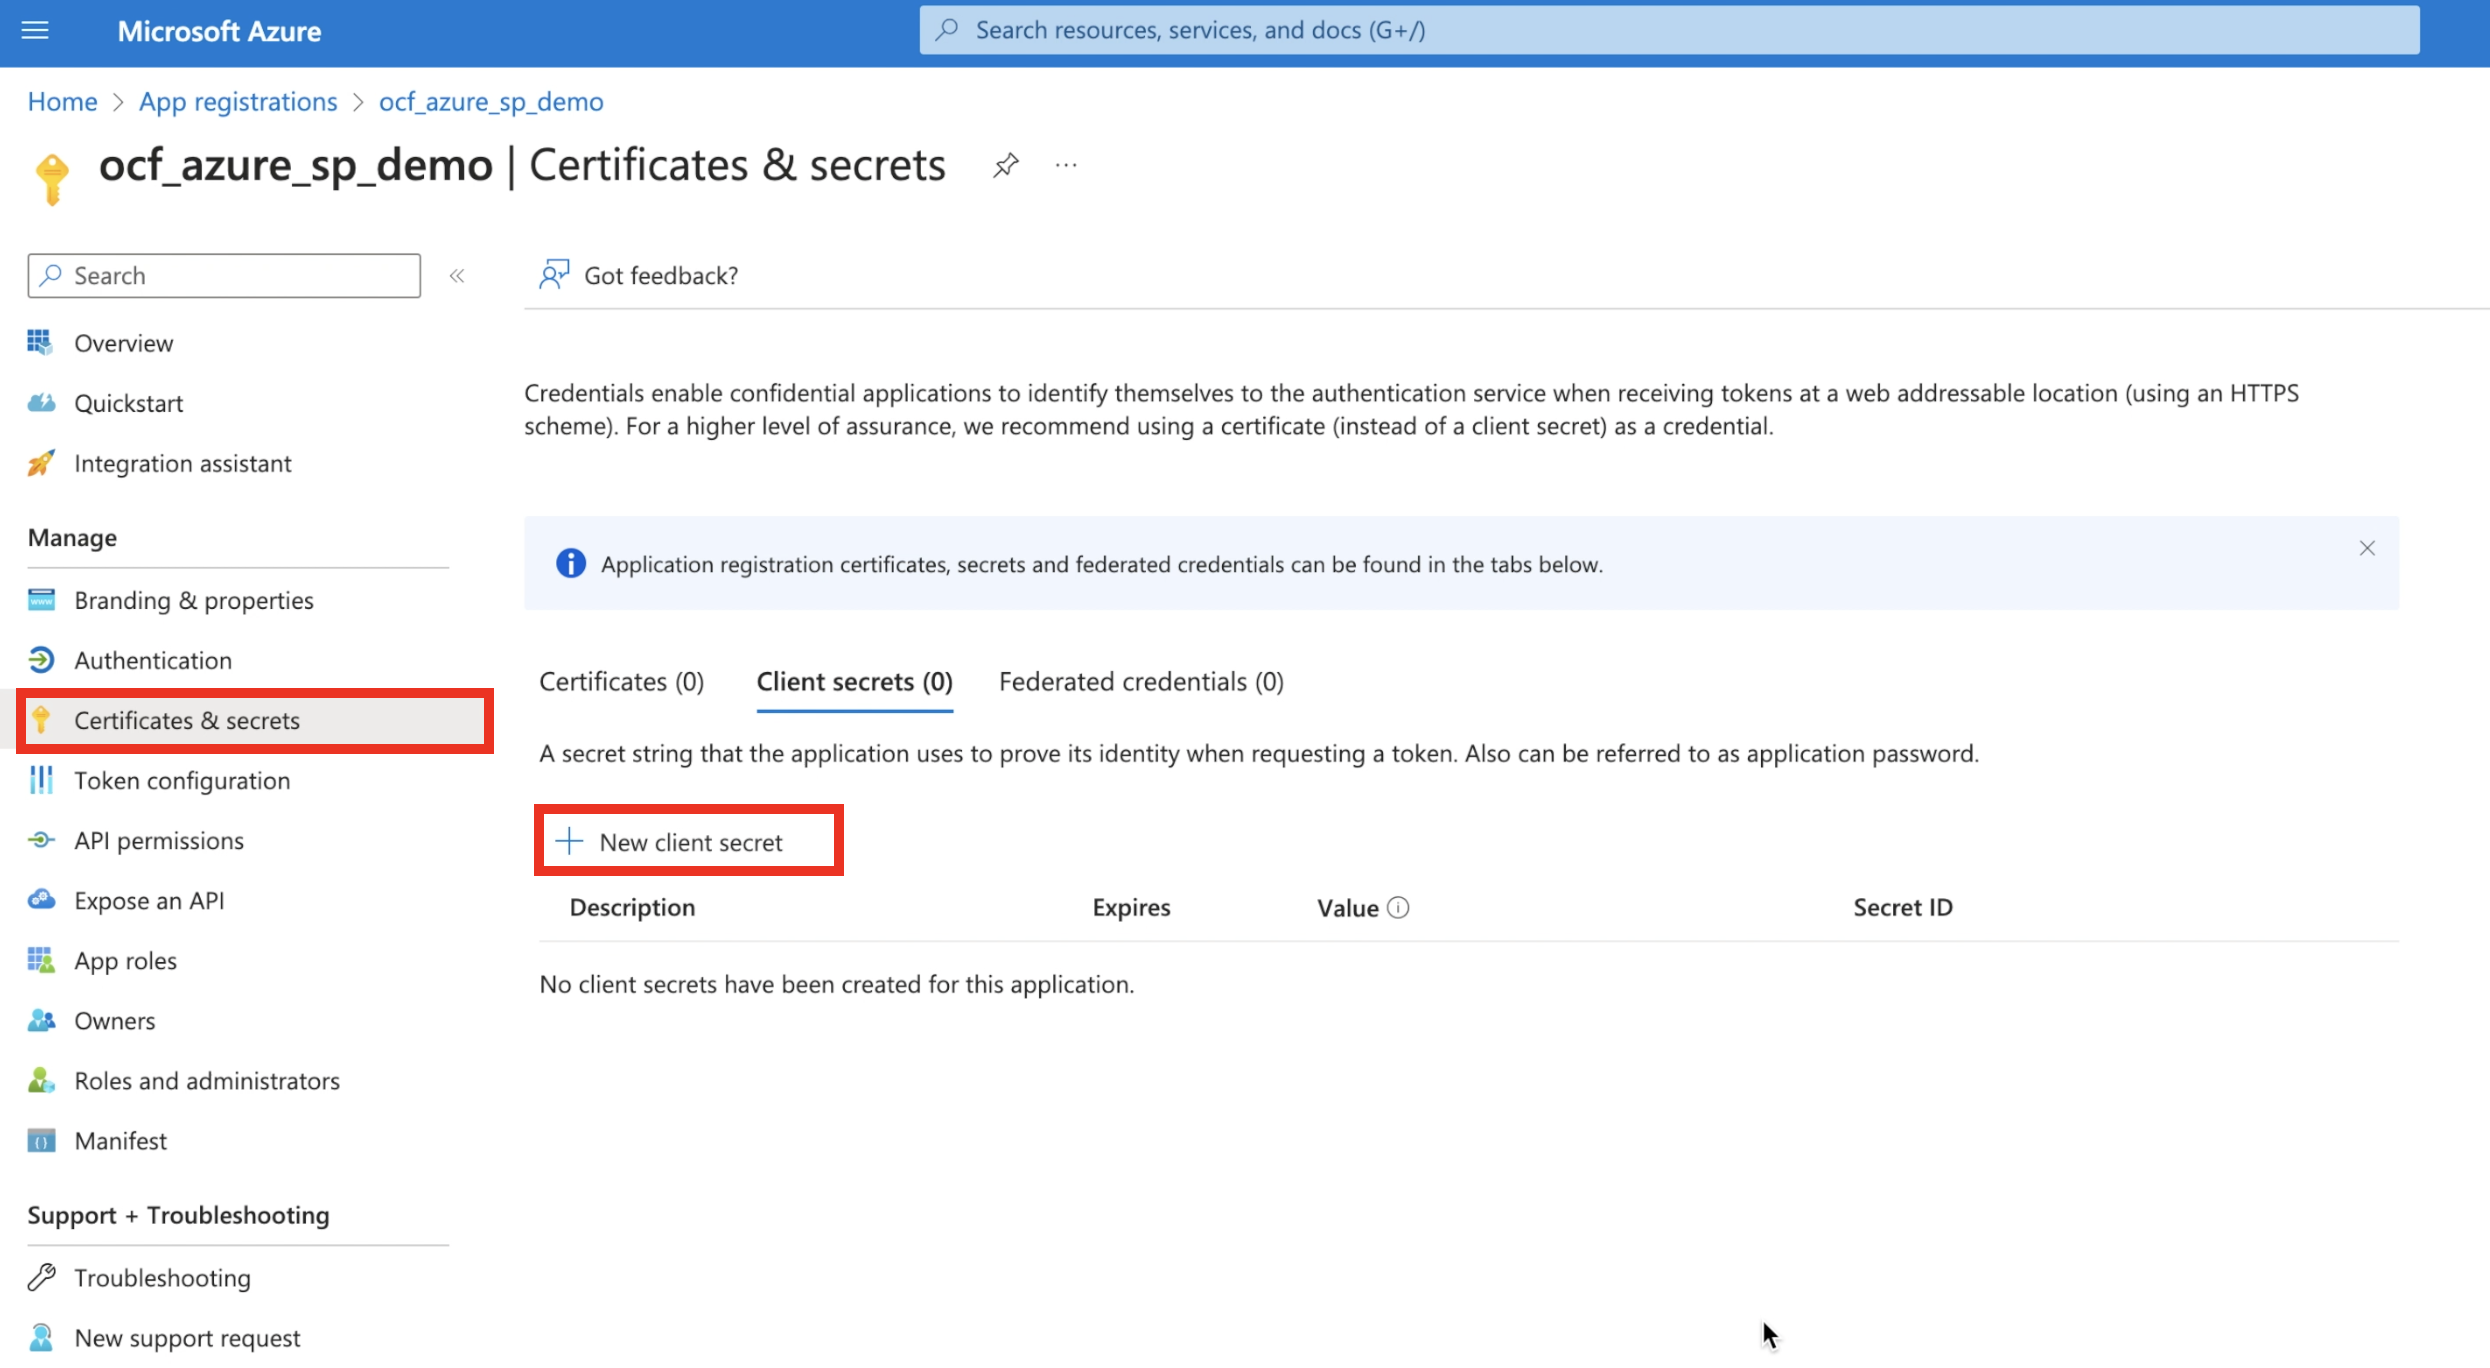
Go to Certificates & secrets and click New client secret to generate a new client secret. Save the client secret on your local machine.
Assign a Role
Once you have the app, perform the following steps to link the app to the storage account from which you want to extract the data and assign a role to the app:
Go to the storage account from which you want to extract the data into Alation.
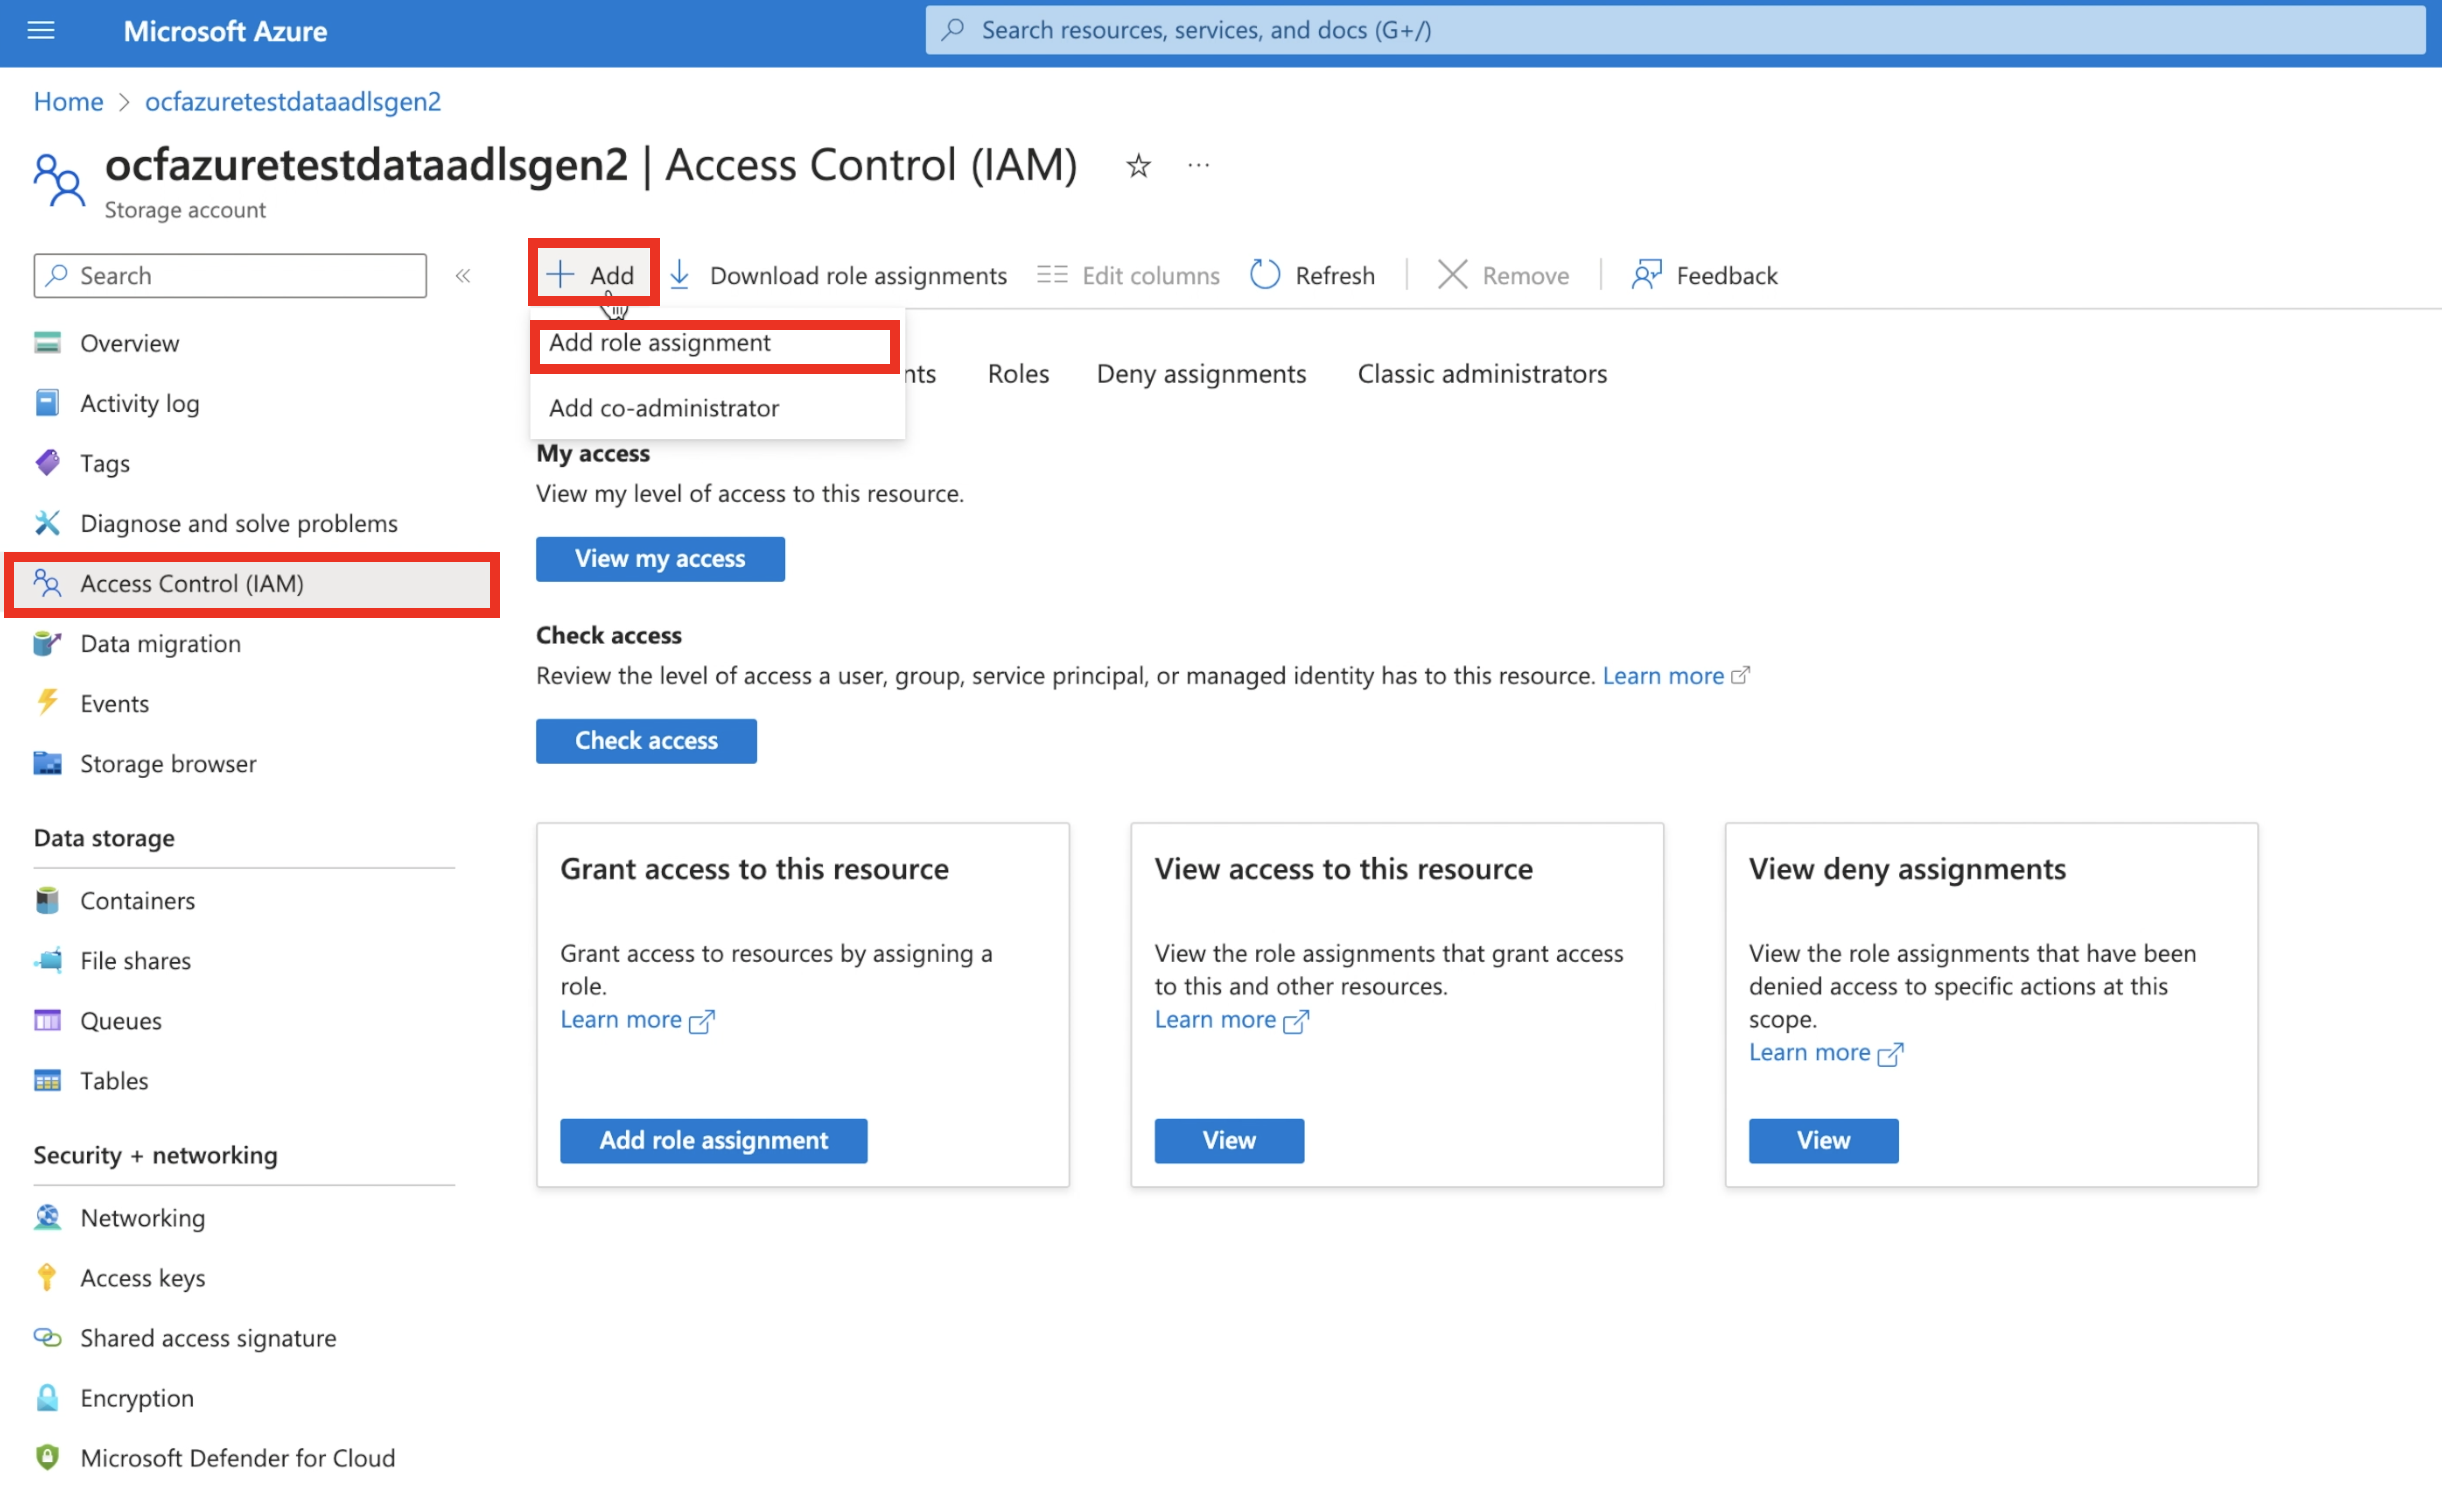
Click Access Control (IAM) > + Add > Add role assignment.
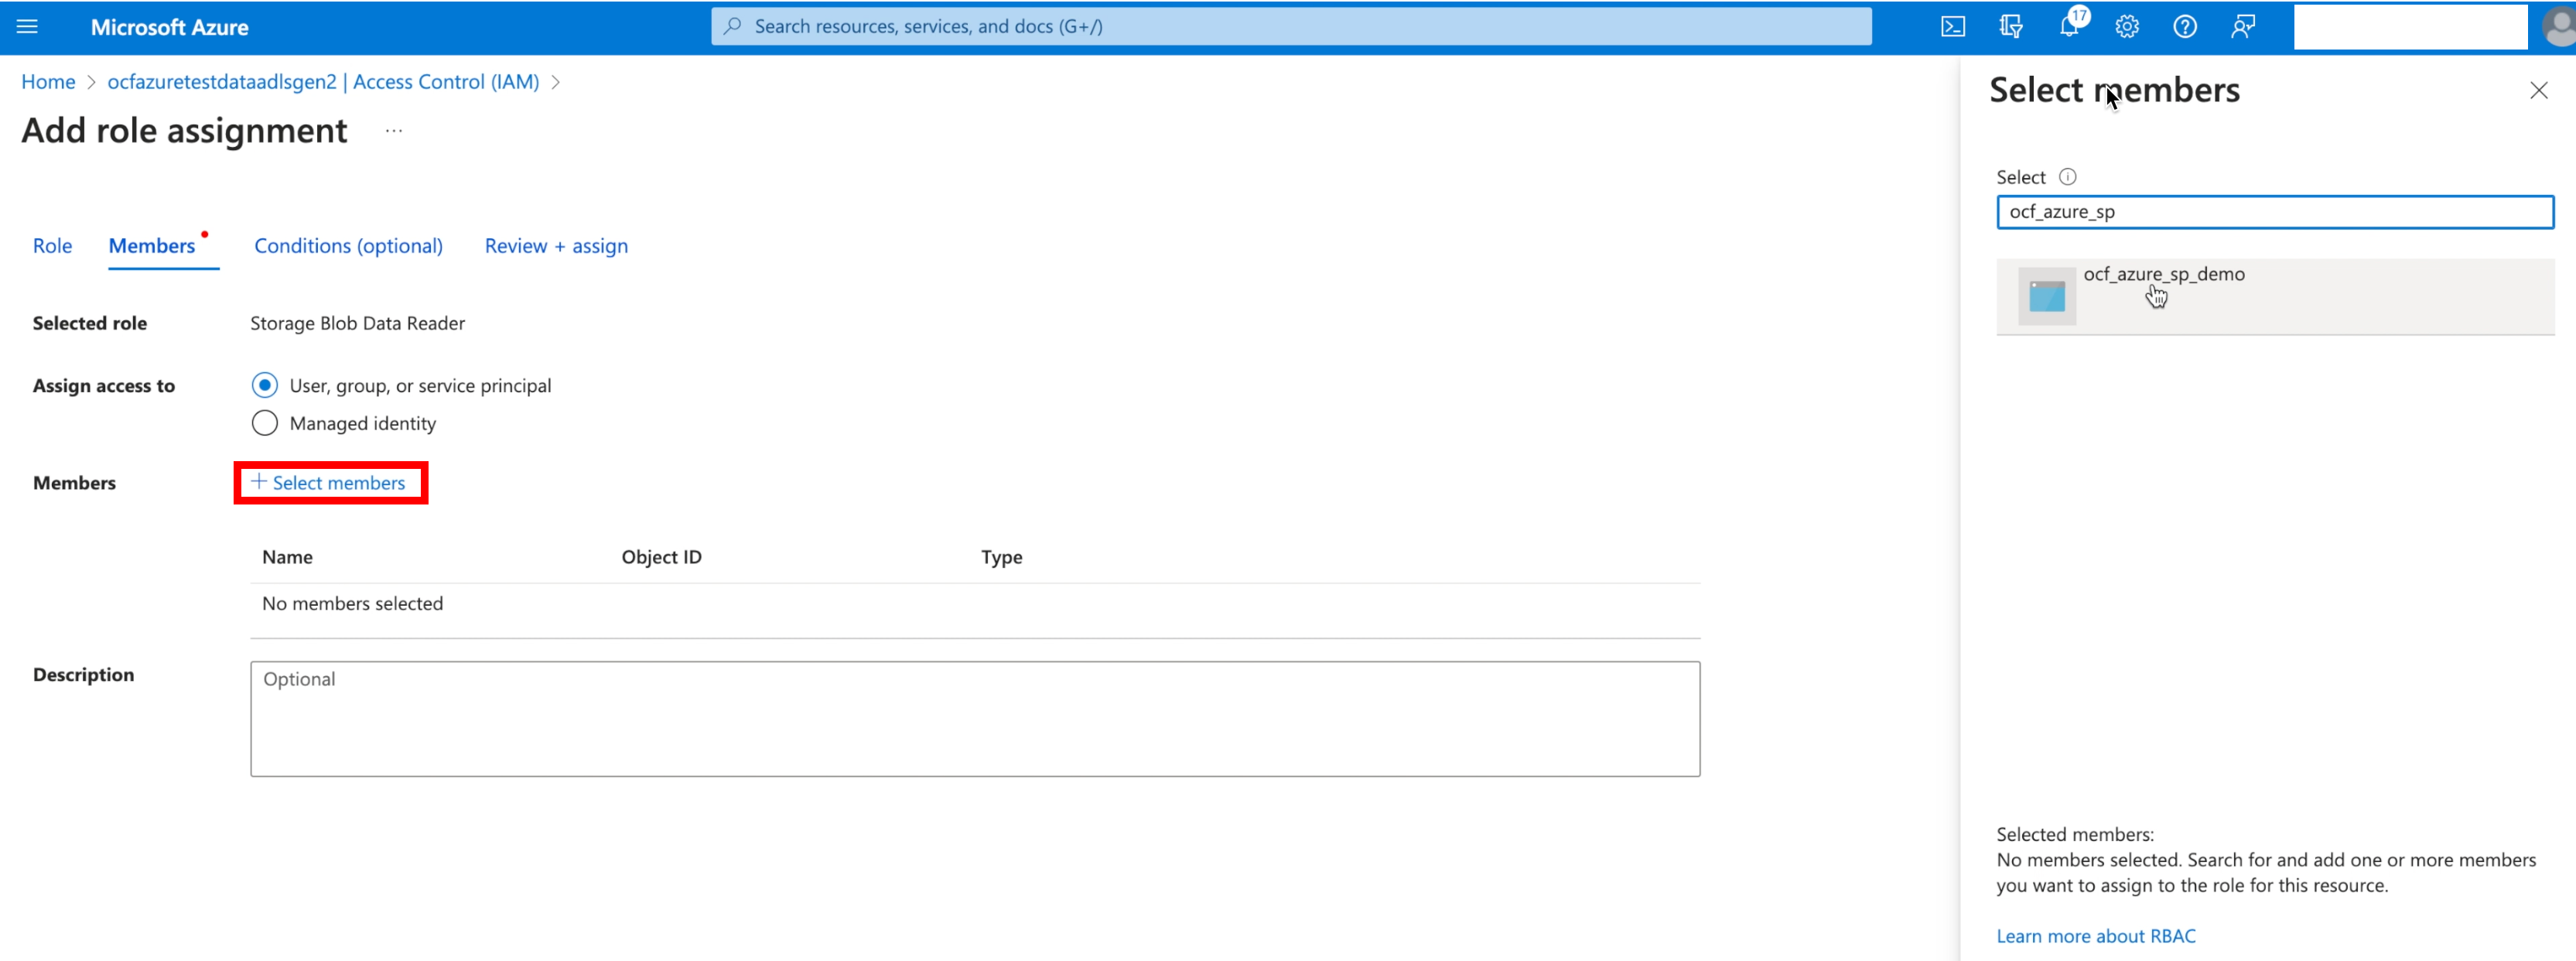
Select the Storage Blob Data Reader permission and click Next.
Click + Select members and select the app that you have created. Click Review + assign.
Setup in Alation
Create an Authentication Profile
Perform the following steps in Alation:
Log in to Alation.
Go to Admin Settings > Server Admin > Authentication.
Under Authentication Configuration Methods for External Systems, click the Add Configuration button.
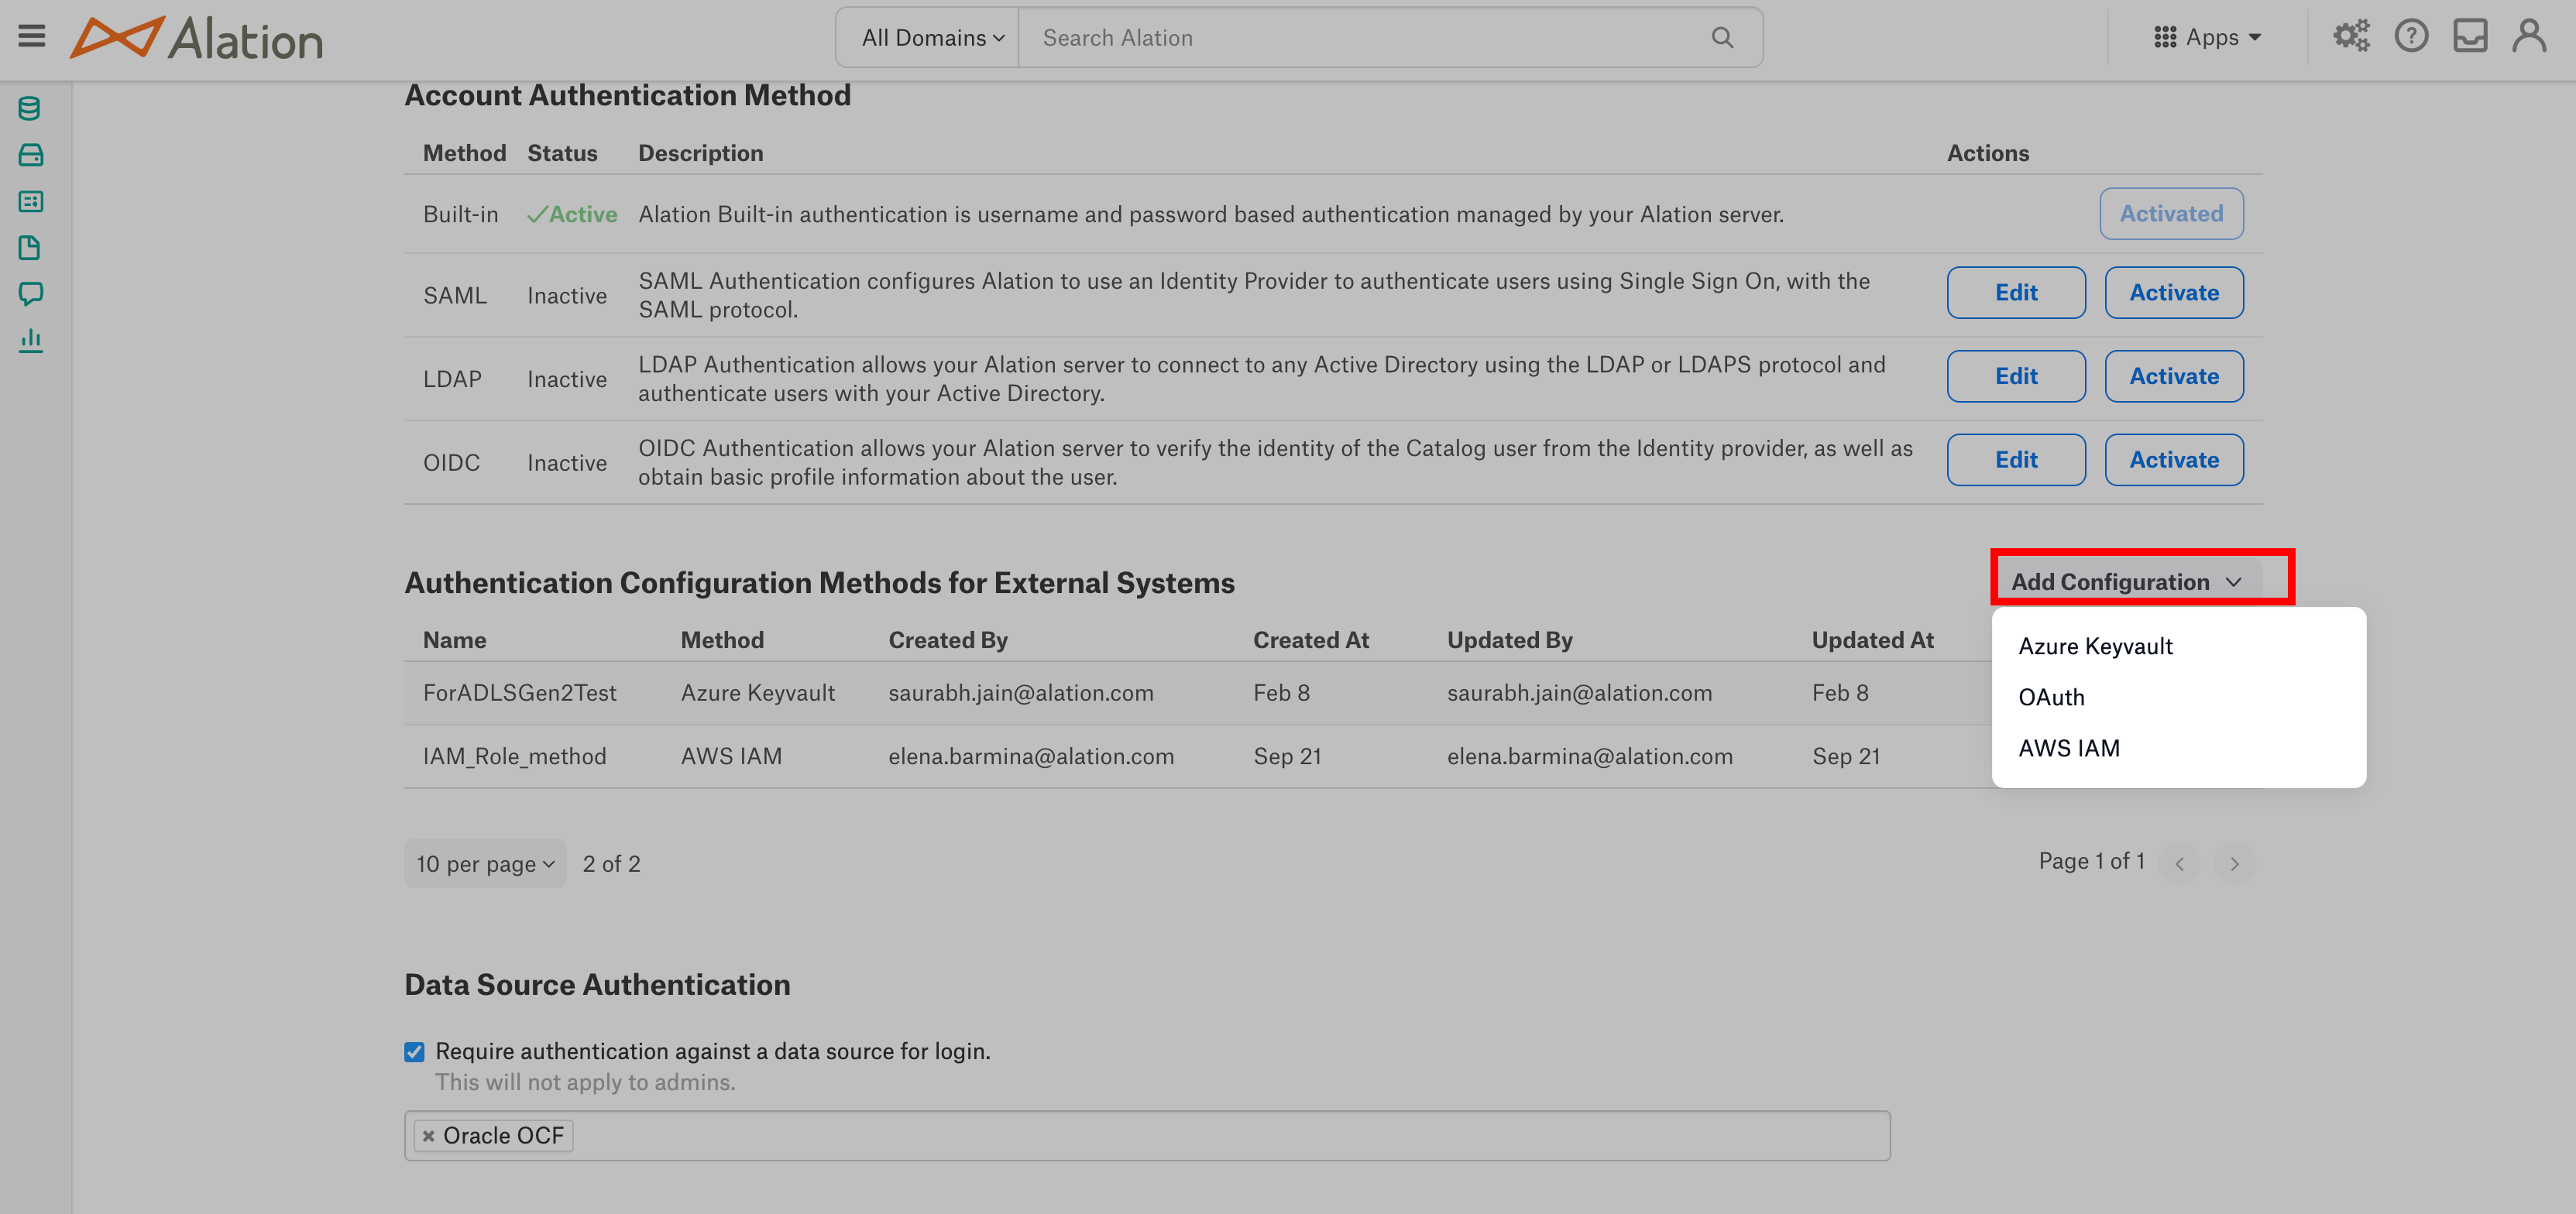
In the list that opens, select OAuth. The OAuth authentication profile editor will open in a new browser tab.
Add these values:
Config Name — Provide a name for the authentication profile you are creating, for example azure_blob_sp.
Client ID — Specify the client ID that you copied in step 3 of Setup in Azure Portal.
Client Secret — Specify the client secret that you copied in step 8 of Setup in Azure Portal.
Scope — Provide the scope as
https://storage.azure.com/.default.Subject — Not applicable.
Token Buffer Time — Not applicable.
Grant Type — Select credentials_flow from the drop-down.
PKCE Verifier — Leave the check box selected.
Authorize Endpoint URL — Provide a placeholder URL, for example,
www.mock_url.com.Redirect URL — Provide a placeholder URL, for example,
www.mock_url.com.Token Endpoint URL — Specify the token endpoint URL that you copied in step 3 of Setup in Azure Portal.
User Info Endpoint URL — Provide a placeholder URL, for example,
www.mock_url.com.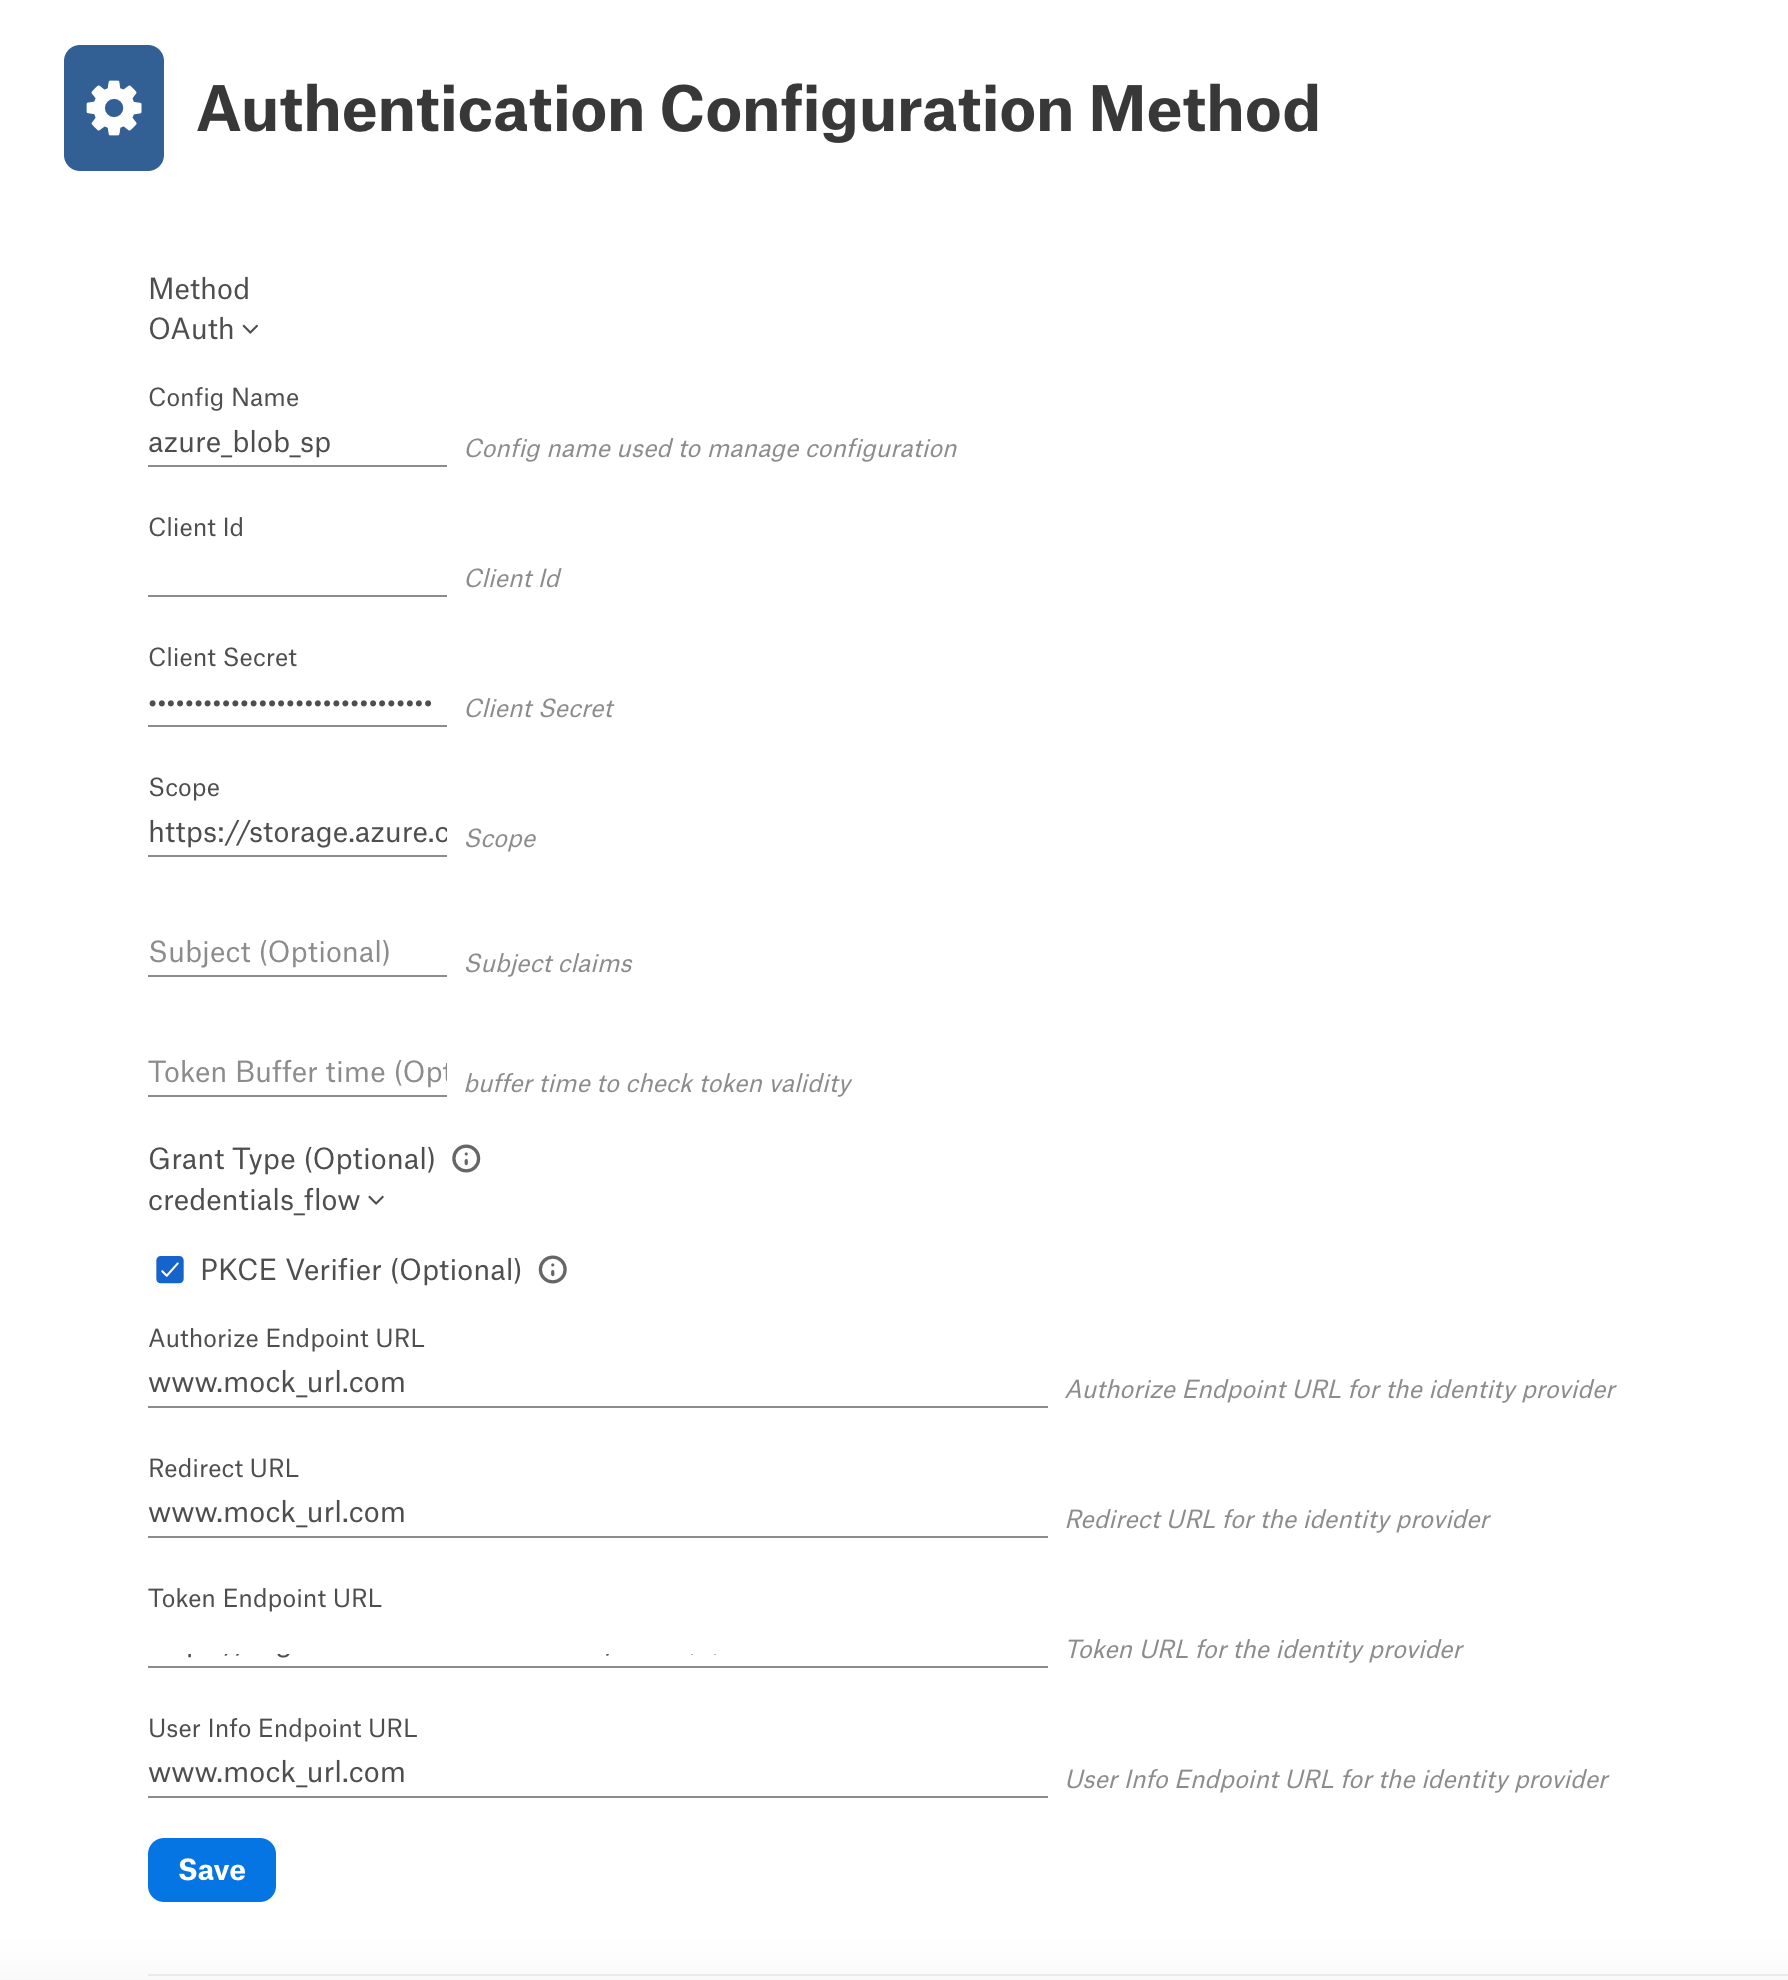
Click Save.
Open the settings page of your Azure Blob Storage source and configure authentication with the Azure service principal. Refer to Connector Settings.