Version 1.5.0 or Newer
Alation Cloud Service Applies to Alation Cloud Service instances of Alation
Customer Managed Applies to customer-managed instances of Alation
Important
This section is applicable for Alation version 2023.3.4 or higher and Oracle OCF connector version 1.5.0 or higher.
Query log ingestion (QLI) extracts and ingests the query history of a database and powers the lineage, popularity, top user, and join and filter information in the catalog. Explore examples of ingested queries on schema and table catalog pages.
The steps involved in configuring and running QLI are:
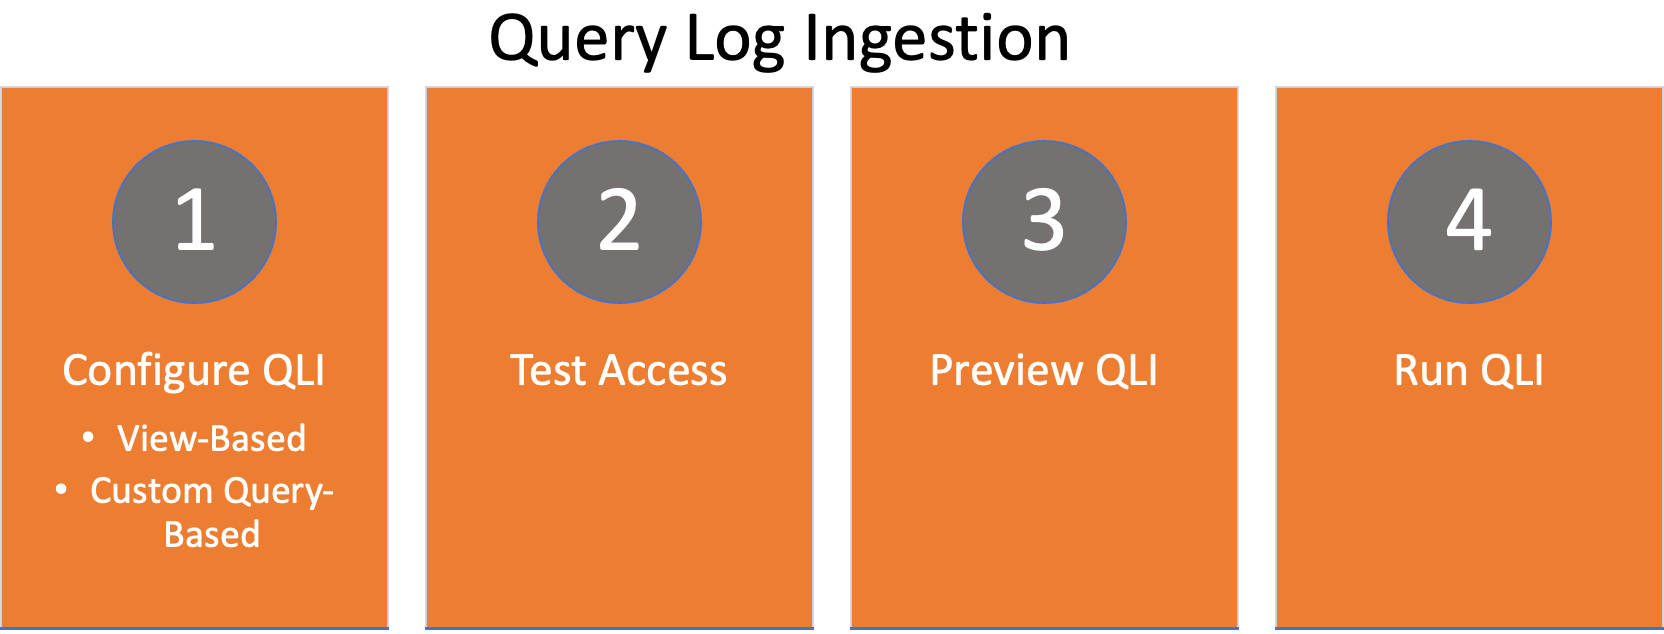
For Oracle data sources added using the Oracle OCF connector, Alation supports the following QLI configuration options:
View-Based
Custom Query-Based
Based on the option you choose, you are required to either create a QLI view in your database or write a query using the template expected by Alation.
Before you can configure QLI in Alation, perform the required configuration in your Oracle database.
If your Oracle data source is deployed on AWS RDS, refer to Configure QLI for Oracle on AWS RDS for information on configuring QLI.
For Oracle on AWS EC2 or on-premise, you can either use audit trail or Active Session History to configure QLI. You can also reuse the QLI view created using recommendations for Oracle data sources on the native (built-in) connector if you already have this view.
Note
The capability to reuse the native QLI view is available from connector version 1.4.0 and Alation version 2023.1.
Using Audit Trail
This configuration assumes your Oracle database has the database audit trail enabled. We recommend including these statements into auditing:
CREATE TABLE
CREATE VIEW
SELECT TABLE
UPDATE TABLE
INSERT TABLE
DELETE TABLE
ALTER TABLE
Configure View-Based QLI
To configure a view-based QLI, perform these steps:
Create a view
Provide the QLI view name in Alation
Create a View
To enable QLI in Alation, in a schema of your choice, create a view on top of the SYS.AUD$ table using the template below. Grant the service account you are using in Alation the SELECT permissions for this QLI view.
In the example below, we’re creating a view ALATION_QLI_VIEW. The <SCHEMA> placeholder represents a schema where the view is created.
CREATE OR REPLACE VIEW <SCHEMA>.ALATION_QLI_VIEW AS
SELECT
    q.userid AS userName,
    q.NTIMESTAMP# AS startTime,
    q.sqltext AS queryString,
    q.sessionid AS sessionId,
    q.NTIMESTAMP# AS sessionStartTime,
    0 AS milliseconds,
    'N' AS cancelled,
    (SELECT * FROM Global_name) AS defaultDatabases
FROM sys.aud$ q
WHERE q.sqltext IS NOT NULL
    AND q.OBJ$CREATOR = q.USERID
ORDER BY
    sessionId,
    startTime;
Provide the QLI View Name
Important
The Alation user interface displays standard configuration settings for credentials and connection information stored in the Alation database. If your organization has configured Azure KeyVault or AWS Secrets Manager to hold such information, the user interface will change to include the following buttons adjacent to the respective fields:

By default, you see the user interface for Standard. In the case of Vault, instead of the actual credential information, you must select the source and provide the corresponding key. For details, see Configure Secrets for OCF Connector Settings.
On the Settings page of your Oracle data source, go to the Query Log Ingestion.
Under the Provide the QLI view name section, enter the QLI view name in the View name field.
Ensure that the service account has the permissions to access the View.
Important
Use the format
schema_name.view_name.
Click Save.
Configure Custom Query-Based QLI
If you cannot create the view for QLI, for example, due to access restrictions, you can use a custom QLI query to extract query history into Alation. If you opt for query-based QLI, every time you run QLI, Alation will query the SYS.AUD$ table to get query history information. If you choose this option, ensure that the service account you are using in Alation is allowed to query the SYS.AUD$ table.
To configure custom query-based QLI, you must:
Use the QLI query template to create a query structure
Provide the custom query in Alation
Use the QLI Query Template
The template for the QLI query is given below. You can customize it by adding, removing, or changing the filter, but the columns and their aliases must remain as is since Alation expects this query structure.
Note
When using the QLI query template, do not substitute the
STARTTIMEandENDTIMEparameters in the WHERE filter. These are mandatory parameters. These parameters are not actual column names and should stay as is. They are expected by the connector and will be substituted with the start and end date of the QLI range selected in the user interface when QLI is run manually or on schedule.
SELECT q.userid AS userName,
    q.NTIMESTAMP# AS startTime,
    q.sqltext AS queryString,
    q.sessionid AS sessionId,
    q.NTIMESTAMP# AS sessionStartTime,
    0 AS milliseconds,
   'N' AS cancelled,
    (SELECT * FROM Global_name) AS defaultDatabases
FROM sys.aud$ q
WHERE q.sqltext IS NOT NULL
    AND q.OBJ$CREATOR = q.USERID
    AND q.NTIMESTAMP# BETWEEN TO_DATE(STARTTIME,'YY-MM-DD HH24:MI:SS')
    AND TO_DATE(ENDTIME,'YY-MM-DD HH24:MI:SS')
ORDER BY
    sessionId,
    startTime;
Provide the Custom Query
On the Oracle data source, go to the Query Log Ingestion tab of the Settings page.
Under the Provide the QLI view name section, go to Alternatively, use a custom SQL query.
In the Custom QLI Query field, provide a custom query to retrieve the query history.
Click Save.
Test the Access
Before you perform the QLI, you must validate that the service account has access to the QLI view.
To test the access and find out the approximate size of the query history metadata, perform these steps:
On the Settings page of your Oracle data source, go to the Query Log Ingestion tab.
Under the Test access section, click Test.
A dialog box appears displaying the access validation result.
The connector uses the ALL_OBJECTS view to verify the access for a given service account. The ALL_OBJECTS view lists all objects accessible to the user. In the case of SQL custom queries, The connector sets a query timeout of 2 minutes that prevents the access check from running for a longer period. After the timeout period, Alation considers the access check to be successful.
Preview Results
Before performing the QLI, perform these steps to preview the queries:
On the Settings page of your Oracle data source, click go to the Query Log Ingestion tab.
Under the Preview Results section, enter the date range for which you want to generate the preview of the query history.
Click Preview.
Click View Results to view the generated preview.
The Preview dialog appears displaying the total number of query statements per user under the User Queries tab and a detailed query statement under the Statements tab. Click Download to download the detailed query statement as a JSON file.
Note
You can use this option to run default QLI using just the date-range.
Run QLI
You can either run QLI manually on demand or configure it to run automatically on a schedule.
Run QLI Manually
To perform QLI manually on demand:
On the Settings page of your Oracle data source, go to the Query Log Ingestion tab.
Under the Run QLI section, turn off the Enable QLI Schedule toggle.
Specify the desired date range using the Date Range calendar widgets. You will need to specify the start date and the end date separately.
Click Import.
A query log ingestion job is initiated.
Schedule QLI
On the Settings page of your Oracle data source, go to the Query Log Ingestion tab.
Under the Run QLI section, turn on the Enable QLI Schedule toggle.
Specify values for the job recurrence and time. The values are set in your local time.
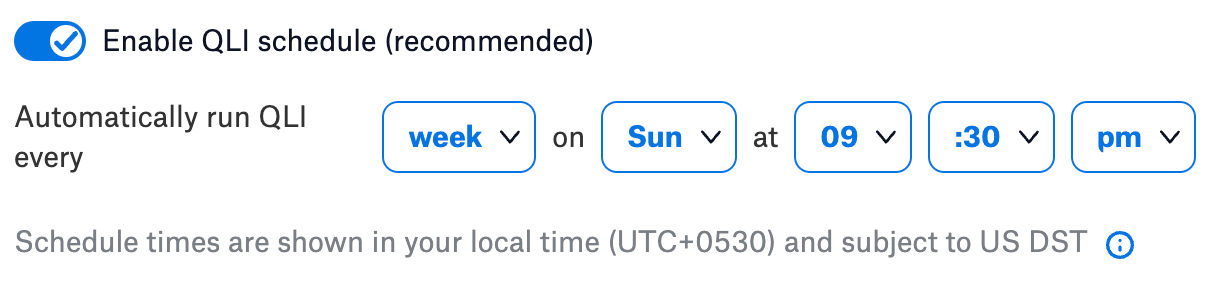
Note
Here are some of the recommended schedules for better performance:
Schedule QLI to run for every 12 hours at the 30th minute of the hour
Schedule QLI to run for every 2 days at 11:30 PM
Schedule QLI to run every week on the Sunday and Wednesday of the week
Schedule QLI to run for every 3 months on the 15th day of the month
Click Import.
The next QLI runs on the set schedule.
View the Job Status
To view the QLI job status after you run the QLI manually or after Alation triggers the QLI as per the schedule, go to Query Log Ingestion > QLI Job Status.
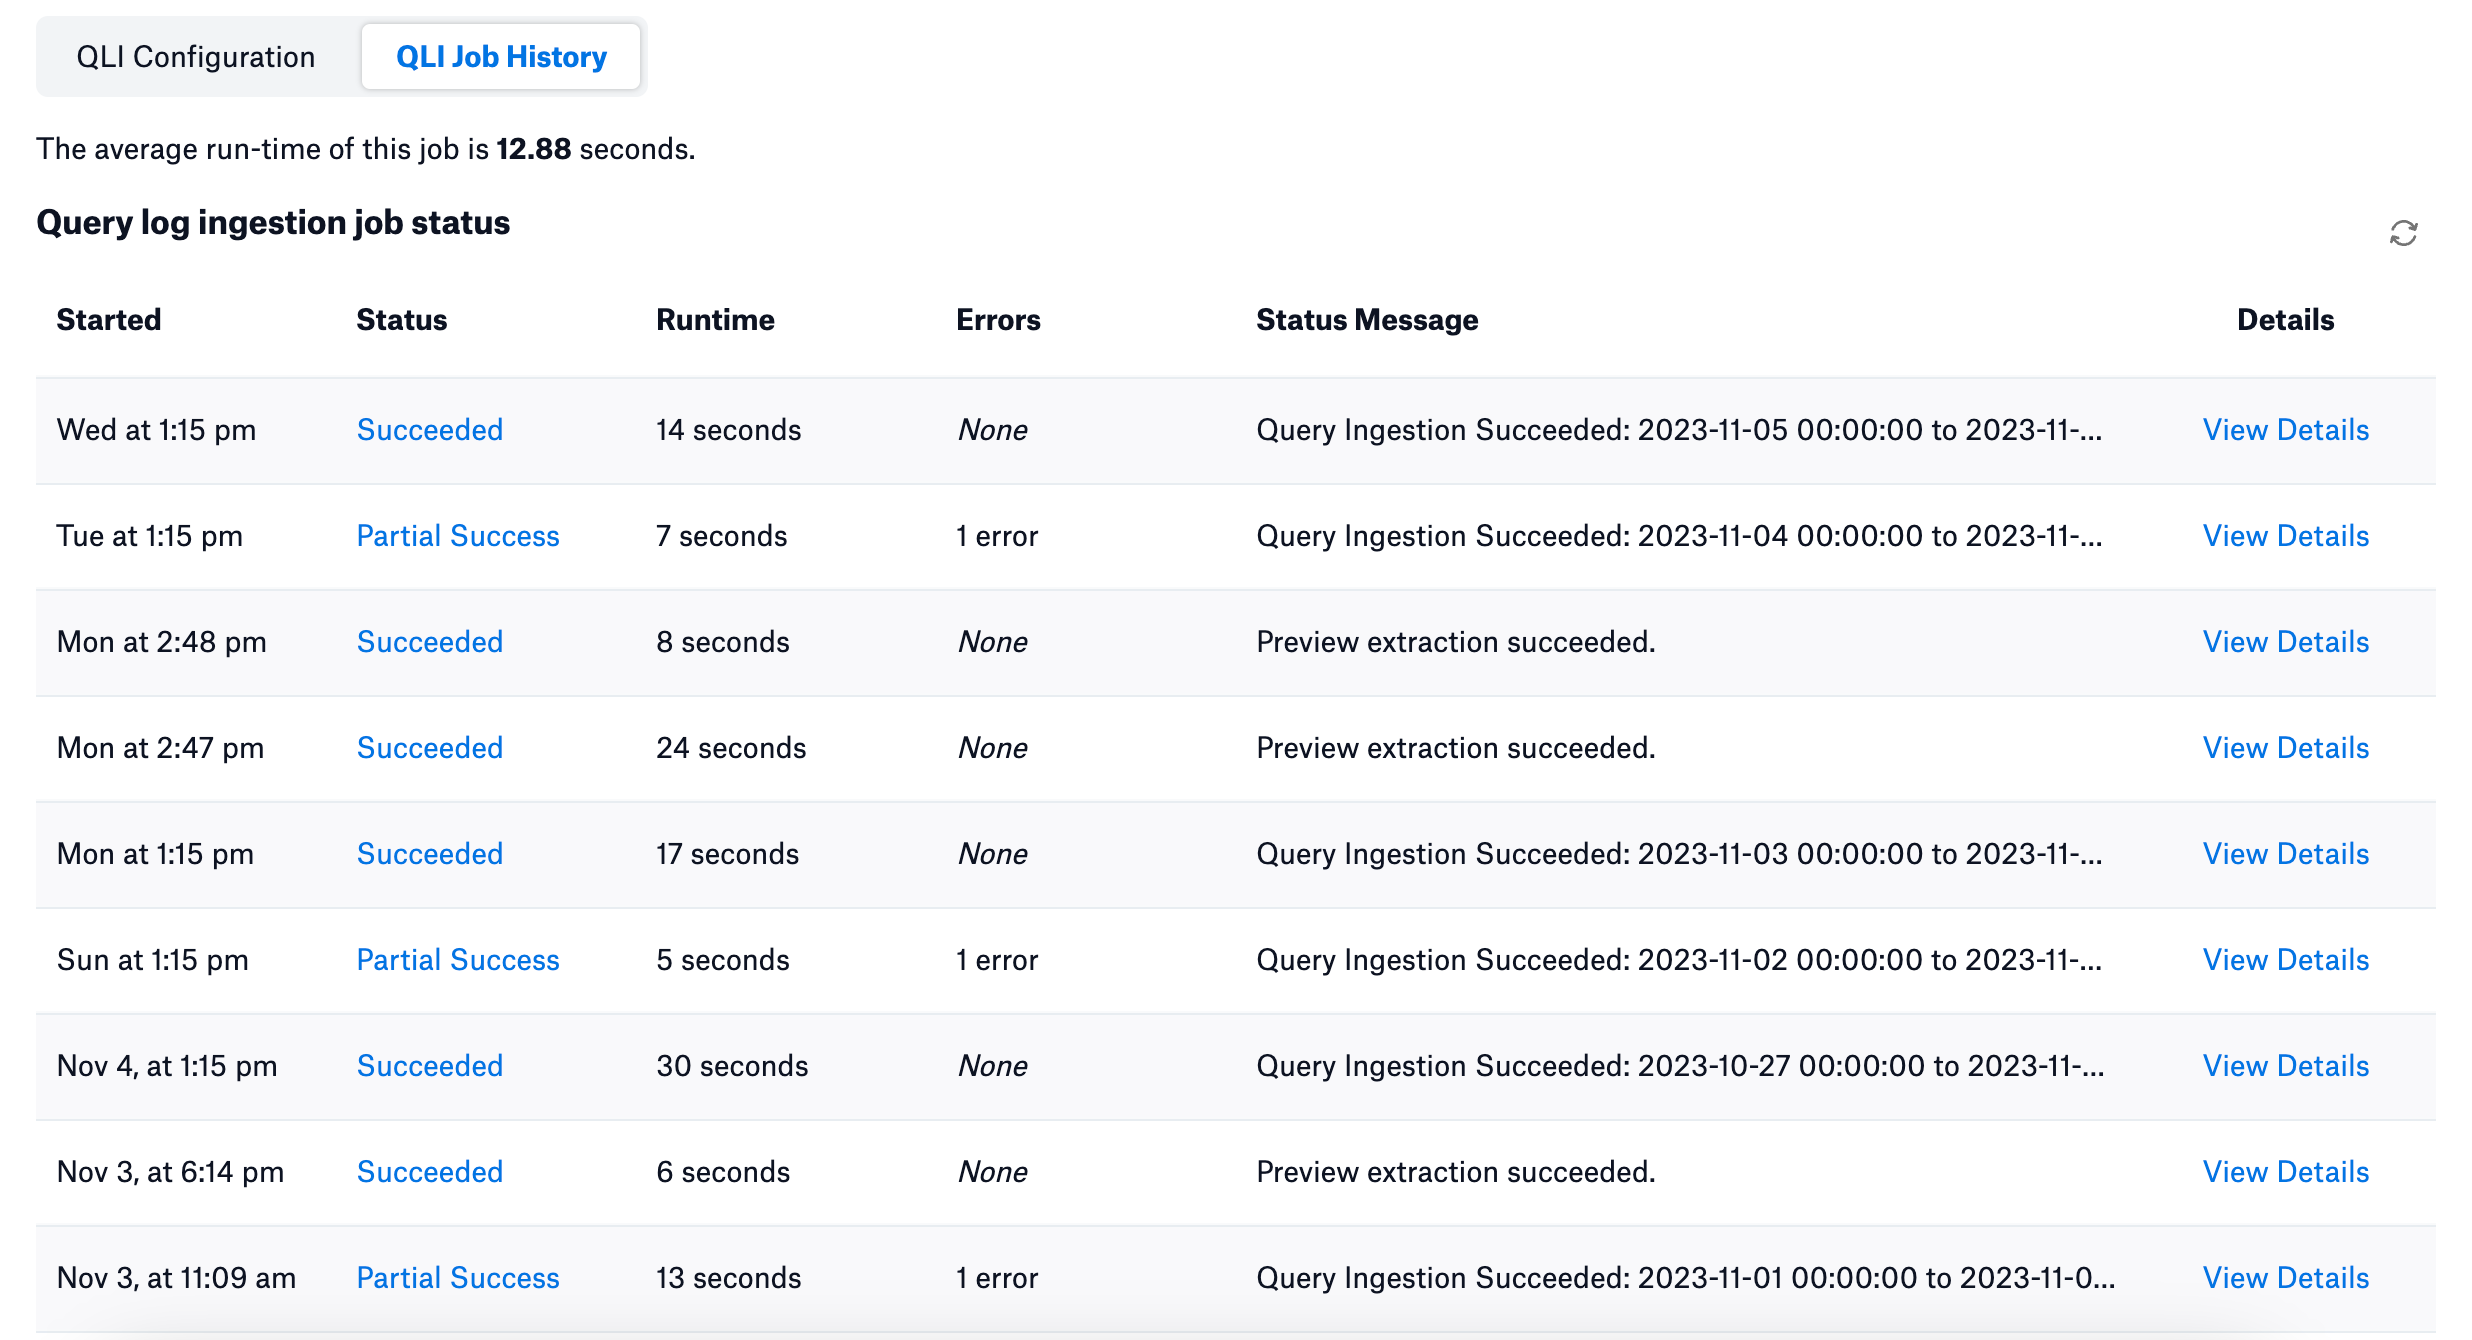
The Query log ingestion job status table logs the following status:
Succeeded - Indicates that the query ingestion was successful.
Partial Success - Indicates that the query ingestion was successful with warnings. If Alation fails to ingest some of the objects during the QLI, it skips them and proceeds with the query ingestion, resulting in partial success. Similarly, if all the queries are ingested by a single user, QLI results in a partial success.
Failed - Indicates that the query ingestion failed with errors.
Click the View Details link to view a detailed report of query ingestion. Click the View Details link to view a detailed report of metadata extraction. If there are errors, the Job errors table displays the error category, error message, and a hint (ways to resolve the issue). Follow the instructions under the Hints column to resolve the error.