HDFS OCF Connector: Install and Configure
Alation Cloud Service Applies to Alation Cloud Service instances of Alation
Customer Managed Applies to customer-managed instances of Alation
Authentication
For metadata extraction (MDE), the connector supports these authentication methods:
- Basic (username)
Basic authentication requires an HDFS user. To use basic authentication to connect from Alation, use your HDFS username. For metadata extraction, as an HDFS user, you must at least have read-only access to the folder that you want to access.
Kerberos
Krb5.conf file
Username
Password
SSL
A valid SSL certificate
Prerequisites
Ports
To connect to the HDFS server, you must open an outbound TCP port to the server. Perform these steps to find relevant ports to use using the Cloudera Manager interface. You can find the relevant ports using the Cloudera Manager interface for either Cloudera Distributed Hadoop (CDH) or Cloudera Data Platform (CDP). To identify the ports, perform these steps:
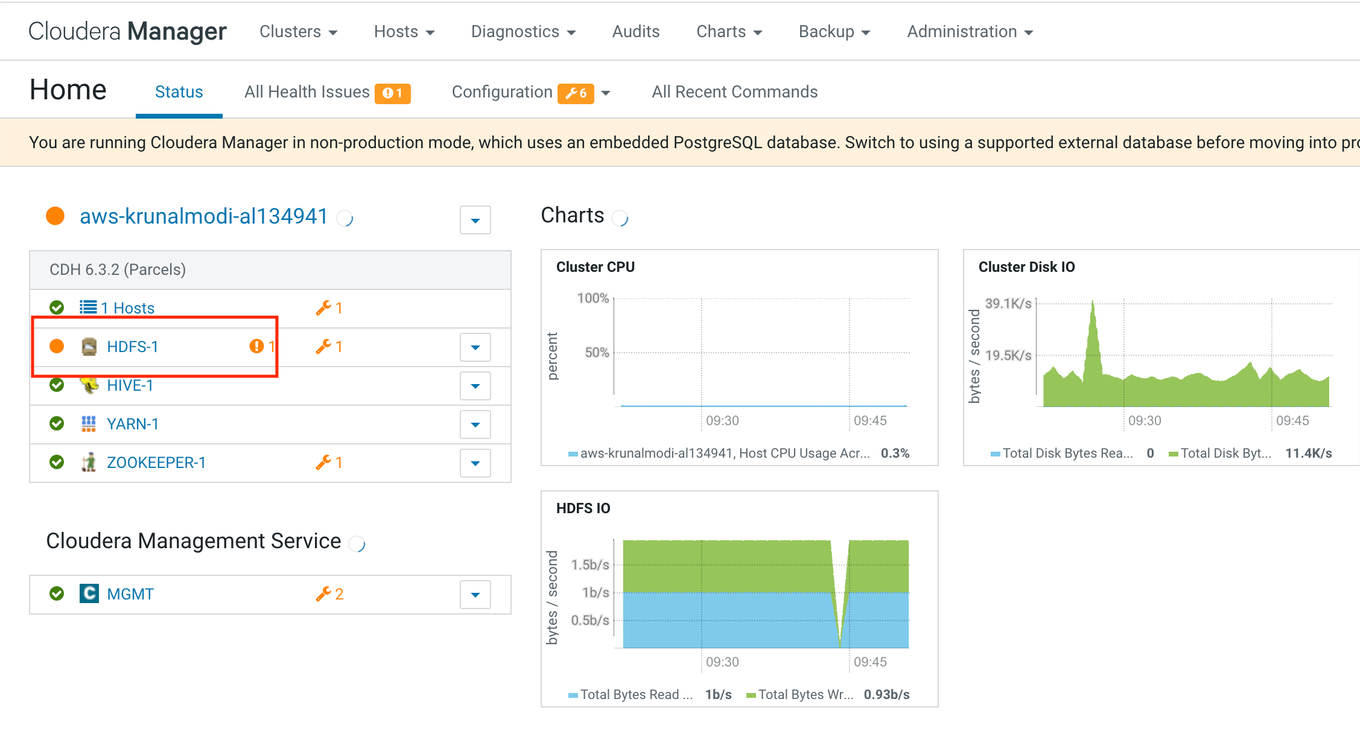
Log in to Cloudera Manager.
On the Clusters dashboard page, on the left, click on HDFS.
Click on the Configuration tab.
From the left navigation bar, select Category > Ports and Addresses.
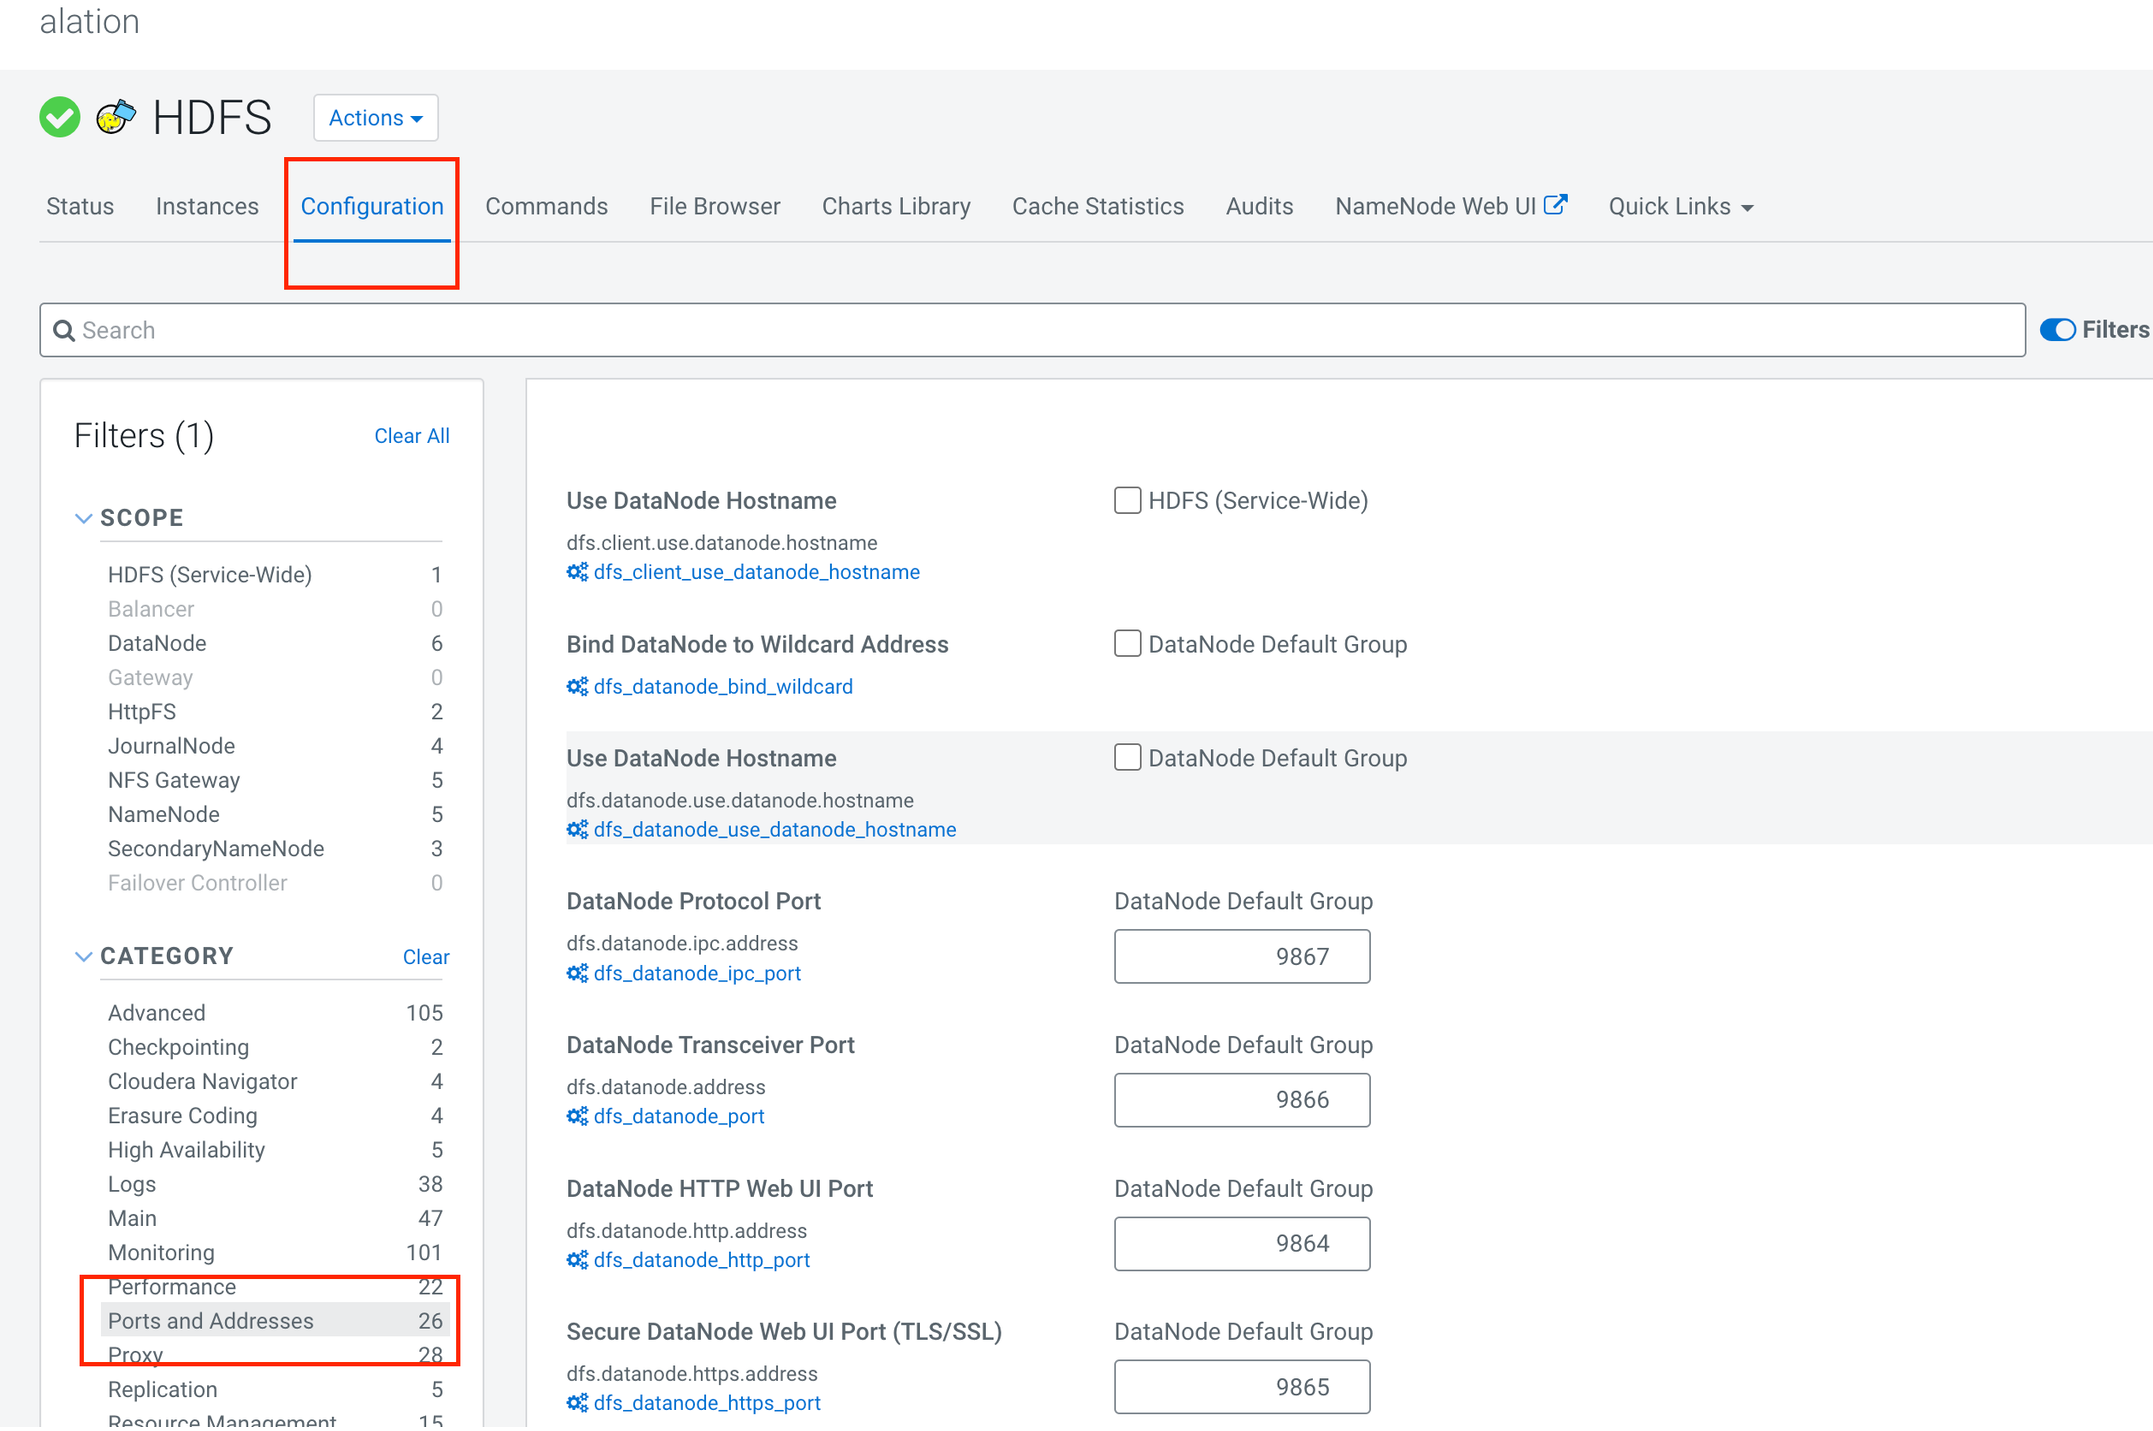
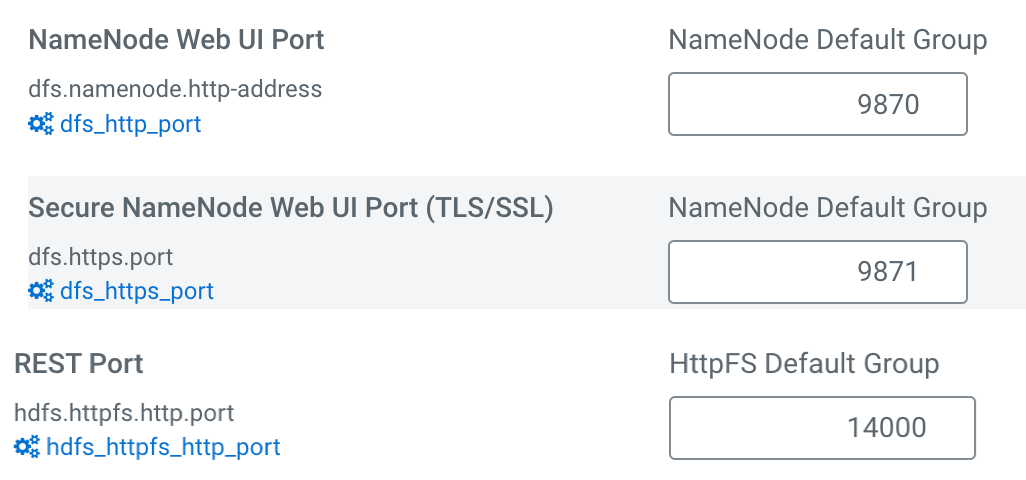
Based on your authentication type, use the port number displayed for the following configuration names:
Authentication Type
Port Configuration Name
Basic
NameNode Web UI Port
SSL
- Secure NameNode Web UI Port
(TLS/SSL)
HttpFS
Rest Port
Activate the HttpFS Connection
If using HttpFS, you must enable the HttpFS port to connect to the HDFS server and configure SSL/TLS for HttpFS.
Perform these steps to enable the HttpFS port using CDP or CDH:
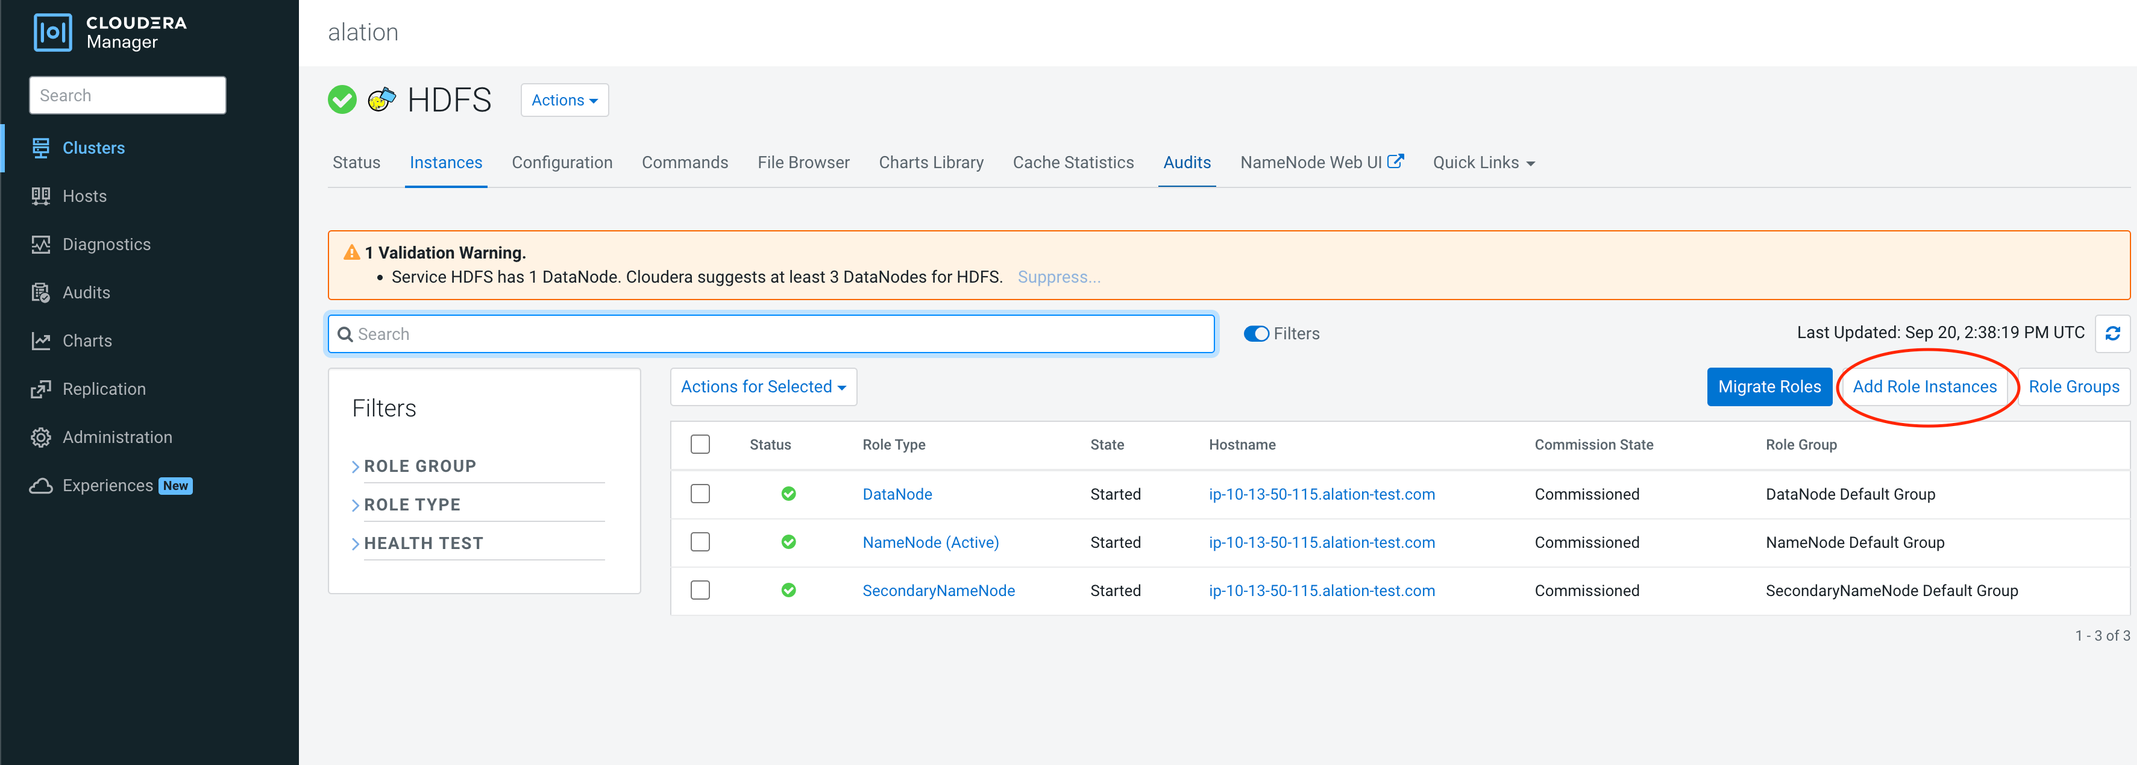
Log in to Cloudera Manager.
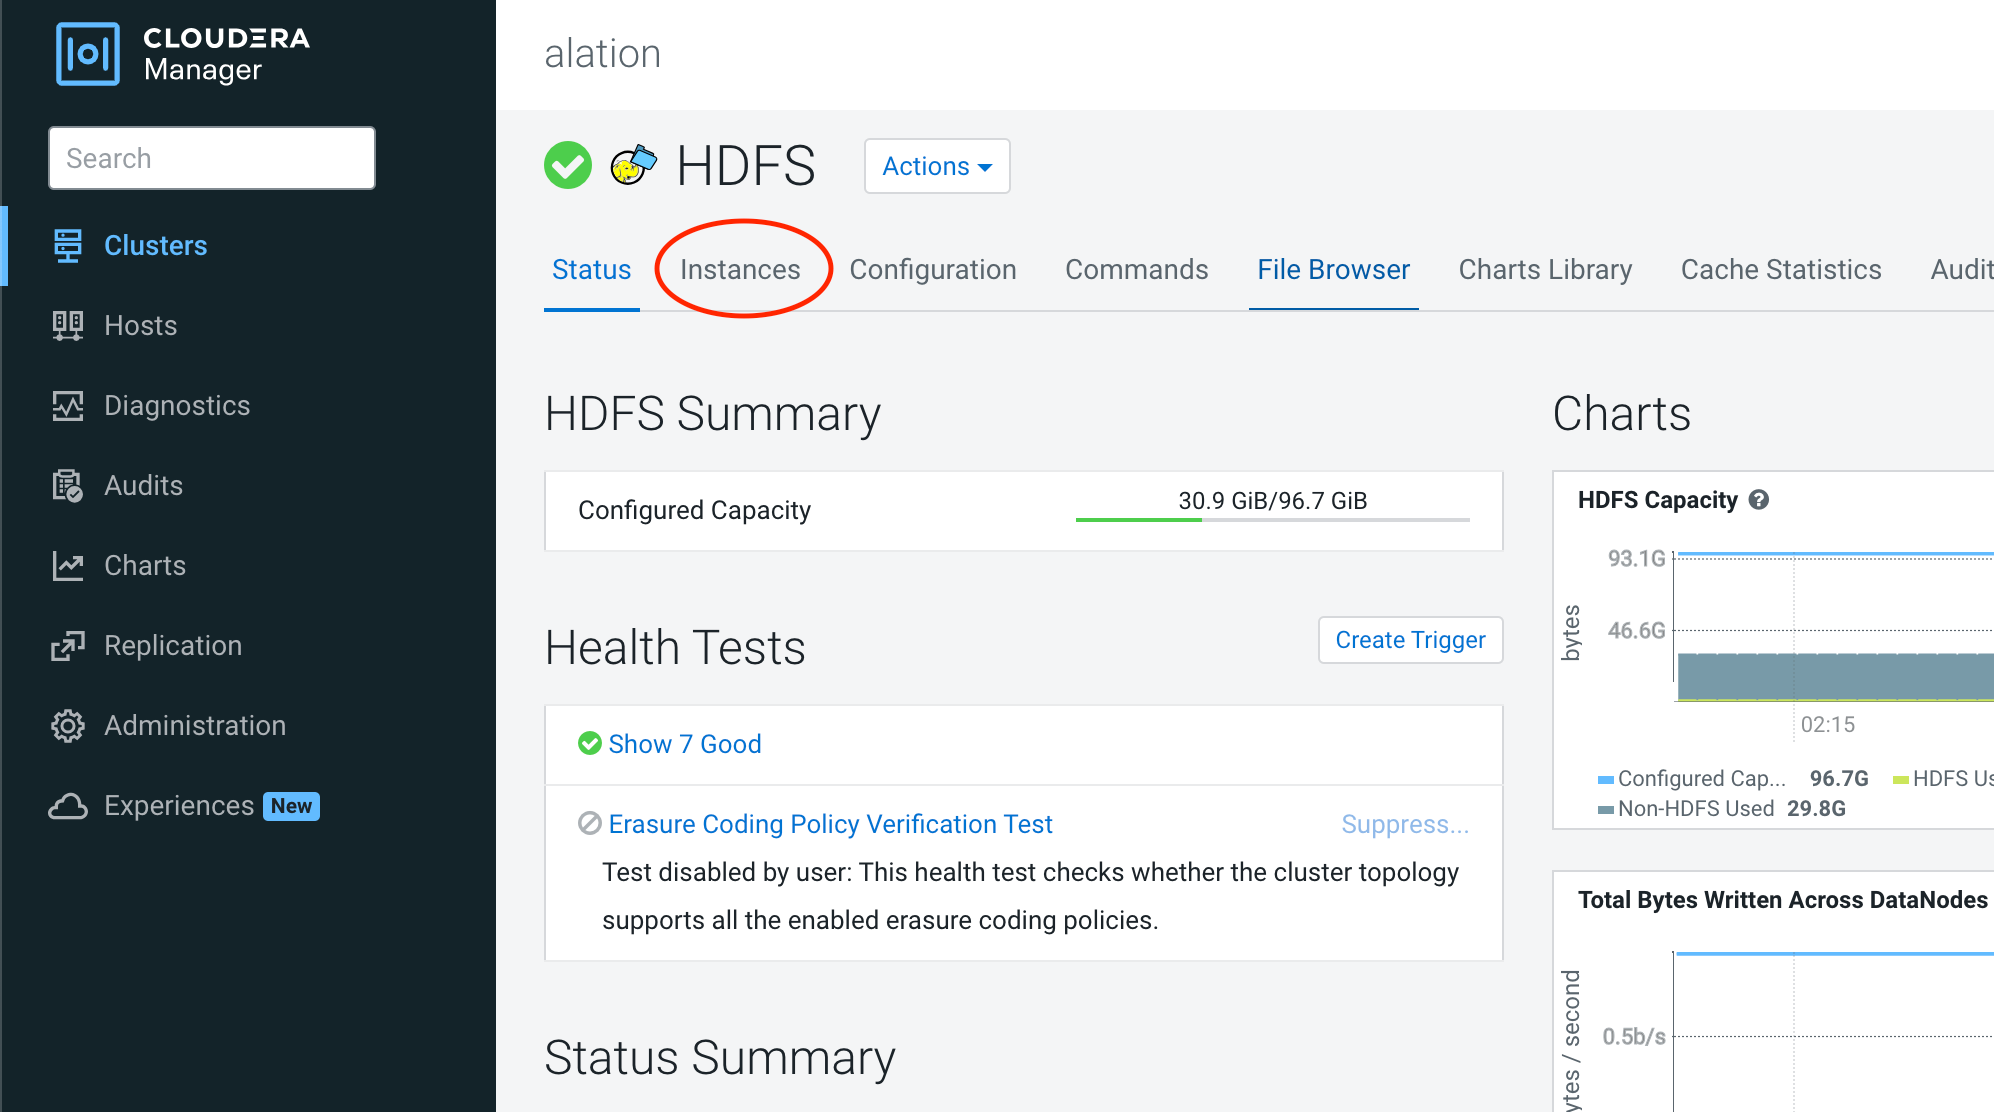
On the Clusters dashboard page, on the left, click on HDFS.
The dashboard for HDFS appears.
Click on the Instances tab.
Click Add Role Instances.
Click on the HttpFS textbox.
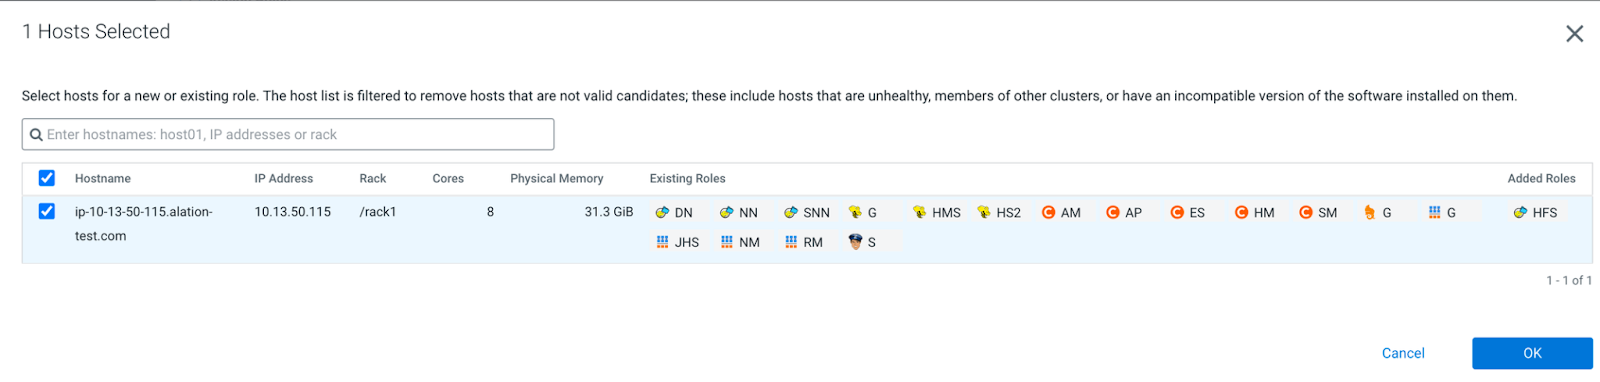
The Select Hosts dialog box is displayed.
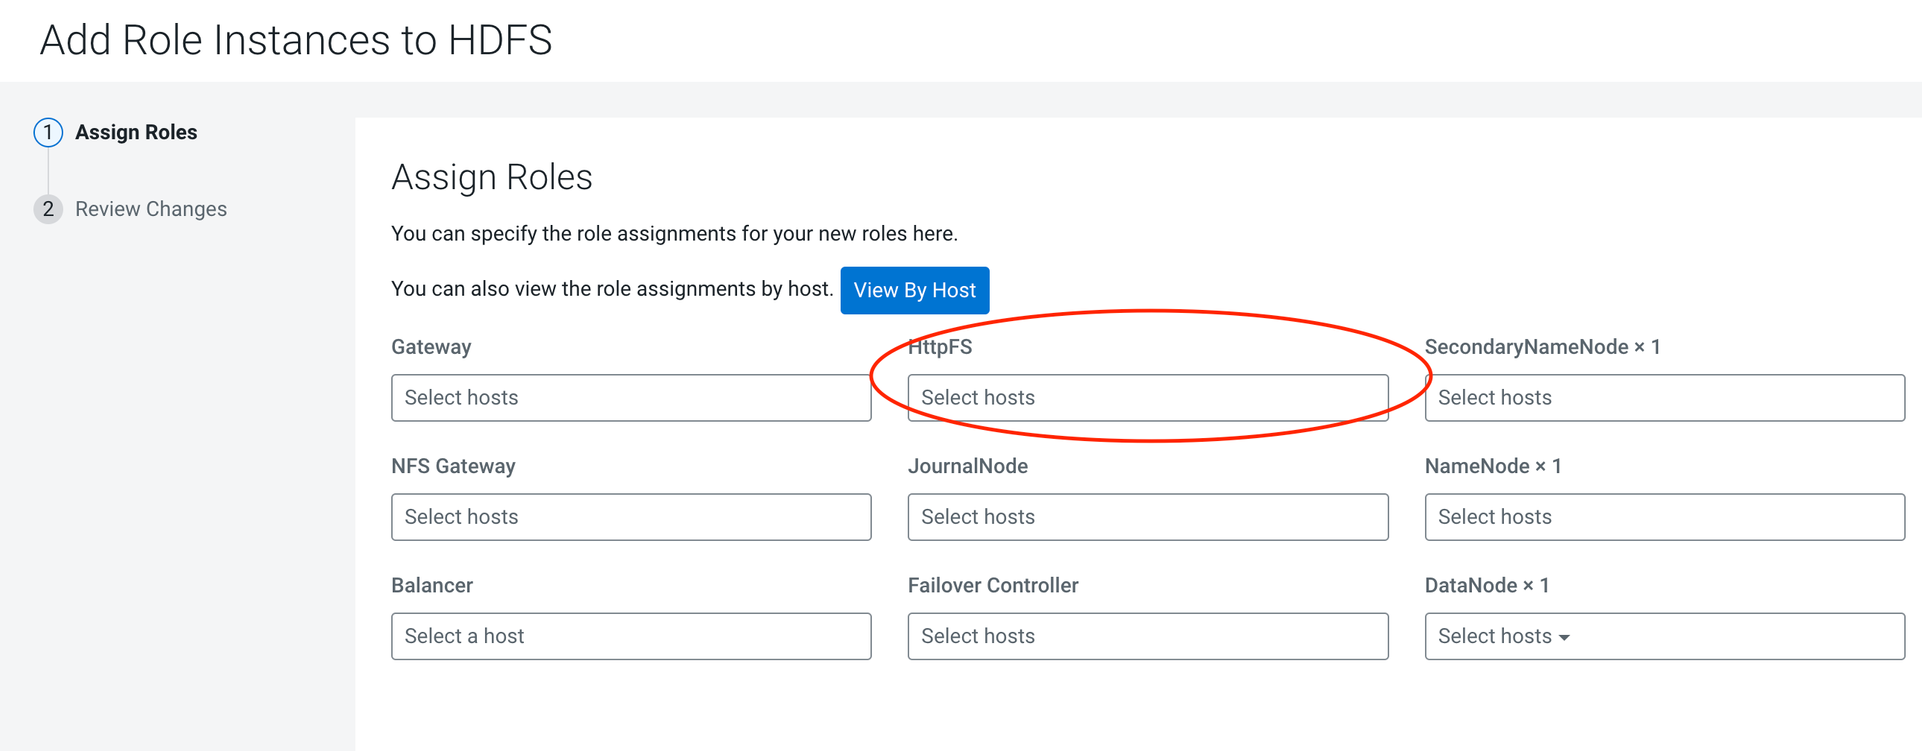
Select the host on which to run the role and click OK.
Click Continue.
Select the HttpFS role.
From Actions for Selected dropdown list, click Start.
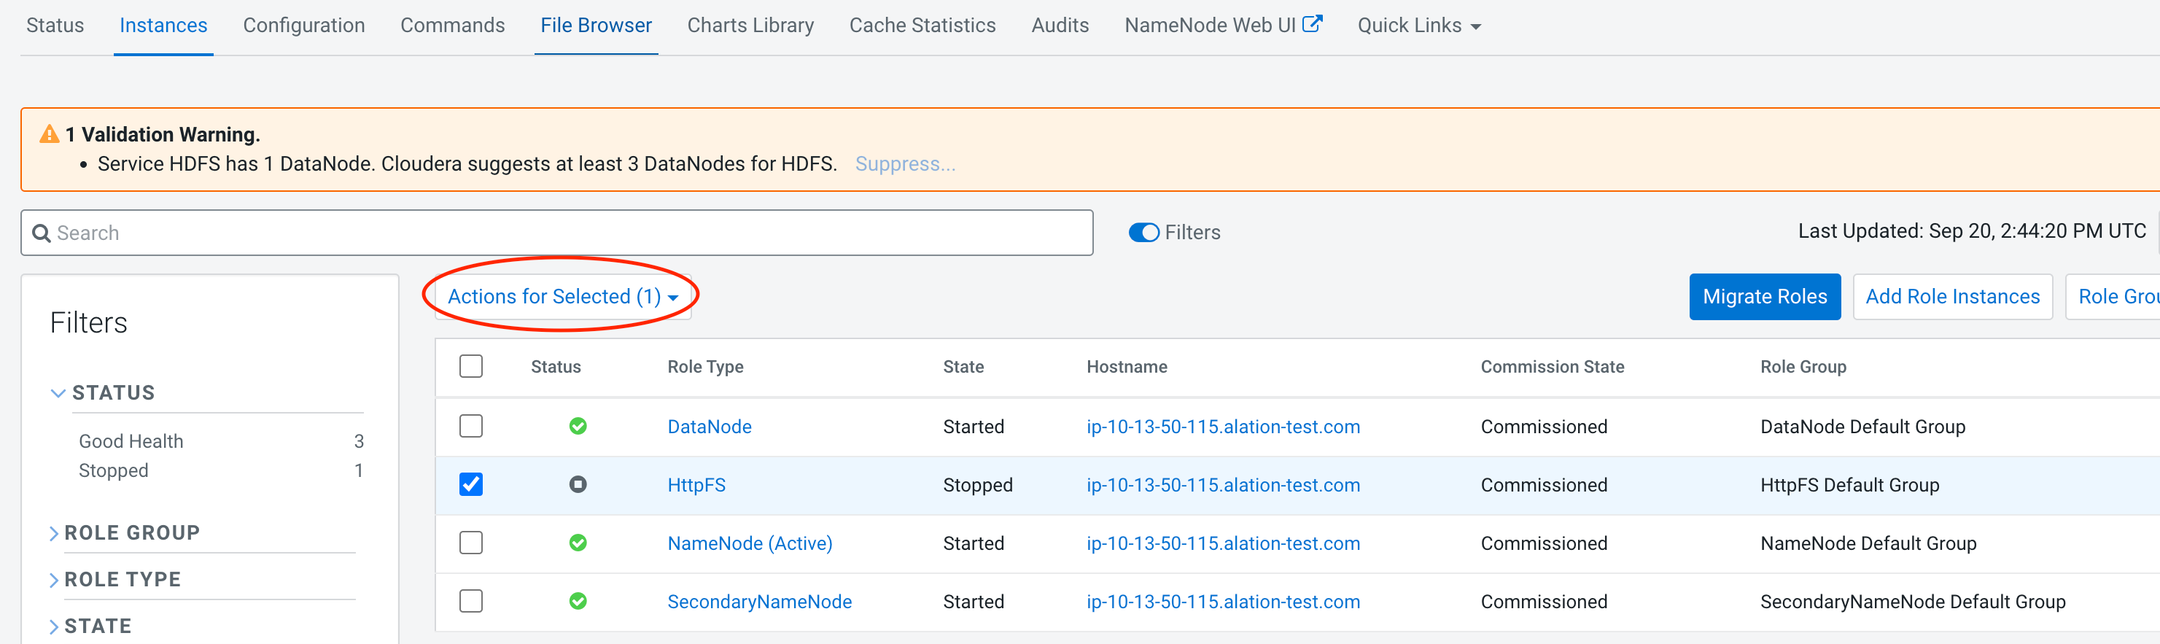
The HttpFS server is started.
Configuration in Alation
Install the Connector
Alation On-Premise
Important
Installation of OCF connectors requires Alation Connector Manager to be installed as a prerequisite.
To install an OCF connector:
If this has not been done on your instance, install the Alation Connector Manager: Install Alation Connector Manager.
Ensure that the OCF connector Zip file is available on your local machine.
Install the connector on the Connectors Dashboard page using the steps in Manage Connectors.
Alation Cloud Service
Note
On Alation Cloud Service instances, Alation Connector Manager is available by default.
Depending on your network configuration, you may need to use Alation Agent to connect to databases.
Connection via Alation Agent
Ensure that Alation Agent is enabled on your Alation instance. If necessary, create a Support ticket with Alation for an Alation representative to enable the Alation Agent feature on your instance and to receive the Alation Agent installer.
Connection Without Agent
To install an OCF connector:
Ensure that the OCF connector Zip file is available on your local machine.
Install the connector on the Connectors Dashboard page using the steps in Manage Connectors.
Create and Configure an HDFS File System Source
In Alation, add a new file system source:
Log in to the Alation instance as a Server Admin.
Go to Apps > Sources > Add > File System and add a new HDFS OCF source.
From the File System Type dropdown, select HDFS OCF Connector.
Provide a title for the file system and click Add File System.
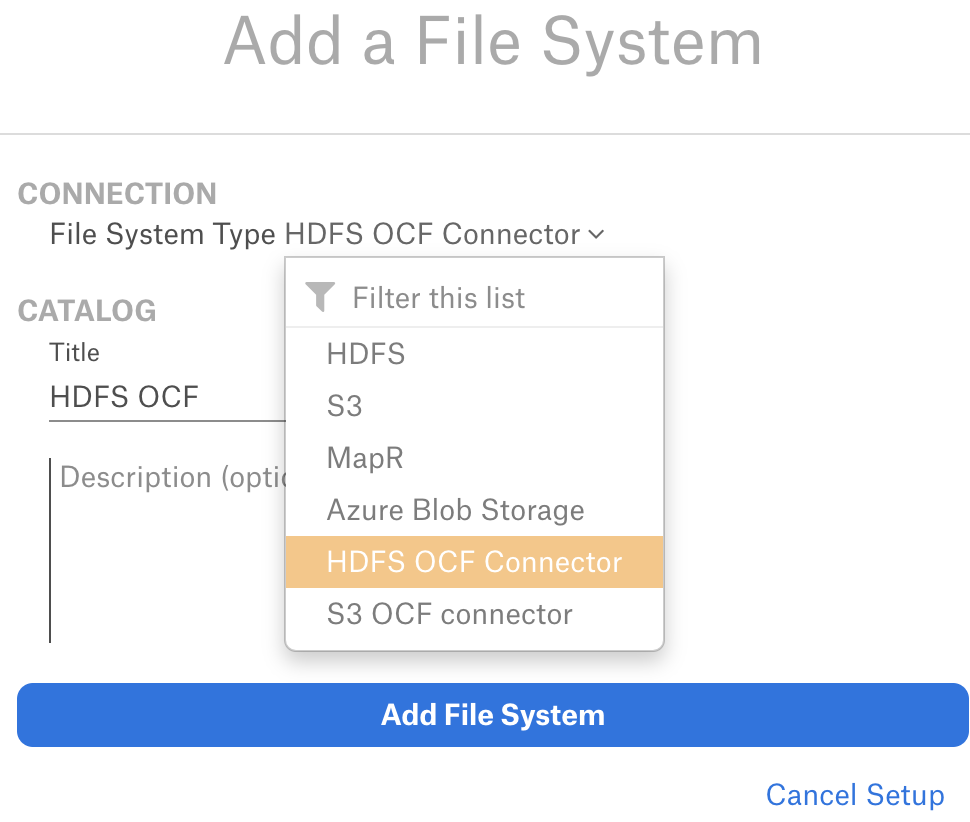
The Settings page of your new HDFS OCF file system is displayed.
Access
On the Access tab, set the file system visibility as follows:
Public File System - The file system will be visible to all users of the catalog.
Private File System - The file system will be visible to the users allowed access to the file system by file system Admins.
Add new File System Admin users in the File System Admins section.
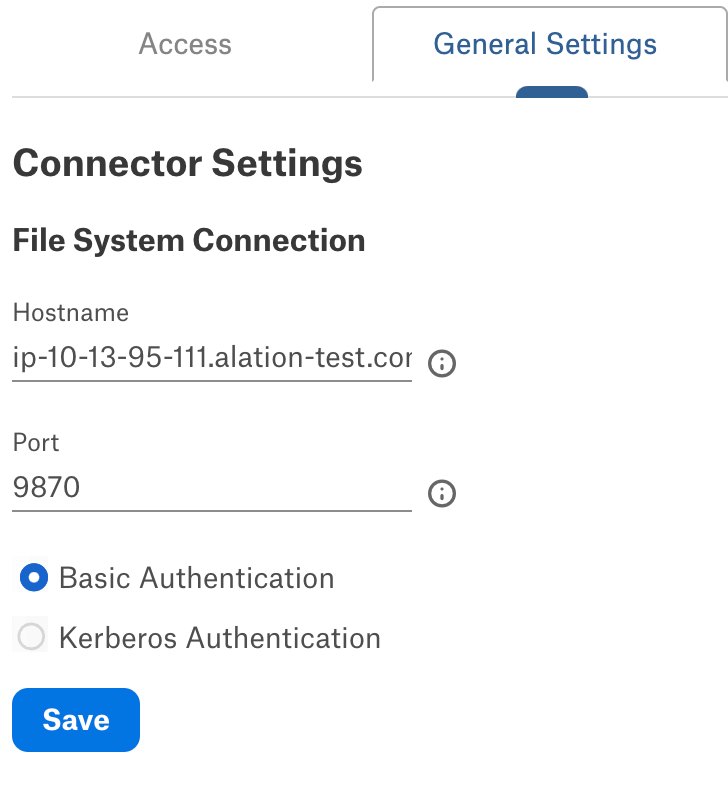
General Settings
Connector Settings
Populate the Connector Settings information and click Save to save each section you fill out.
File System Connections
Parameter
Description
Hostname
Specify the hostname or the IP address of the HDFS web server.
Port
Specify the HDFS web server port number.
Basic Authentication
Select Basic Authentication if your user role has the Basic authentication access.
Kerberos Authentication
Select Kerberos Authentication if your user role has the Kerberos authentication access.
Basic Authentication
Note
This section is applicable only if you have selected Basic Authentication.
Parameter
Description
HDFSUser
Username. The HDFS user must have at least read-only access to the destination folder.
Kerberos Authentication
Note
This section is applicable only if you have selected Kerberos Authentication.
Parameter
Description
krb5.conf file
Upload the krb5.conf file containing the Kerberos configuration information.
Kerberos Username
Provide your Kerberos username.
Kerberos Password
Provide your Kerberos password.
SSL Configuration
Parameter
Description
Enable SSL
Select the Enable SSL checkbox to connect to an https:// server.
SSL certificate
Upload the SSL certificate.
Logging Configuration
Select a logging level for the connector logs and save the values by clicking Save in this section. The available log levels are based on the Log4j framework.
You can view the connector logs in Admin Settings > Server Admin > Manage Connectors > HDFS OCF Connector.
The default logging level is INFO.
Test Connection
After specifying the connector settings, under Test Connection, click Test to validate network connectivity.
Delete File System
You can delete your data source from the General Settings tab. Under Delete File System, click Delete to delete the file system.
Metadata Extraction
The connector catalogs HDFS objects such as directories (folders) and their contents such as files and folders. It enables end users to discover, search, browse, and curate HDFS objects as files and folders from the Alation user interface.
You can perform a full extraction or selective extraction for an OCF file system source on the Metadata Extraction tab.
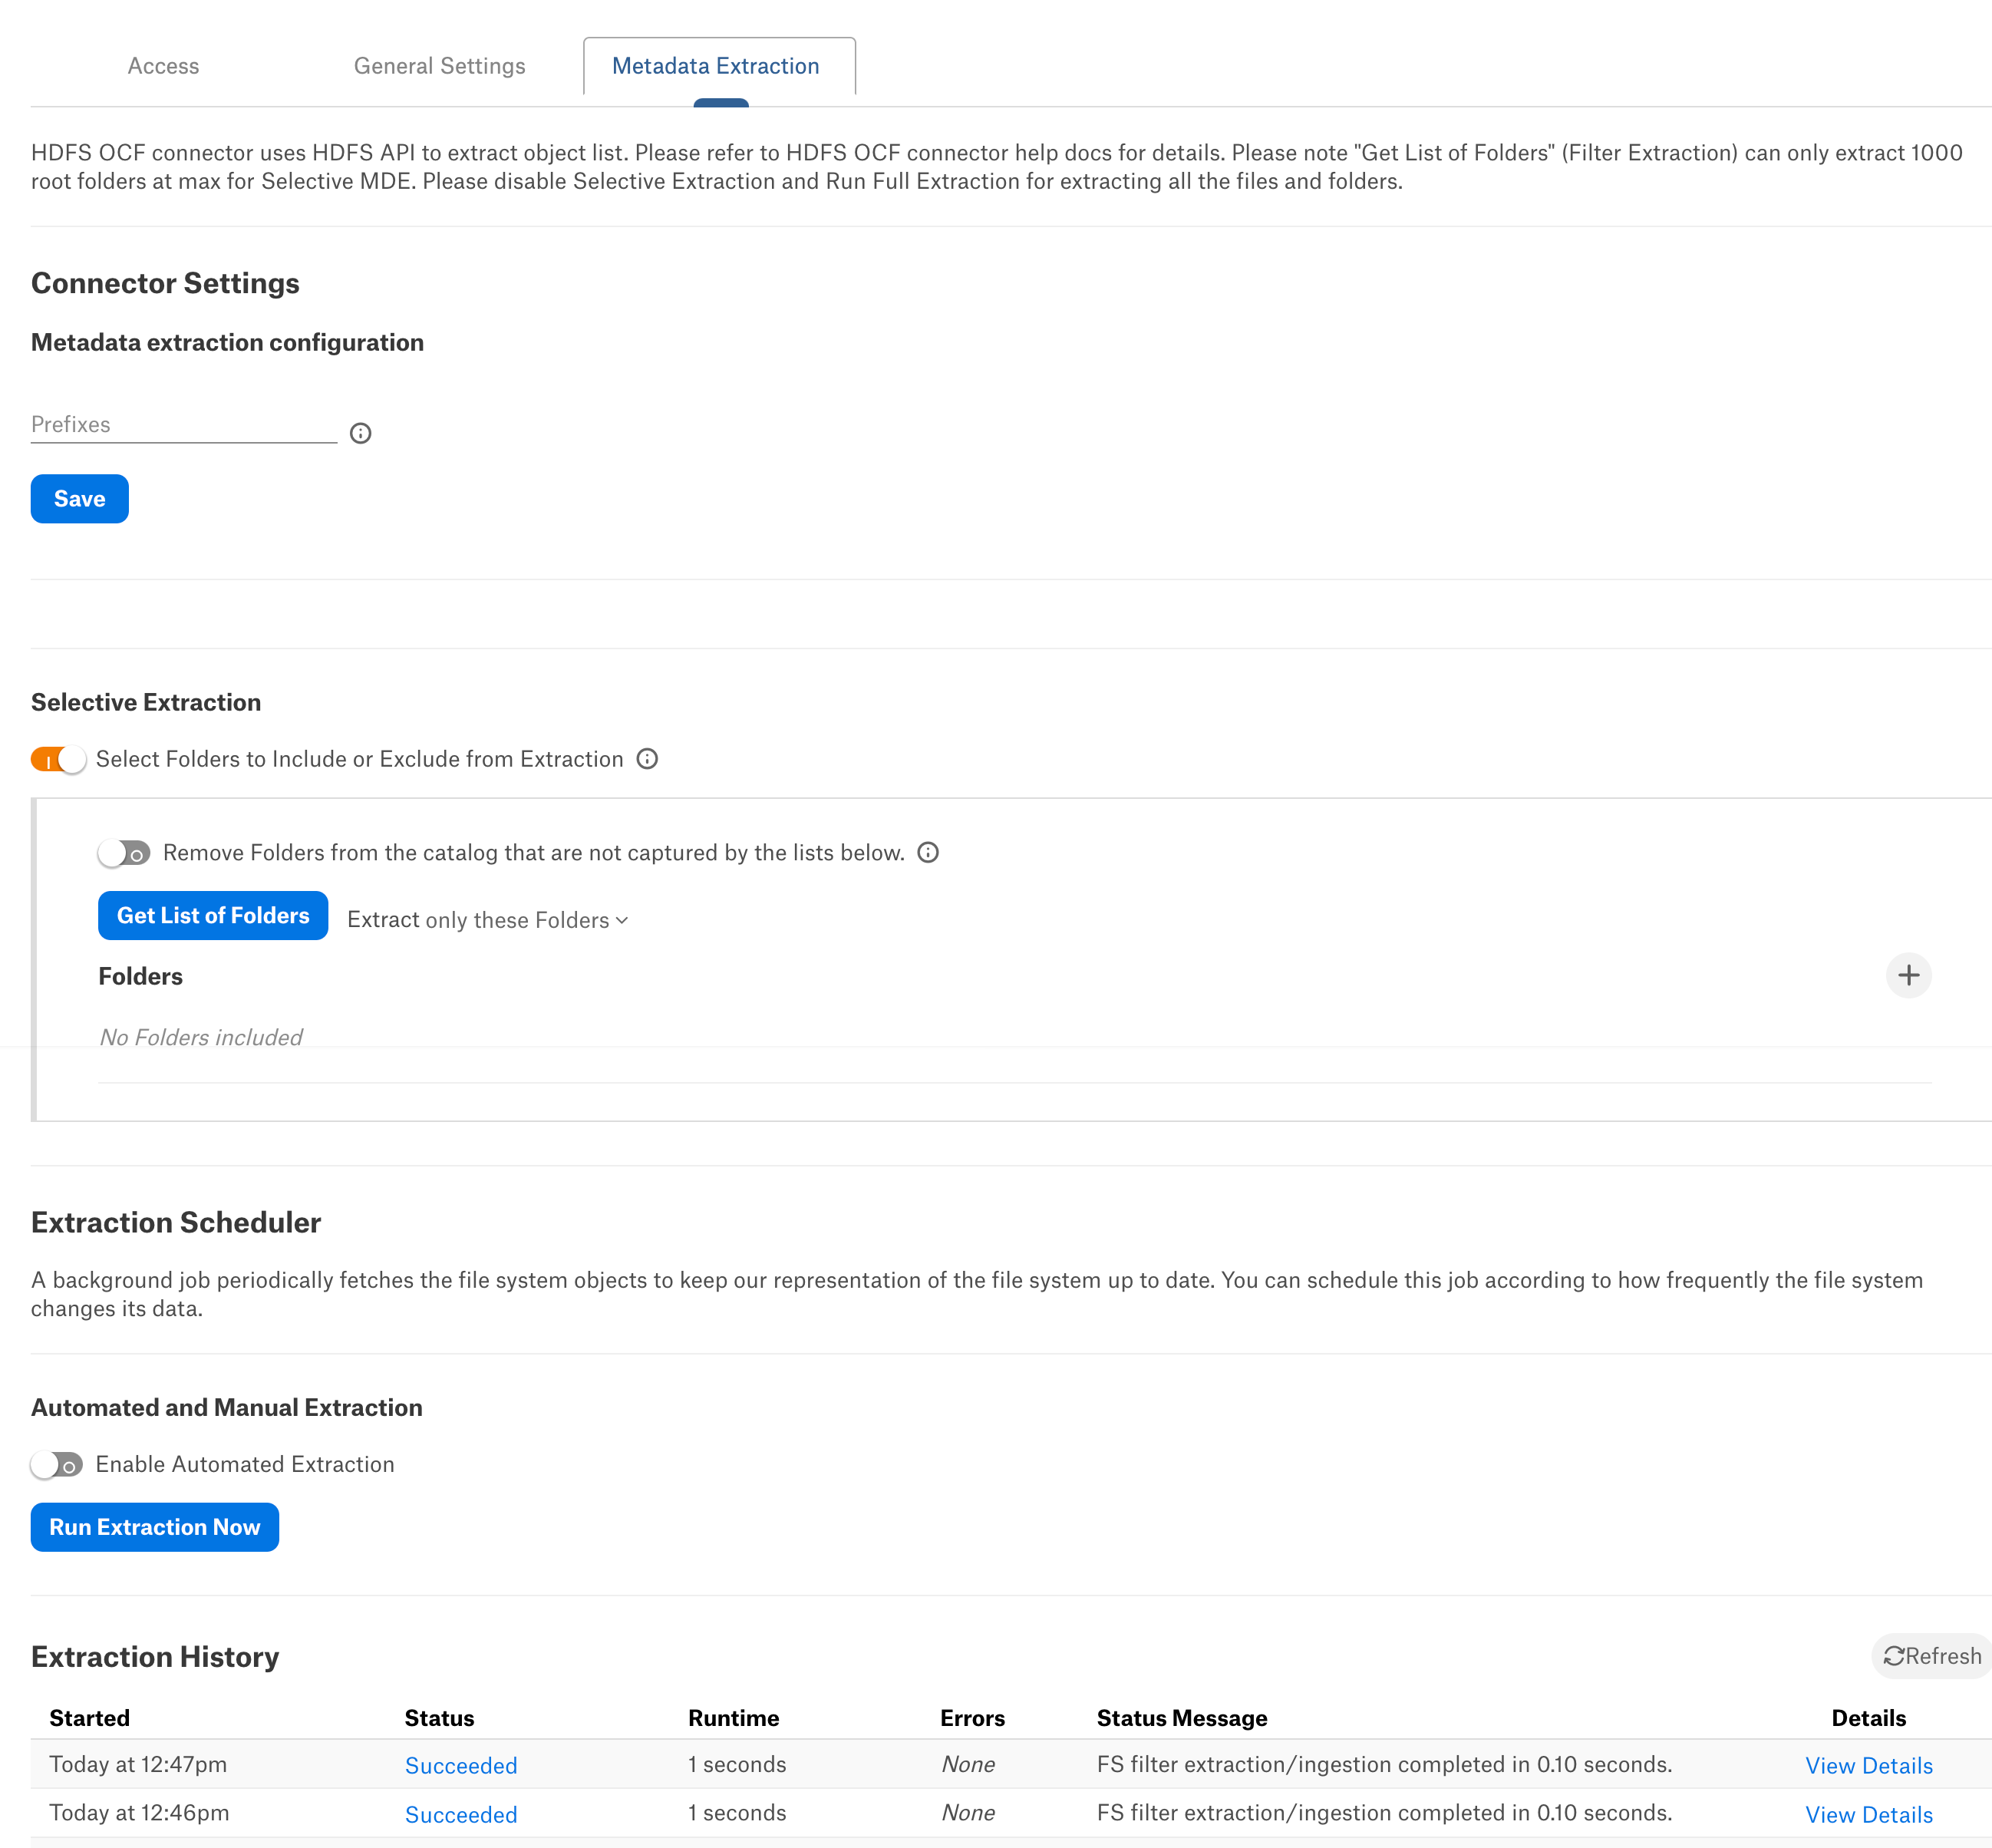
Prefixes
Use prefixes to limit the folder extraction.
In the Prefixes field of the Metadata Extraction tab, you can provide a list of comma-separated strings for metadata extraction. When this list is populated, only the files that match one of the prefixes are extracted.
Prefixes must start with a delimiter. Add the directory name as the first part of the path, for example, /directory/folder_to_be_extracted.
Use Cases
You can provide a full folder or file path to extract specific files or folders and their content.
For example, when you specify the following prefix: rootFolder1/subFodler11/subFolder2/, rootFolder1/subFolder12/, rootFolder2/file1.csv, the connector extracts all the files and folders within “rootFolder1/subFodler11/subFolder2/”, “rootFolder1/subFolder12/” and file “rootFolder2/file1.csv”.
You can provide partial prefixes to extract all the files and folders matching the prefix.
For example, when you specify the following prefix: rootFolder1/subFodler11/su, rootFolder2/test, the connector extracts all the files and folders within “rootFolder1/subFodler11/” with the prefix “su” and all the files and folders within “rootFolder2/” with the prefix “test”.
Metadata Extraction Using Prefixes
Perform these steps to extract only select folders from the root folders:
On the Metadata Extraction tab, enter the list of comma-separated folder paths in the Prefixes field under the Metadata extraction configuration section.
Click Run Extraction Now to extract the metadata.
The status of the extraction action is logged in the Extraction History table at the bottom of the page.
At the top of the page, locate the page breadcrumbs and click the arrow icon. The data source catalog page appears. You can view the extracted metadata for the specified folders.
Note
Alation does not support the prefixes functionality for prefixes with a comma (“,”). If a prefix includes a comma (“,”), the Alation user interface treats it as two separate prefixes.
Selective Extraction
On the Metadata Extraction tab, you can select the folders to include or exclude from extraction. Enable the Selective Extraction toggle if you want only a subset of folders to be extracted.
Perform these steps to extract only select folders:
Click Get List of Folders.
This action fetches the list of all folders at the root level. You can choose the folders that you want to extract. The status of the action is displayed in the Extraction History table at the bottom of the page.
Note
The Get List of Folders displays a maximum of 1,000 folders. Folders with no names or empty spaces as their name are not displayed.
After Alation extracts the list of folders, select one of the following options from the Extract list next to the Get List of Folders button.
Filter Option
Description
all Folders except
Extracts metadata from all folders except from the selected folders.
only these Folders
Extracts metadata only from the selected folders.
Click the Add+ icon on the right to open the list of extracted folders and select the folders you want.
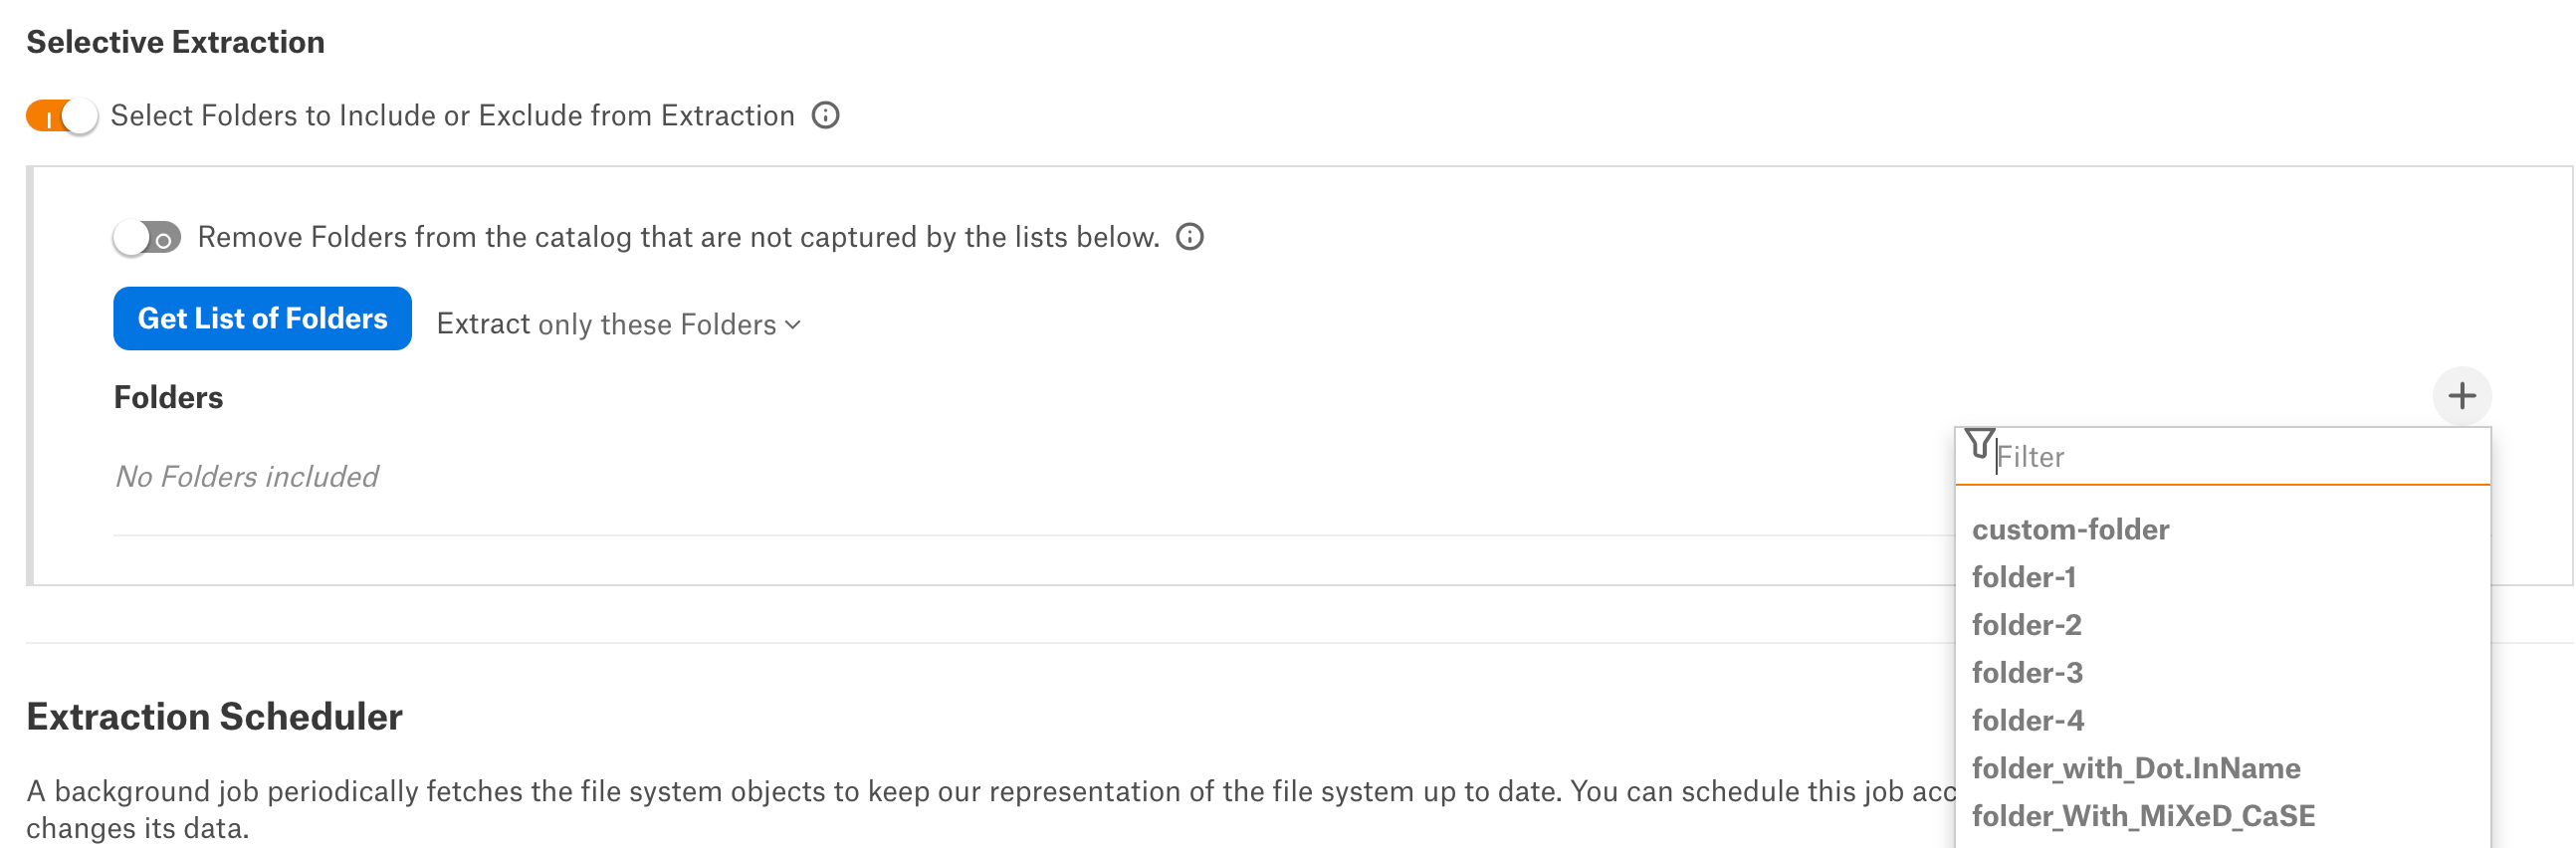
The selected folders appear in the Folders list.
The prefixes you provide in the Prefixes field combine with the list of folders you choose for Selective Extraction. Alation extracts only those folders and files from the root folders that you specified in the Prefixes field. Therefore, if you are using the Prefixes field to filter the folders, ensure that you add the root folder from the list of extracted folders to the Folders list of Selective Extraction.
Important
In case the root folder names are different, then the metadata extraction of folders specified in the Prefixes field takes precedence over folders specified in the Folders list of Selective Extraction. Then, folders specified in the Folders list of Selective Extraction will not be extracted.
Click Run Extraction Now to extract the metadata. The status of the extraction action is logged in the Extraction History table at the bottom of the page.
Extraction Scheduler
Automated Extraction
If you wish to automatically update the metadata extracted into the catalog, under Automated and Manual Extraction, turn on the Enable Automated Extraction switch and select the day and time when metadata must be extracted. The metadata extraction will be automatically scheduled to run on the selected schedule.

Full Extraction
Perform these steps to run full extraction:
Disable the Selective Extraction toggle.
Click Run Extraction Now to extract metadata.
Note
If you provide values in the Prefixes field, then the extraction is similar to Metadata Extraction Using Prefixes. You can monitor the status and progress of the extraction in the Extraction History table at the bottom of the page.
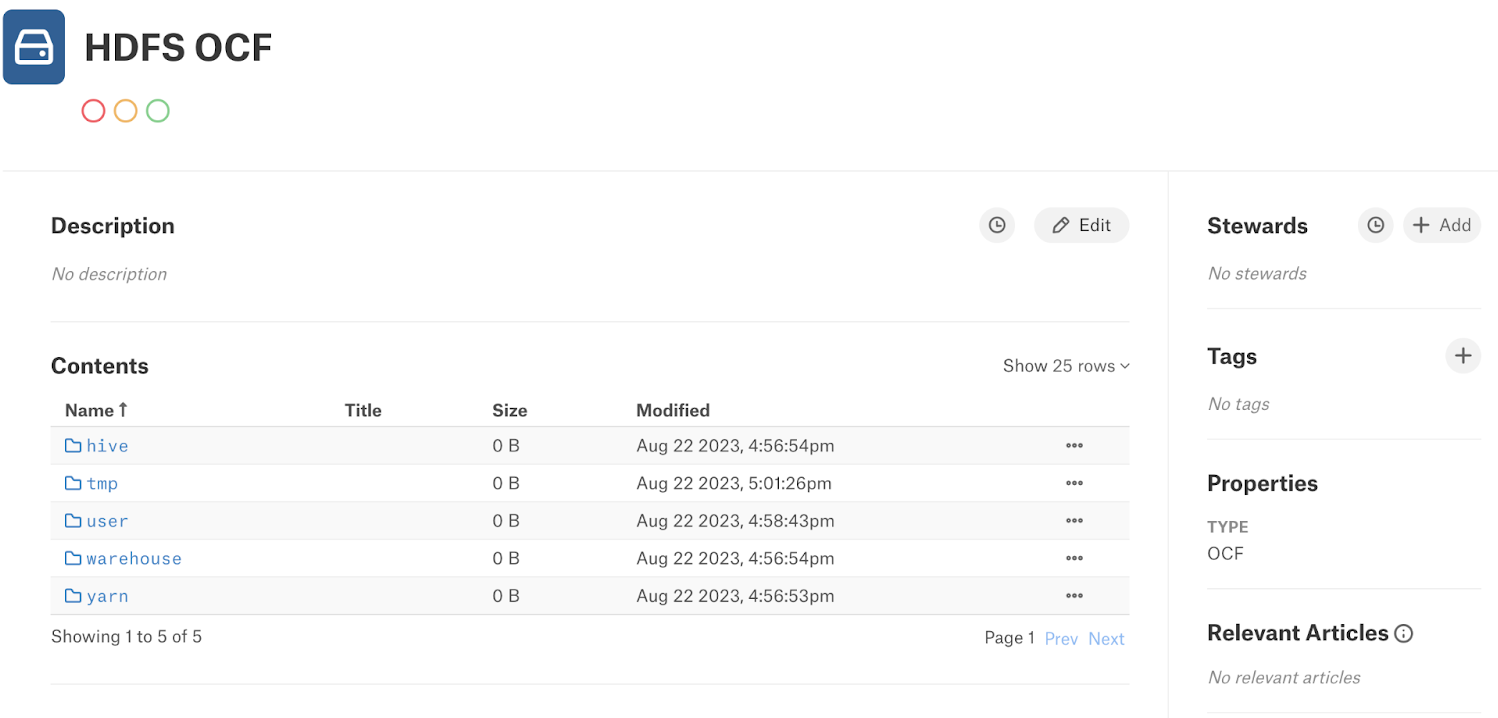
At the top of your HDFS OCF file system page, locate the page breadcrumbs and click the arrow icon to view the data source catalog page. The catalog displays the extracted data.
Native to OCF Migration
For information on migrating SFDC sources to OCF connectors, see Migrate Native File System Sources to OCF.
Limitations
The Get List of Folders displays a maximum of 1,000 folders. Folders with no names or empty spaces as their name are not displayed.
The Prefixes functionality does not work appropriately for prefixes with a comma (“,”). If a prefix includes a comma (“,”), the Alation user interface treats it as two separate prefixes.
Test connection fails for Kerberos authentication when you use an IP address instead of a hostname.
On customer-managed (on-premise) Alation instances, if you create two file system sources with Kerberos and SSL enabled, the test connection fails for the second file system source.
Alation has not tested the support of the HDFS OCF Connector with the High Availability (HA) service.
Troubleshooting
Refer to Troubleshooting.